This will cover how to add the coupon layer if it is missing as well as how to add and edit the coupon(s) associated with your promotion.
At a glance:
Getting Started
Adding/editing a coupon to your promotion
Last update: 12/16/2021
Getting Started
Make sure the coupon layer is present in your promotion. If you do not see any [coupon code] layer within the post-purchase area this means the template you are using did NOT use a coupon presenter layer. To add the coupon layer, please first head to the design canvas.
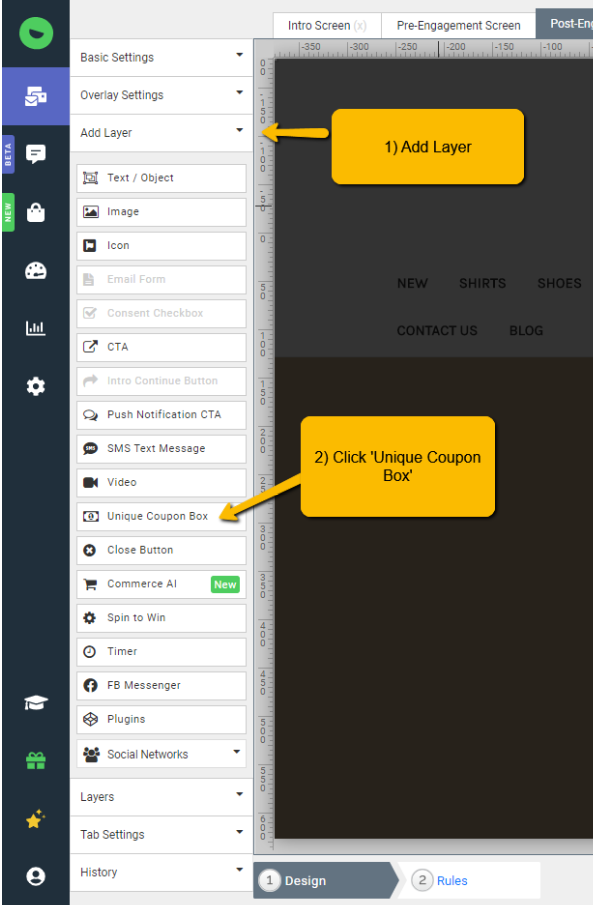
1) Once in the Design Canvas, click on the 'Add Layer' from the menu on the left-hand side
2) Drag and drop the 'Unique Coupon Box' to the desired location of the promotion. Here is what this would look like:
Final result after the layer has been added:

You may update the colors and size accordingly within the design canvas to best fit your brand. Now that his has been added, you can begin setting up the respective coupon(s) for the promotion.
Adding/editing a coupon to your promotion
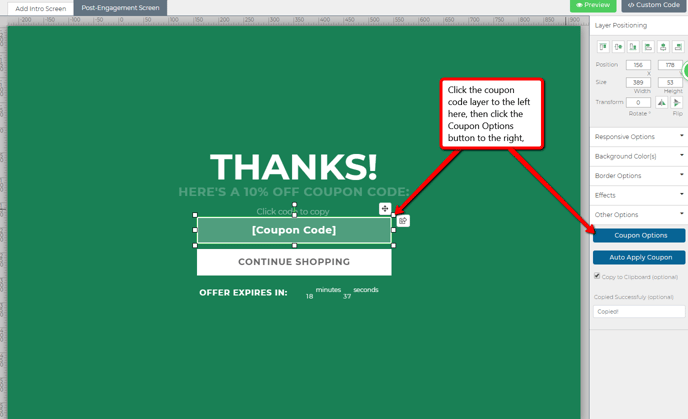
In the Design Canvas for the promotion, find the coupon code layer within the "post-engagement" tab.
Click on the [Coupon Code] layer and a menu will appear on the right-hand side.
From this menu, select the "Coupon options" button:
Caution: Please ensure you are not altering the [Coupon Code] text in any way or it will affect your coupon code is displayed.
Finally, you can add your coupon code!
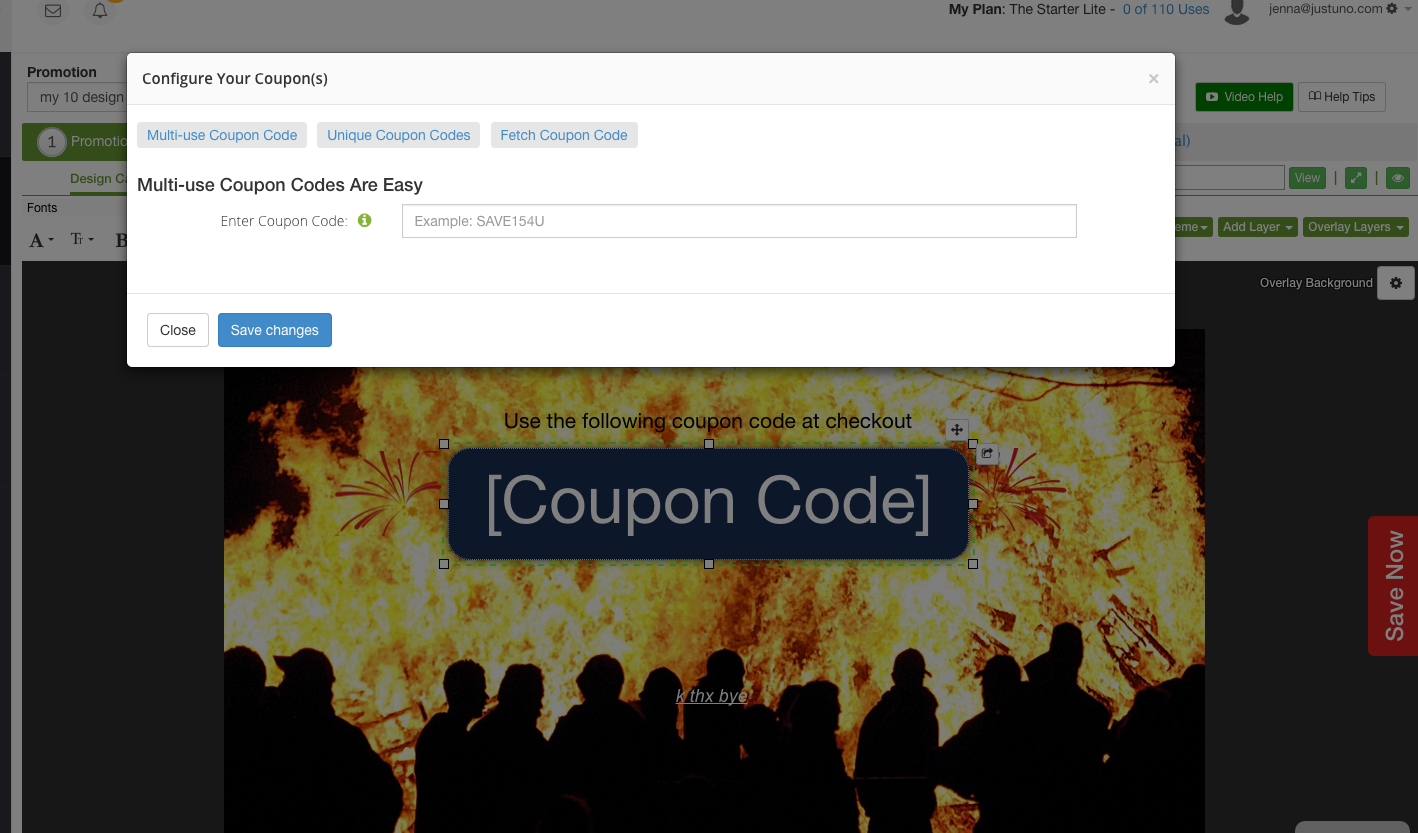
Note: The coupon code layer will not update after you add your coupon code, but you can preview the code in your promotion preview area or when set live.
As of August 8th, 2018, Justuno now features an auto-fetched coupon system that dynamically generates coupon codes based on a promotion engagement. This feature is currently available on the e-commerce platforms SHOPIFY and BIGCOMMERCE.
You may also add a single unique or bulk coupon