This article will go over how to setup Push notifications on your site by using Justuno
At a glance:
Analytics
Last updated 9/2/2021
Introduction
Justuno has the ability to create a push notification on the site to allow new ways to engage with your customers.
This feature is only available one Justuno Plus plans but this will require a pop up to appear first so they can opt into allowing push notifications. Below are the limitations and a guide on how to set this up.
Disclaimer
iOS (Apple) mobile devices do not currently support mobile web push notifications. So iPhone users will not receive any web push notifications; this is because Apple focuses on App-based notifications. Android mobile devices do support mobile web push notifications for users running Chrome, Firefox, and Opera on their device. However, what they see will depend on their individual settings.
Instructions
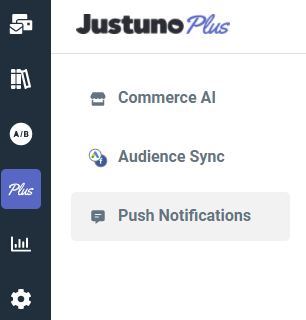
1. Navigate to the 'Plus' submenu and then select the 'Push Notifications'
2. Under the 'Push Notification' submenu, select 'Notifications'. Once on the new screen, select 'Create Notification' from the blue button in the top right hand corner.
- The Notification Name, above, will only be seen by you.
- The Notification Title is the main topic of your notification. It will be larger than the other text on the notification. An example of a title might be "Huge Sale!".
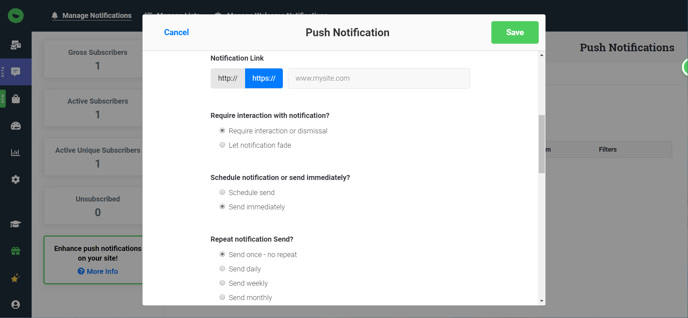
- The Notification Link, above, is the website your subscribers will be sent to if they click on your notification with the full URL including the "http://" or "https://".
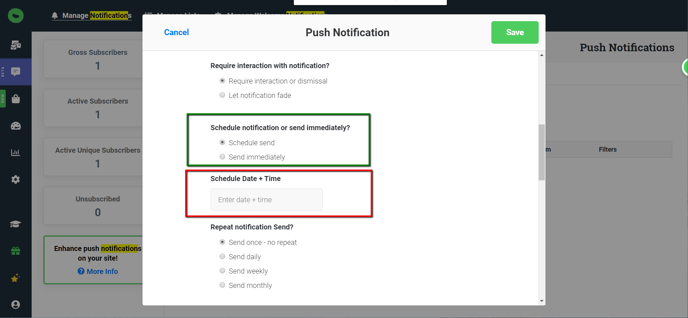
- The Require Interaction option, above, lets you decide if you want to let the notification fade away on its own after 20 seconds or if you want the notification to remain on your user's screen until they click on it or close it manually. Please note that not all browsers allow this option if you choose to "require an interaction" the notification will still send to all browsers but will fade without needing an interaction.
The next couple of options are for uploading an icon or image. This is where you can use seasonal or sale specific images.
Safari always uses the icon that you set through your promotion design and does not support images. If a browser supports images they will appear below the Notification Body.
3. Choose Who: The next options are for segmentation. You can send notifications to specifically desktop, mobile, or both kinds of users.
- All Users to send to everyone regardless of the list they are in.
- Users in Specific Lists will present you with lists that you can select from to segment your customers.
If you want more info on what lists are or how to manage them please refer back to these articles: Managing Your Push Notification Subscribers or Creating a Push Notification Promotion
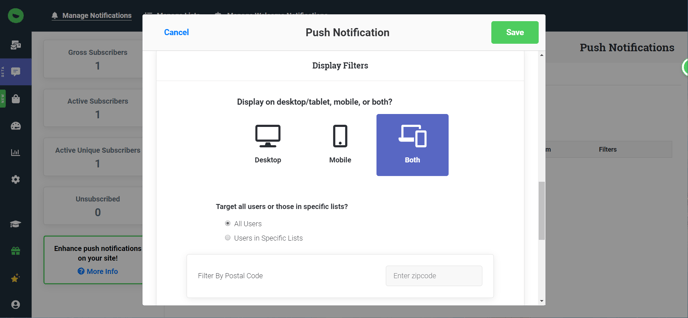
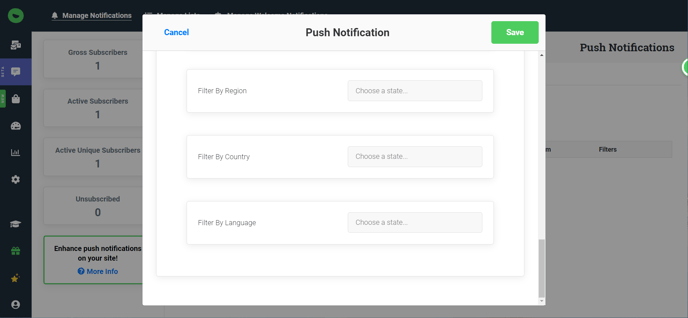
4. Advanced Notification Filters: The options are postal code, region, country, and language.
5. Choose When: The first option allows you to select when your notification will be sent whether you want to send it now or at some set time in the future.
- Schedule send in the future (outlined in green below)
- Schedule Date + Time question appears (outlined in red below).
Next, you'll want to assign an expiration time for the notification.
- The expiration cannot come before the send time and cannot be any longer than 30 days after the send time.
- One example of how to set your expiration date would be when you have a sale lasting for one week. In this case, you would set the notification to send it at the beginning of the week and expire at the end of the week.
- The last option for scheduled notifications is whether you want the notification to be sent just this one ("No Repeat"), or if you want it to recur on a daily, weekly, or monthly basis.
6. Save: All you need to do to prepare the notification to be sent is hit the Save button in the bottom right-hand side of your screen. If there are any required fields you forgot to fill out, a red error messages will appear.
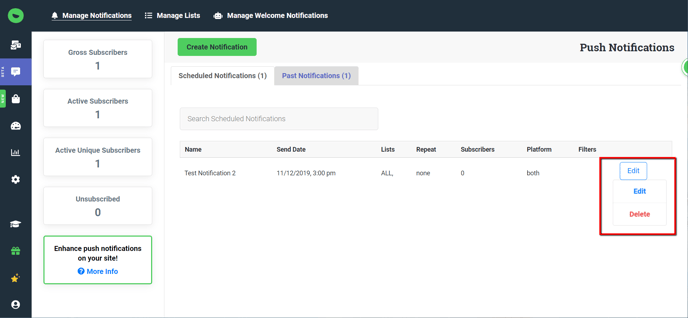
7. Canceling a Notification: After you have saved your notification you will be sent back to the admin page. Next to each future scheduled notification or triggered notification is an "Edit" button. If you click it you will see a dropdown menu. You have the option to cancel the notification (outlined in red below). Select "Cancel" and click "Yes, cancel it" when the confirmation box pops up.
If you need to know how to collect subscribers please read this article Managing Your Push Notification Subscribers.