How to sync the Commerce AI engine to your online store
At a glance
Updated 11/03/2021
This feature is only available on Plus plans, once this feature is turned on it can take a few days for the data to be ingested by our AI-powered servers.
After the data is uploaded to our system it will update every hour.
Commerce AI can only be connected to one domain at a time.
Introduction
Justuno employs AI for a variety of tasks: to optimize our product suggestions with more Intelligent Visitor Profiles, catalog statistics, and its own ongoing track record to display 1-to-1 personalized product Upsell and Cross-sell promotions.
Justuno's Intelligent Visitor Profiles are a by-product of our core visitor intelligence technology; they store hundreds of data points for each website visitor. Justuno uses these profiles in conjunction with targeting rules and personalization to increase visitor conversions. This article will show you how to sync the data from your online store to the Justuno Commerce AI engine and how to apply the Commerce AI layer to a Justuno promotion.
Initial Commerce AI Setup
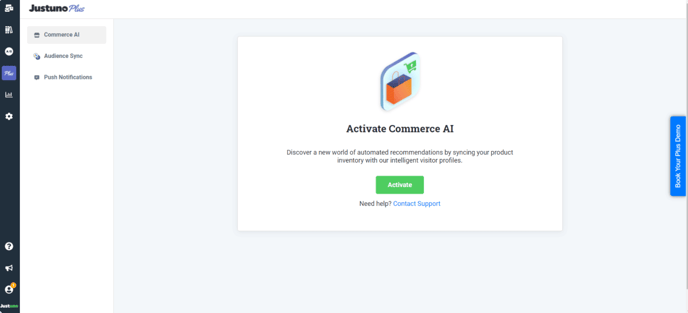
1. After installing Justuno on your platform, go to the Plus section, and click on Commerce AI. Click the green Activate button.
2. Select your platform. Currently, we only support Shopify, BigCommerce, Magento, and WordPress/Woocommerce.
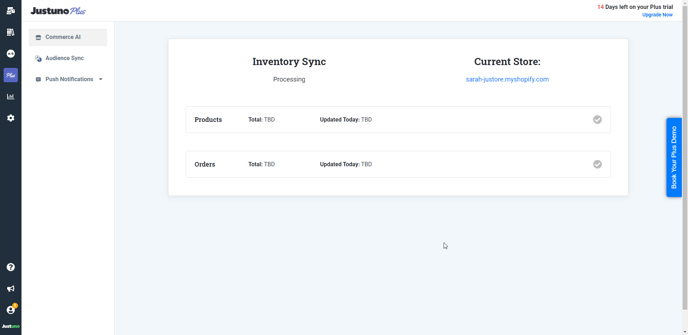
3. Wait for your store's Products, Orders, and Customers to sync into the Justuno AI engine.
Note: All items in your inventory will be synced but a draft, disabled, deleted items will not be shown.
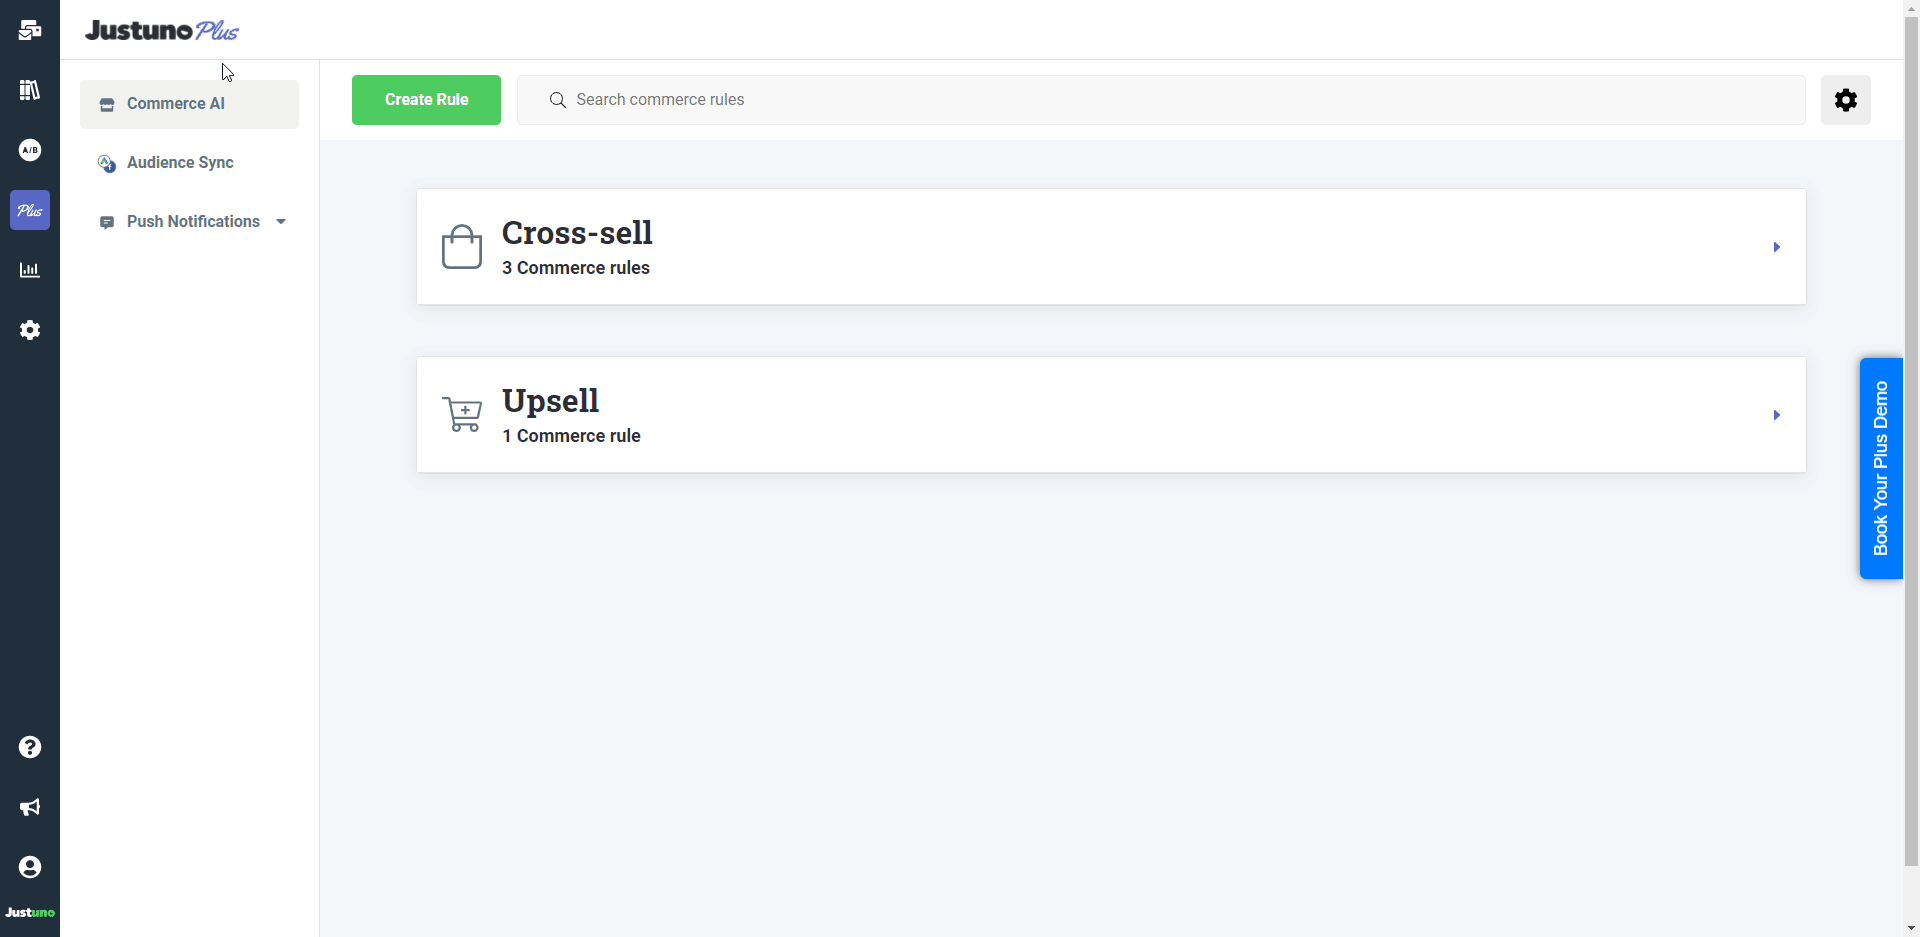
4. Start drafting Commerce AI rules by pressing the green Create Rule button.
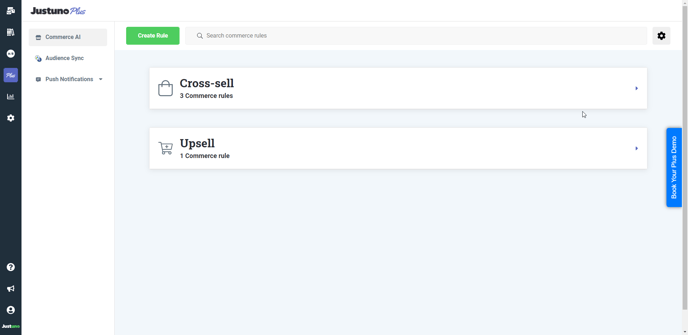
5. Fill out the modal in order to create a new rule based on four main algorithms: Upsell, Cross-sell, Most Viewed, and Most-Purchased. These algorithms will ultimately determine what the Commerce layer will display when fired; you can also add filters to achieve a more granular level.
More information about each rule and option can be found here.
How to Add Commerce AI Layer to a Promotion
Create a message promotion, use this article for step-by-step instructions on how to create one. In the final step, you will need to choose to edit with the design canvas in order to add the Commerce layer.
1. In the design canvas under Add Layer, choose the AI Products tab and then Upsell/ Cross-sell feature.
2. Once the layer is selected under other options on the right-hand side, you will find the options to edit colors, CTA text, and the number of items shown, and currency in the promotion. See the bulleted list below for editable features on the AI layer.
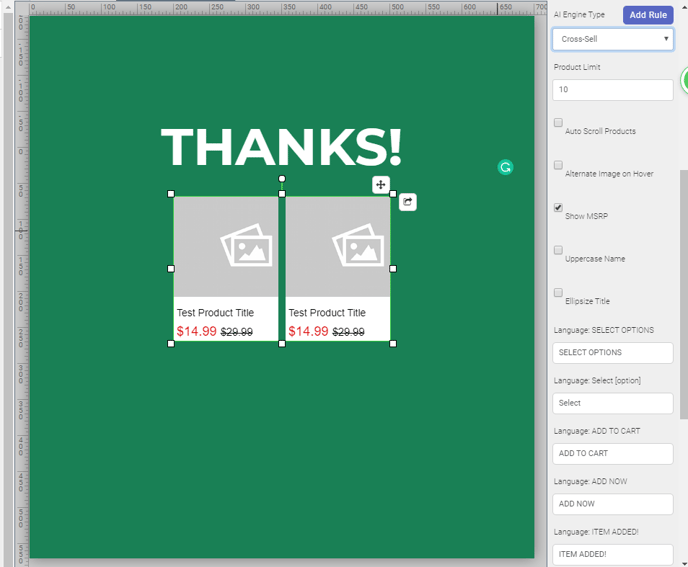
- AI Engine Type: Choose between cross-selling and upselling functions.
- Product Limit: The number of items shown within the promotion.
- Direction: Horizontal or Vertical
- Responsive Layout Items: How many items are displayed at one time.
- When adding more responsive items write 1 with a comma then the number of items. Ex: 1,2 up to 1,7
- Arrows: Where the arrows to scroll between products are placed.
- Show Pagination Dots
- Auto Scroll Products
- Alternate Image on Hover: If there are more images associated with the product this will show the alternate image previews for the specific item when an imaged is hovered over.
- Show MSRP: Will show the standard pricing vs. the pricing for your website if applicable.
- Upper Case Name: This makes the product title names all caps.
- Ellipses Title: If the title name is long or doesn't fit within the iFrame, it will ellipses instead of wrapping.
- Select Options: This is the copy for if the product has different options such as color or size.
- Select: This will be the copy that will change on the hover state of the options described above.
- Add to Cart: This is the copy that will appear before the options have been selected and open the options menu if applicable.
- Add Now: This will show as the final copy and step to add the item to the cart.
- Item Added: This is the copy that will show after the item is added to the cart.
- Button Color: This is the background of the Add Now, Add to Cart, and Select Options buttons.
- Font Options: This is where you can choose the font, font size, color, and alignment of the product description text.
- Botton Border Color: The color of the border around your buttons.
- Botton Text Color: The color of the text that will appear on your buttons.
- Price Text Color: The color of the price of your products. Note: if you pick the MSRP option the original price will be in red and struck through while the MSRP price will be in the color of your choice.
- Mini Cart Quantity Selector: This option will allow the promotion to target your website's mini cart, how to find the proper selector will be explained in step 3 below.
- Currency Format: Change the currency for the products displayed in your promotion.
3. To have your cart update the number of items added to it from the promotion you will have to set up your Mini Cart Quantity Selector. This article will explain how to find and format a specific class or ID for your cart.
4. When you have finished head to your rules section to set up targeting parameters for which audiences you'd like this promotion to be shown t
Key Features
What does our AI logic control and what will it show to customers: It depends on whether upsell or cross-sell is selected in the layer. We cannot yet filter based on “shade”, for example, though the next iteration will include filters to solve this.
A. If a visitor is brand new and on the homepage, will show the best sellers?
-It won’t show the same product as in a cart or what the customer is looking at
B. What’s the difference between up-sell and cross-sell?
- Up-sell: will show you other shirts if you’re looking at a certain shirt, does not really look at ticket value. Shows the same category of the item
2. Cross-sell: buy a Burton snowboard, get Burton bindings
C. What if a product is out of stock?
- We will not show a product in the recommendations only if there are 0 variants of it left in stock. We check inventory once a day (middle of the night), and will likely increase that frequency soon
D. Is conversion rate the only metric we are monitoring?
- No, also observing behavior, whether up-sell or cross-sell is selected, and best sellers
E. Could I set up multiple AI promotions targeting certain products?
- No need to at this point since we’re showing product recommendations based on what the visitor is browsing/has in their cart.
F. If I have multiple price variants on one item what price will it show?
- Total price shown is based off the lowest combination of variants that are in stock.
Visit Justuno @ Justuno.com