Covers how to integrate Postscript to your Justuno promotion
At a glance:
1. Creating your Keyword in Postscript
2. Instructions
Last updated 01/04/2022
- Display your SMS capture field on a different screen from your email capture field. *Please see How to Set up a Two-Step Form for instructions to display on separate screens*
- Cannot require the SMS capture field, it must be an optional field
Creating your Keyword in Postscript
The first thing we need to do in Postscript is to create a keyword and keyword reply so that you have a way for your JustUno popup users to opt into your subscriber list. When you installed Postscript, you were given two default keywords that you can use if you want, or instructions here will show you how to create a custom keyword. Remember, custom keywords are not available on the free tier.
- First, click "Keywords" on the left.
- Next, click "Create Keyword", found at the top right of the screen.
- Name your keyword, decide if you will include a coupon in the reply, and save.
- If you want to edit the reply, click the purple "Reply" box, or to create an automatic reply to this keyword, click "Add Action" and then create your reply.
- Follow the instructions below to include this keyword later for new subscribers to trigger.
Instructions
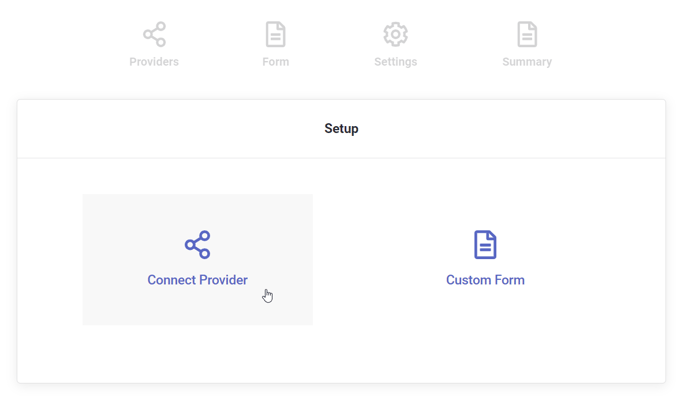
1. Go to your Justuno promotion, from the design canvas, and click the input field, then click the Change Form.
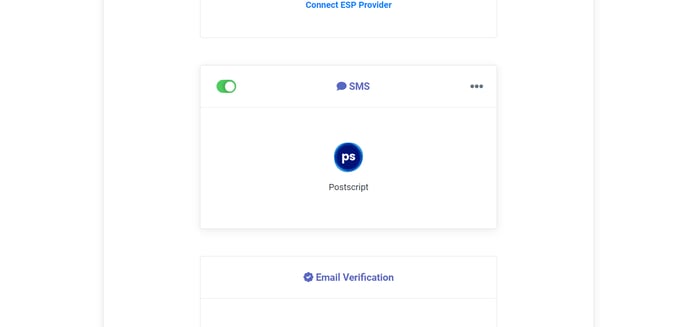
2. Click Connect Provider.
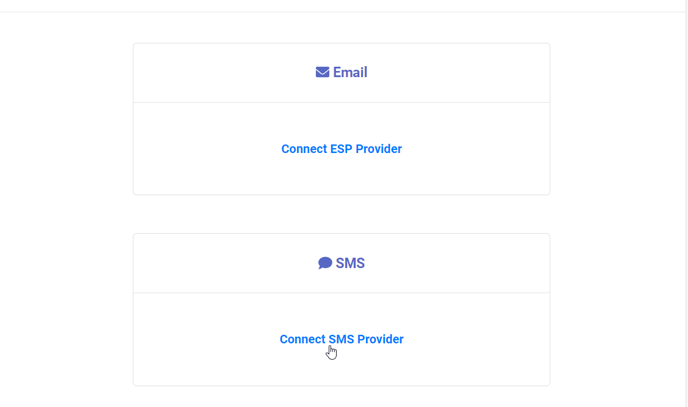
3. Click Connect SMS Provider, then click the postscript icon.

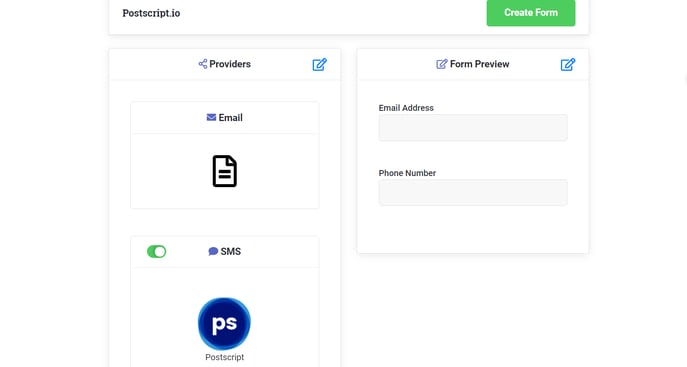
4. Enter your Postscript Private API key and keyword- from the first section.
Note: Please ensure you are entering your Private API key and not the Public Key.
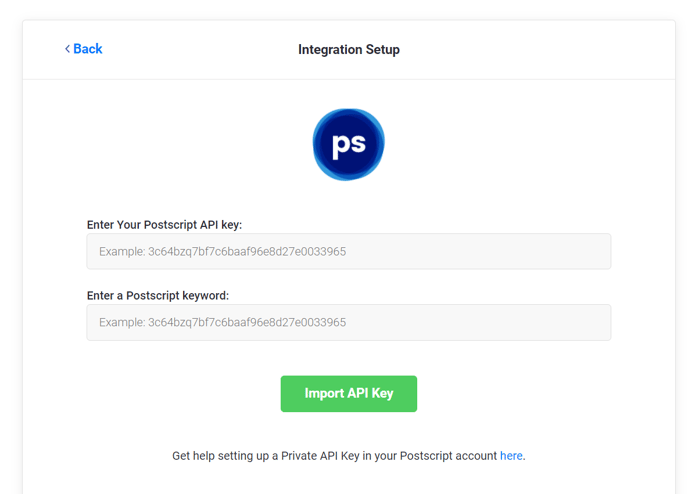
5. Ensure that postscript is successfully integrated, then click Next.
6. Review your form and then click Create Form.
7. Modify the Justuno promotion to your preferences, and then you are done! The Justuno promotion has successfully integrated into postscript.io.
How to add the SMS Keyword
The keyword does need to be in the SMS message box. Most clients are using it in the message box as “Reference ‘Keyword’” at the bottom of the message so that the postscript reads it.
There is no way at this point for us to have it as a hidden layer.
If it is added as a hidden layer PostScript will not read it and the promotion will not work correctly.
Collecting more data by adding extra fields
You can now pass extra field data to Postscript. This will help with personalizing the text messages being set out by Postscript. Below are the steps required, as well as the fields that work with this flow.
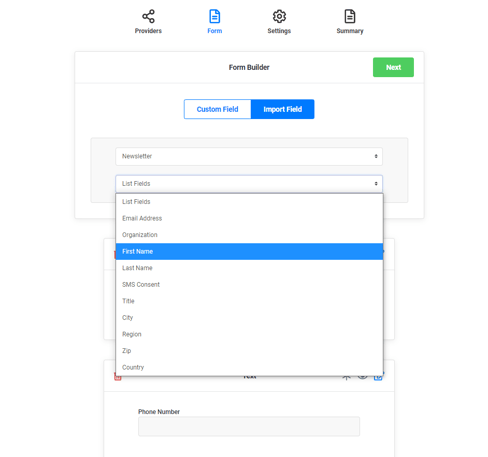
1. With all the steps above accomplished, you can visit the form builder section to add the extra fields.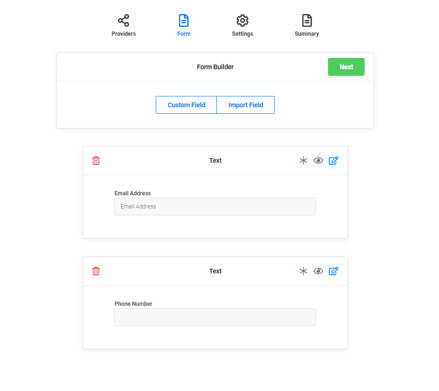
2. Here you will want to add in any of the following fields from the Import field option. Email, First Name, and or Last Name.
3. Create/update the form once you are satisfied with the fields you wish to capture. When the fields are filled out and submitted, the data will be passed to Postscript.
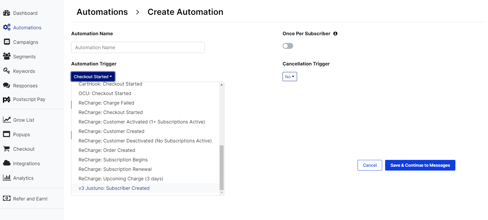
4. On the Postscript side, you will want to create an Automation. This automation will need to be tied to the V3 Justuno: Subscriber Created trigger.
5. Once this trigger is selected and you continue to the Messages area, you can select the More dropdown button. This will offer a Tags option.
6. Select the Tags option and you will notice two new buttons.
A dropdown that will show the tags that are allowed and an insert option. Clicking the dropdown will show Justuno tags related to the forms fields we offer.
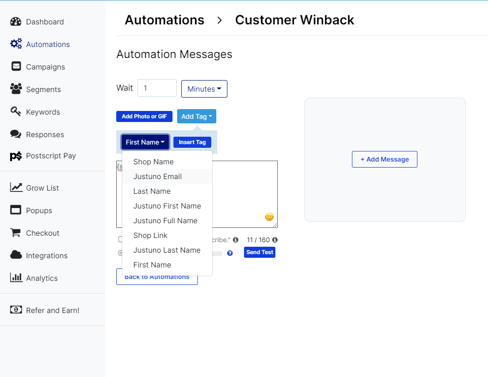 7. You can now edit the automated message to include these tags by selecting the Justuno tags and using the Insert Tag button to the right of it.
With the automation on, once the submit occurs on the Justuno promotion, the data will be passed over to help personalize the automated message. You are all set!
Visit Justuno @ Justuno.com