A comprehensive overview of Justuno's MailChimp integration
We have added two different types of Mailchimp integrations, one uses our integrations section step 3 of set up; there's an easy way to access it here:
The second uses the easy Mailchimp form builder in the design canvas; this can capture email and collect more information through a form. For steps on the easy form builder scroll down:
Follow the steps below to integrate Justuno in the Integrations area:
- You will need to have the following information on hand:
a. API Key
http://kb.mailchimp.com/accounts/management/about-api-keys
b. List ID
http://kb.mailchimp.com/lists/managing-subscribers/find-your-list-id
c. Segment ID (optional)
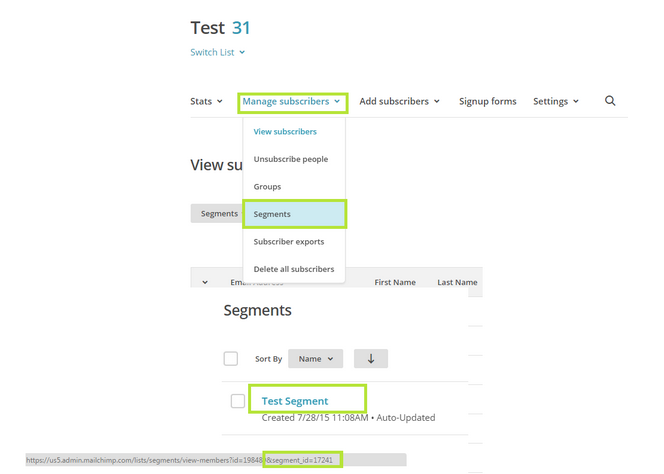
- Log in to MailChimp. Navigate to your List and select Manage Subscribers to locate your Segments.
- Mouse over the Segment and copy the highlighted segment_id that appears in your browser address bar.
- Now you have an API Key and List ID that you can use with Justuno. After logging in, click "Promotions" and then select "Edit Integrations" next to the desired Promotion.
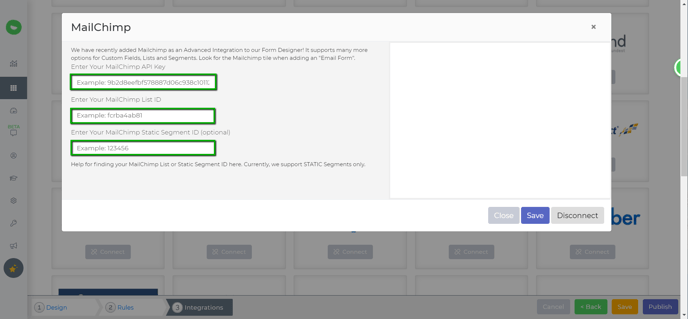
- On the "App Integration tab", locate and click on MailChimp "Connect" to launch the configuration options.
a. Enter your API Key and List ID from Step 1.
b. Select a MailChimp list and click "Save." - Your Justuno will now sync new signups to your selected MailChimp list as they come in!
Install Video:
Easy integration with MailChimp
The easy Mailchimp integration allows for quicker and deeper integration with Mailchimp lists and the collection of more visitor information. Here’s a quick list of what we’ll cover in the article:
At a Glance
1. Connect a MailChimp List with a Justuno Promotion
2. Add a Segment/Tag to New Contacts
3. How to Add Fields
4. How to Hide Fields
5. Auto-Populate Fields (Collect IP Address, Coupon Code, Current Website URL)
Video Guide
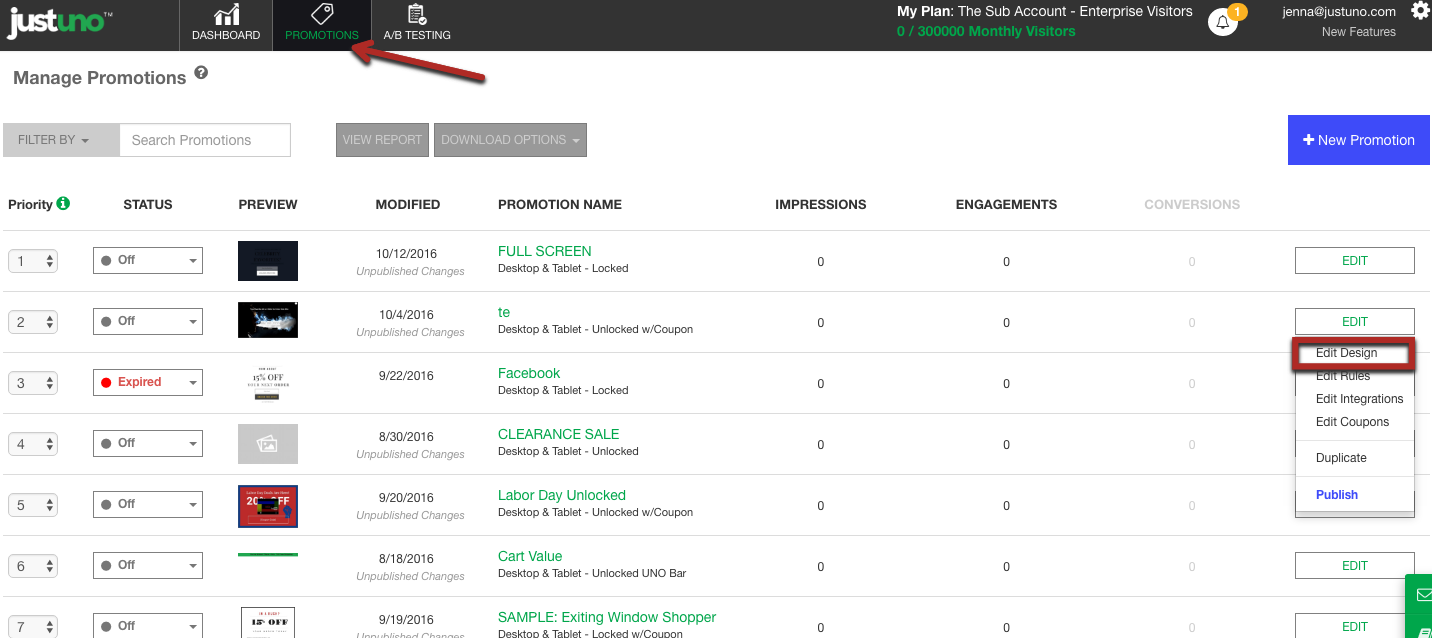
1. From the promotions area, select the promotion you would like to edit and hit edit design
![]()
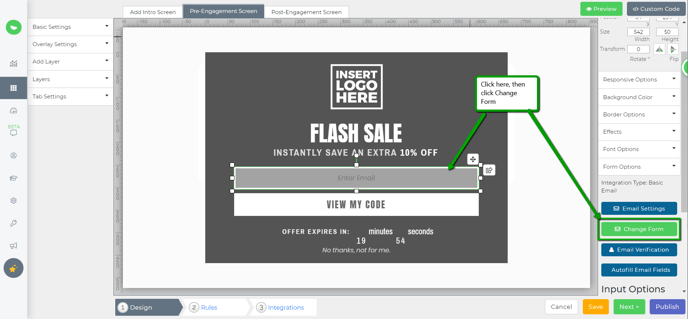
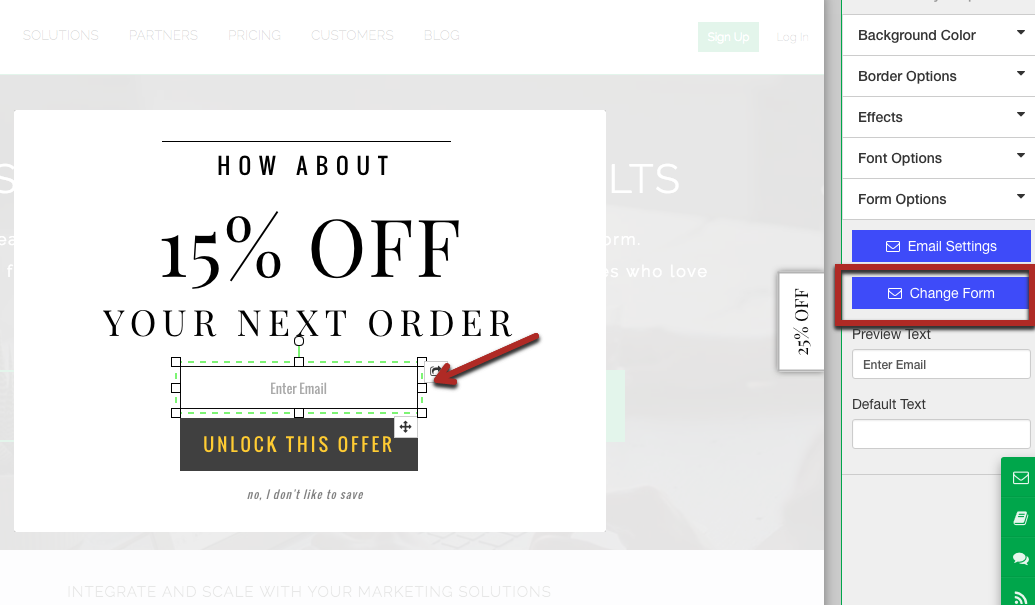
2a. If there is already an email field present, click on the email layer and find change form on the right-hand side
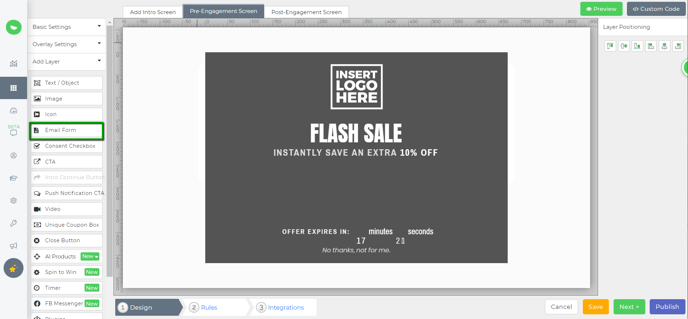
2b. If there is no email field already on the canvas click the Email Form layer
3. The email form options will open in a module, please click on Mailchimp and enter in your email and password.
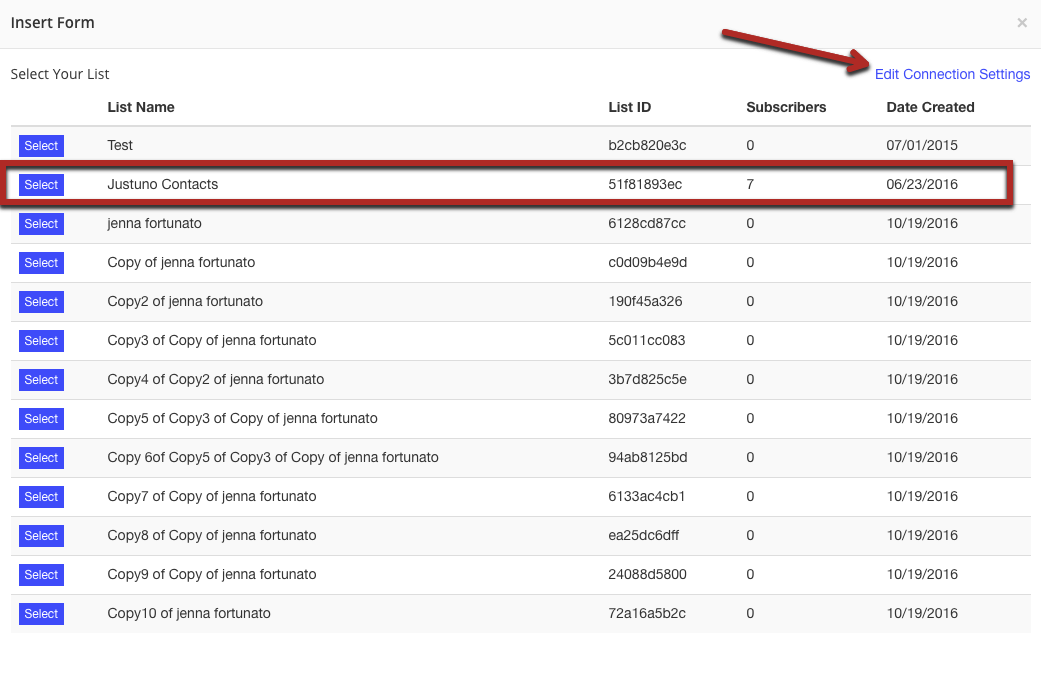
4. Select the list where you would like the information/emails to be pushed to MailChimp. If you need to link a different Mailchimp account use the "edit connection settings" button
5. Next add in a segment if you are using this feature, if not skip to the next step
6. In this step, your form will appear. If the form was not set up in MailChimp you can use the "Load additional Fields" feature and add in the fields you want to collect
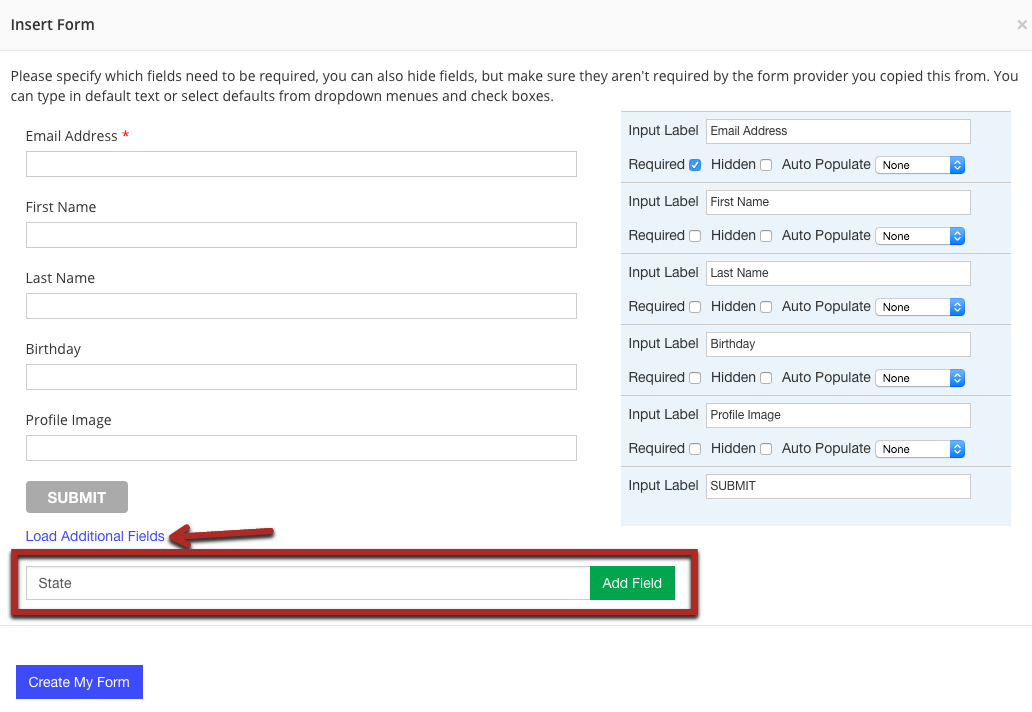
7. If all fields are required to receive the code make sure all required settings are checked off

8. If you are sending information that does not require a user to fill anything out make sure the hidden setting is checked. We have added in three hidden fields most commonly used:
- Current URL (the URL a user is on when they submit the form)
- The IP address (the visitor’s IP address)
- Coupon code (the coupon code they receive in the post engagement)
If you are pushing the coupon code to Mailchimp please make sure you have a coupon code presenter layer in the post engagement. Here is an article to help you with that setting
9. Hit create form and edit the design to your liking! Please note: You do not have to integrate Mailchimp again in step three (Integrations) unless you would like to send emails to two separate lists in MailChimp!
The easy Mailchimp integration allows for quicker and deeper integration with Mailchimp lists and the collection of more visitor information. Here’s a quick list of what we’ll cover in the article:
- Connect a MailChimp List with a Justuno Promotion
- Add a Segment/Tag to New Contacts
- How to Add Fields
- How to Hide Fields
- Auto-Populate Fields (Collect IP Address, Coupon Code, Current Website URL)
Watch the video or follow the instructions below:
1. From the promotions area, select the promotion you would like to edit and hit edit design
Step 2a: If there is already an email field present, click on the email layer and find change form on the right-hand side
2b. If there is no email field already on the canvas click the Email Form layer
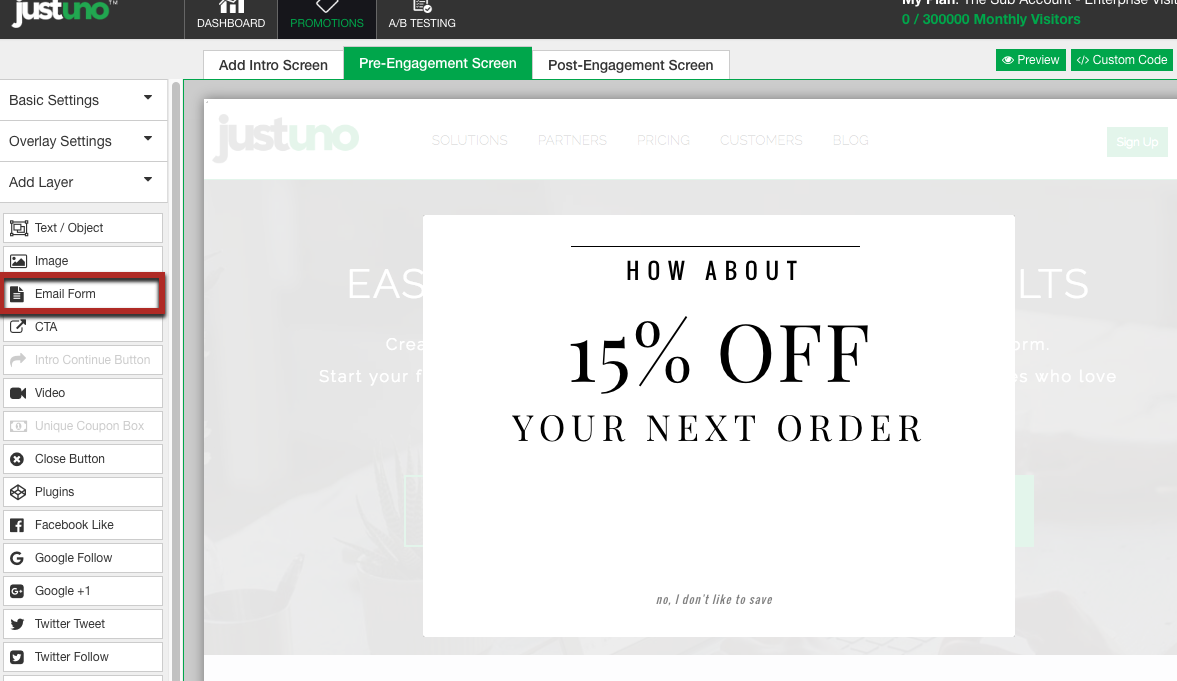
3. The email form options will open in a module, please click on MailChimp and enter in your email and password.
4. Select the list where you would like the information/emails to be pushed to MailChimp. If you need to link a different Mailchimp account use the "edit connection settings" button

5. Next add in a segment if you are using this feature, if not skip to the next step
6. In this step, your form will appear. If the form was not set up in MailChimp you can use the "Load additional Fields" feature and add in the fields you want to collect

7. If all fields are required to receive the code make sure all required settings are checked off
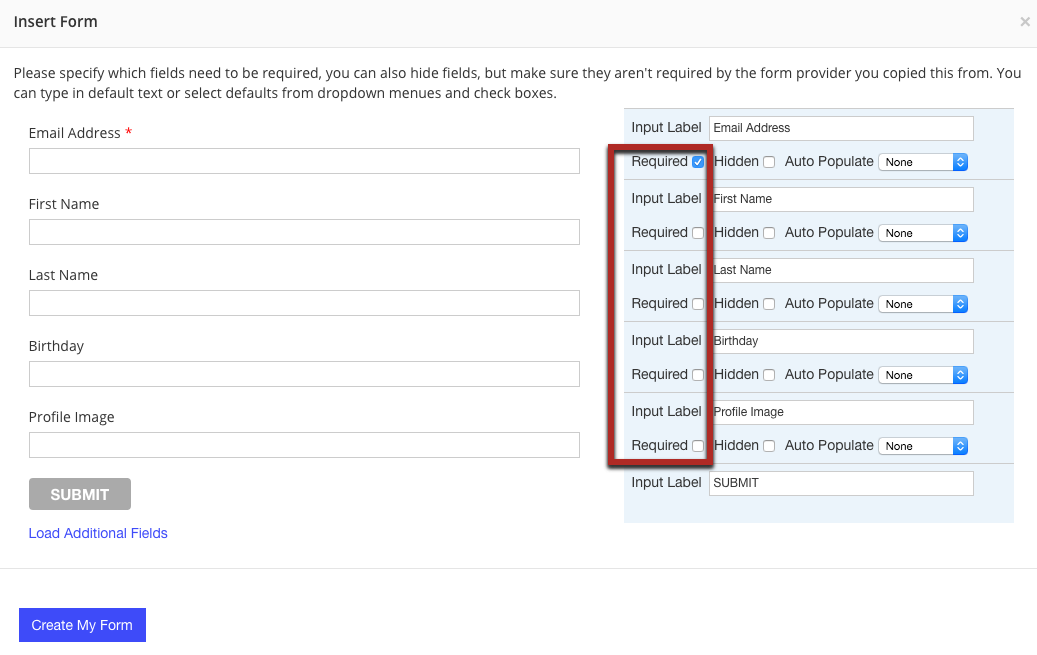
8. If you are sending information that does not require a user to fill anything out make sure the hidden setting is checked. We have added in three hidden fields most commonly used:
- Current URL (the URL a user is on when they submit the form)
- The IP address (the visitor’s IP address)
- Coupon code (the coupon code they receive in the post engagement)
If you are pushing the coupon code to Mailchimp please make sure you have a coupon code presenter layer in the post engagement. Here is an article to help you with that setting
9. Hit create form and edit the design to your liking! Please note: You do not have to integrate Mailchimp again in step three (Integrations) unless you would like to send emails to two separate lists in MailChimp!