In this Justuno Support article, we will cover the steps to Install Justuno on Telium
At a glance:
Introduction
Instructions
Last updated: 01/14/2022
Introduction
The Telium integration contains both Justuno embed code snippets for Tracking and Conversion. To utilize Conversion tracking, be sure you have configured an E-commerce Extension. The Conversion script will automatically fire once an Order ID is created.
Setup Outline
- Add the tag and fill out the Account ID field (ju_num)
- Setup the E-Commerce Extension to let Tealium know which data layer elements contain order id and subtotal (you may have done this already)
- Set the Tag to load on All Pages (default load rule). For Conversion, be sure to include your Thank You page.
- Publish and test
E-commerce Extension
Justuno supports the eCommerce extension parameters "Order ID" (_corder) and "Sub Total"(_csubtotal).
Step 1: How to activate:
Extensions > Advanced > Ecommerce ( http://grab.by/LIdq )
Step 2: Add in Order Values > ( http://grab.by/LIdy )
Instructions
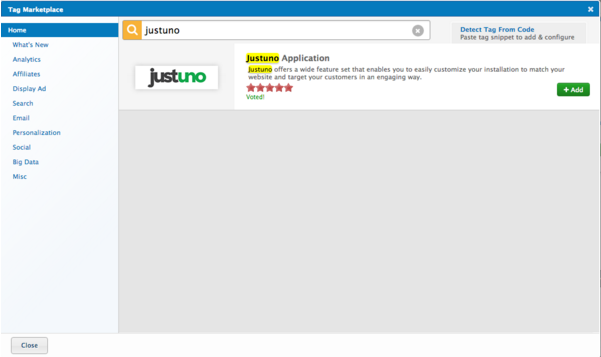
Step 1: From your Tealium dashboard head to the tag marketplace section and search for Justuno
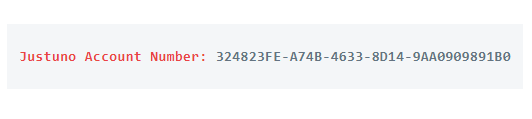
Step 2: Within Justuno, access your account section and select Embed Code. On the top right corner you will be able to copy your Justuno Account Number.
Step 3: Place your Justuno ID number within the vendor configuration account id area
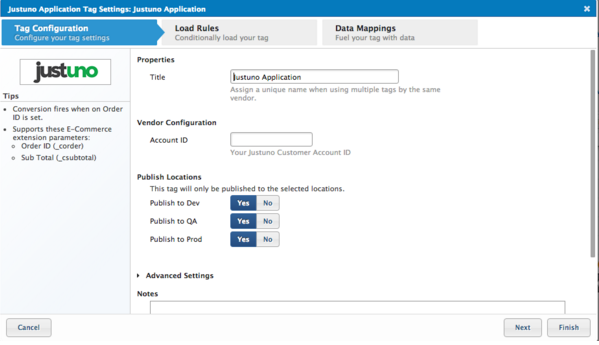
Step 4: Hit apply and you're all set!
Visit Justuno @justuno.com