Integrate with Gatsby using Justuno custom integration.
Overview:
Updated 1/6/2021
Getting started
- Requirements: Access to your Gatsby account and your Justuno account
- No developer required, and no need to add any Gatsby code directly to your website
Once the promotion has been created and the design has been set, you will just be creating a new form within that popup that includes the Instagram handle field along with your Gatsby brand ID and Post URL. This may sounds technical, but it's very simple:
Here is a short video that will walk through getting this setup:
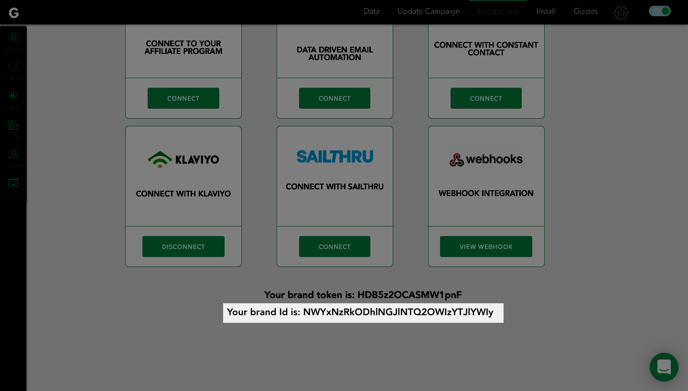
Step 1: Find your Gatsby Brand ID
- Log into Gatsby
- Click Integrations in the header
- Scroll down and just take note of your Brand ID. You will need it later
Step 2: Setting up Gatsby alongside an ESP
This step is if you plan on having an ESP setup alongside Gatsby. For example, if you would like to have Klaviyo and Gatsby within the same promotion. If you do not want an ESP on the promotion, please skip to step 3.
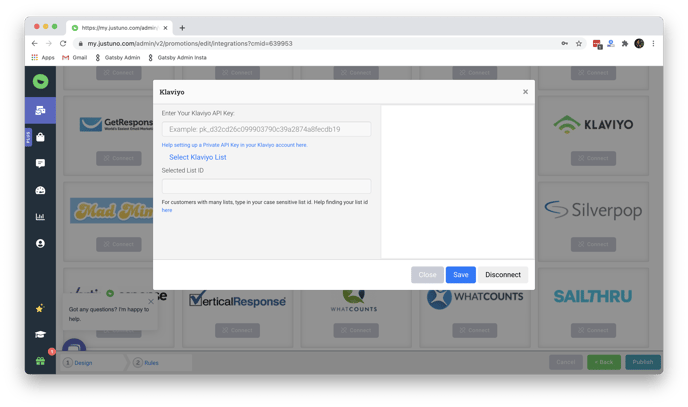
When setting up a Justuno built in integration, this will not allow for the Gatsby custom code to be added. To be able to add an ESP alongside Gatsby, the desired ESP will have to be setup under Settings > Integrations instead.
Next, select Integrations and scroll down to connect with your ESP / Email Provider
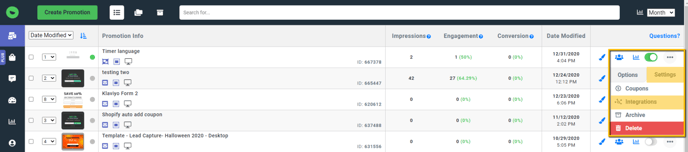
Step 3: Update Your Justuno Form
- Log into Justuno
- Follow these steps from Justuno on embedding a form using html.
When you get to the section to add "Custom Code", simply copy / paste the following:
<form action="https://gatsby.tech/shopper/post">
<label for="email">Email Address</label><br>
<input type="email" required id="email" name="email" value=""><br>
<label for="instausername">Instagram Username</label><br>
<input type="text" id="instausername" name="instausername" value="">
<input type="hidden" required id="brandID" name="brandID" value="YOUR BRAND ID"><br><br>
<input type="submit" value="Submit">
</form>
Replace the YOUR BRAND ID with the ID you found in Step 1 above. Keep the quotation marks around it.
- Optional: If you need to add additional input fields to your form, ie: for the customer's Phone #, just add them in using the same html format:
<label for="phone">Phone Number</label><br>
<input type="phone" id="phone" name="phone" value=""><br>
Wrapping up!
- Your Justuno form may need some slight redesigns, like replacing the button location etc. Spend a few minutes making your popup look great
- Be sure to save & publish your updates in Justuno
- Be sure to click the Launch Campaign or Update Campaign button in Gatsby as well, available in the header.
Once you're live, you can test that it is working by adding an email address and Instagram handle into your popup and confirming that the submission appears in both your Justuno and Gatsby dashboards.