In this Justuno Support article, we will cover how to fetch Coupon Codes via API
At a glance:
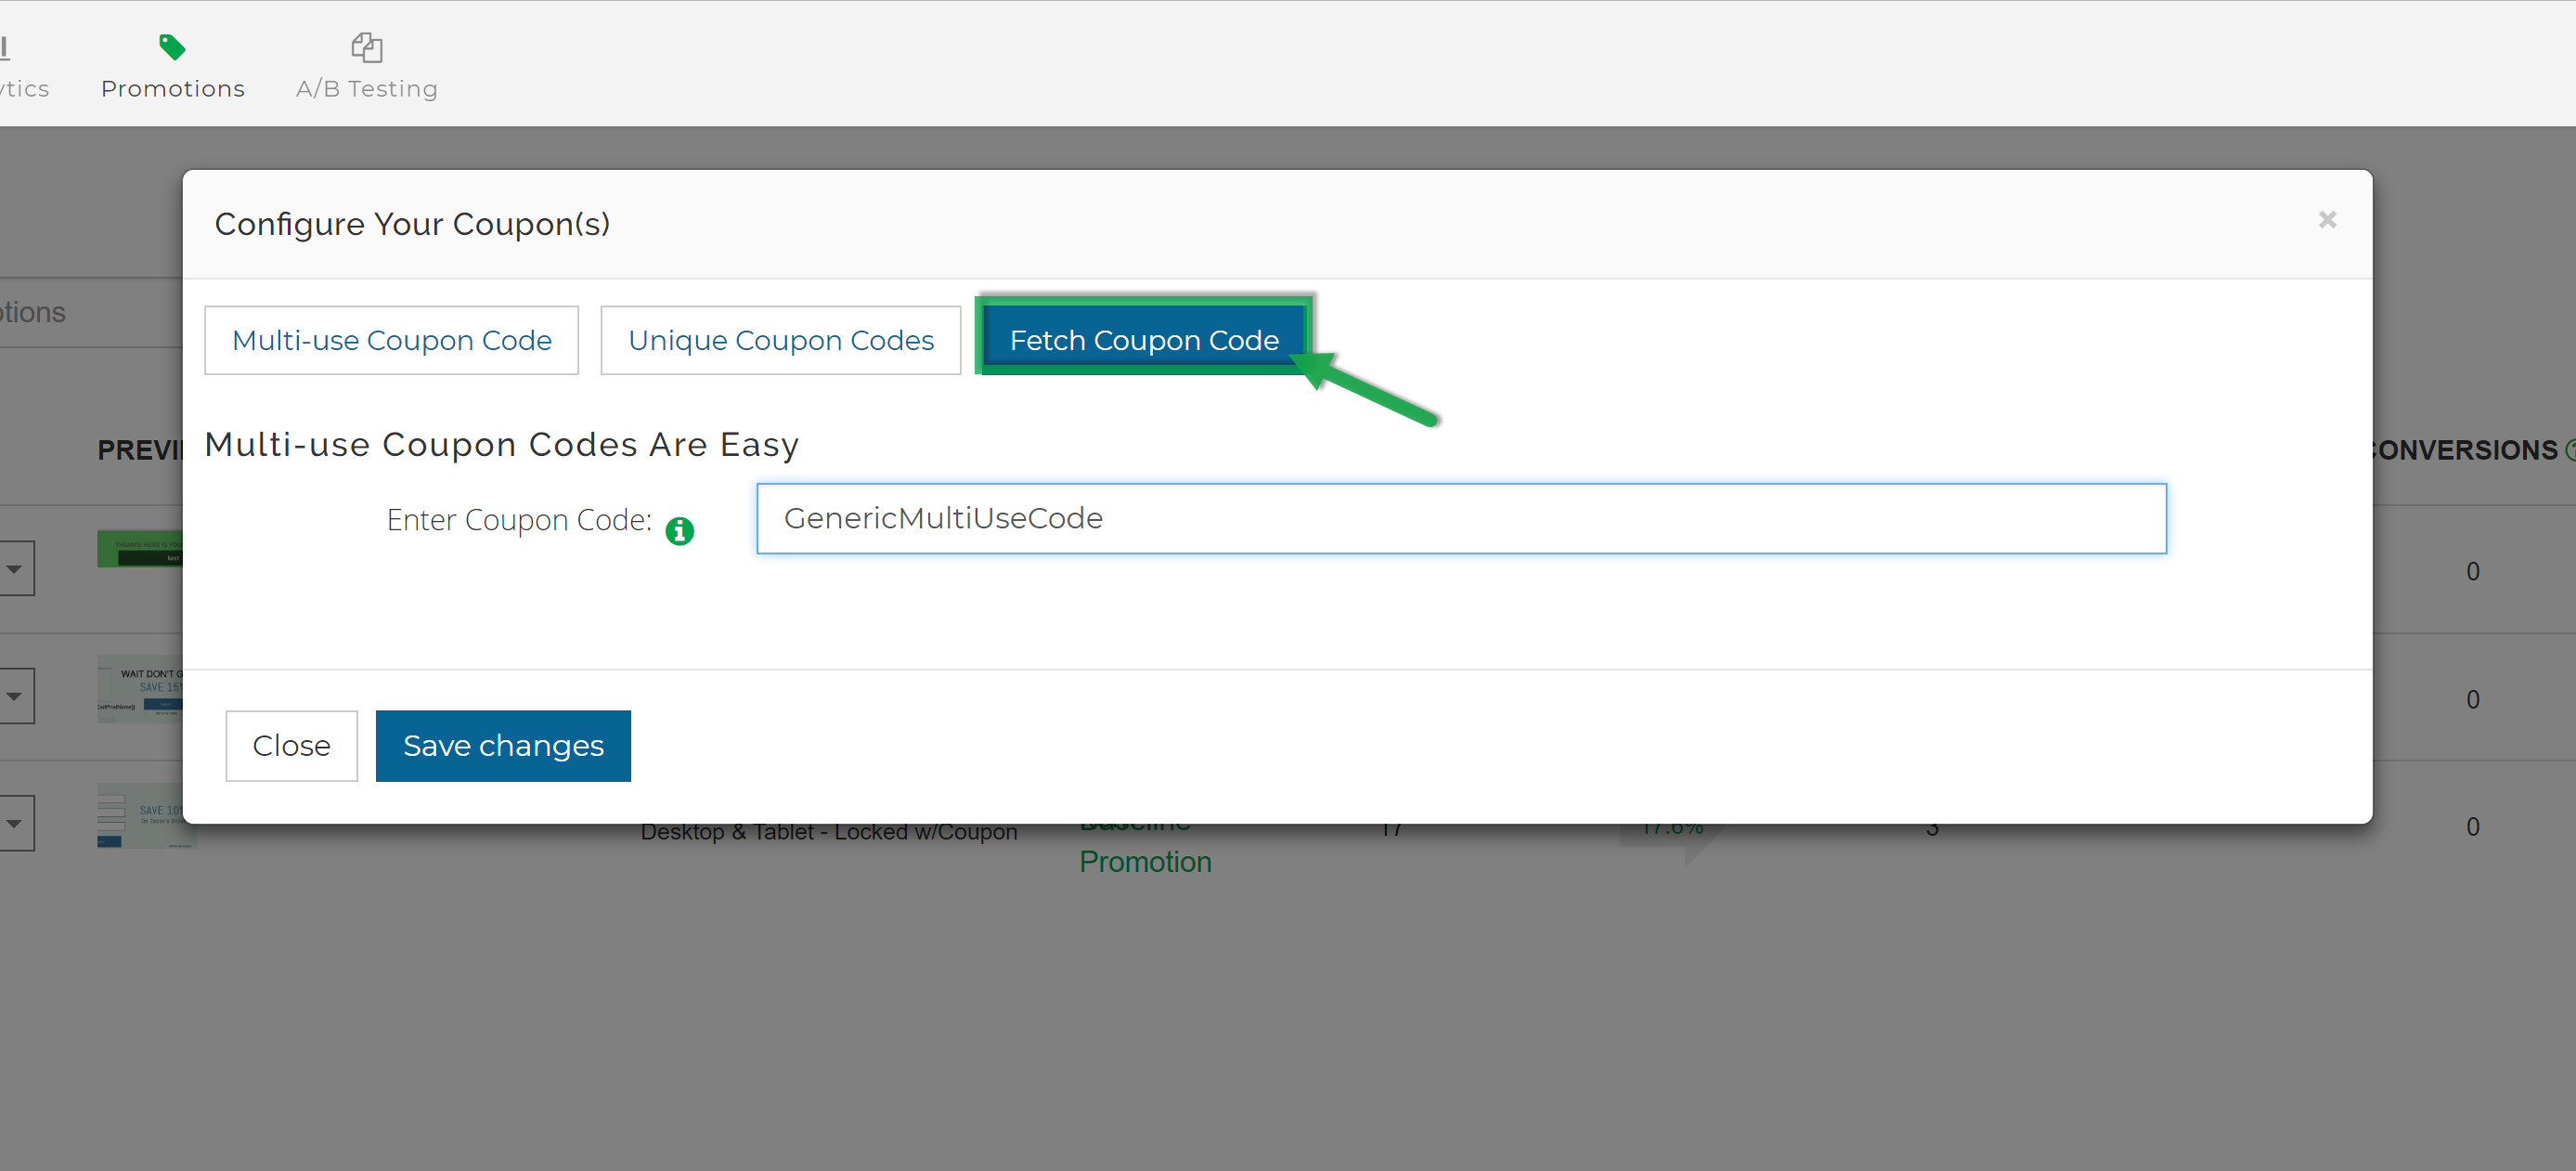
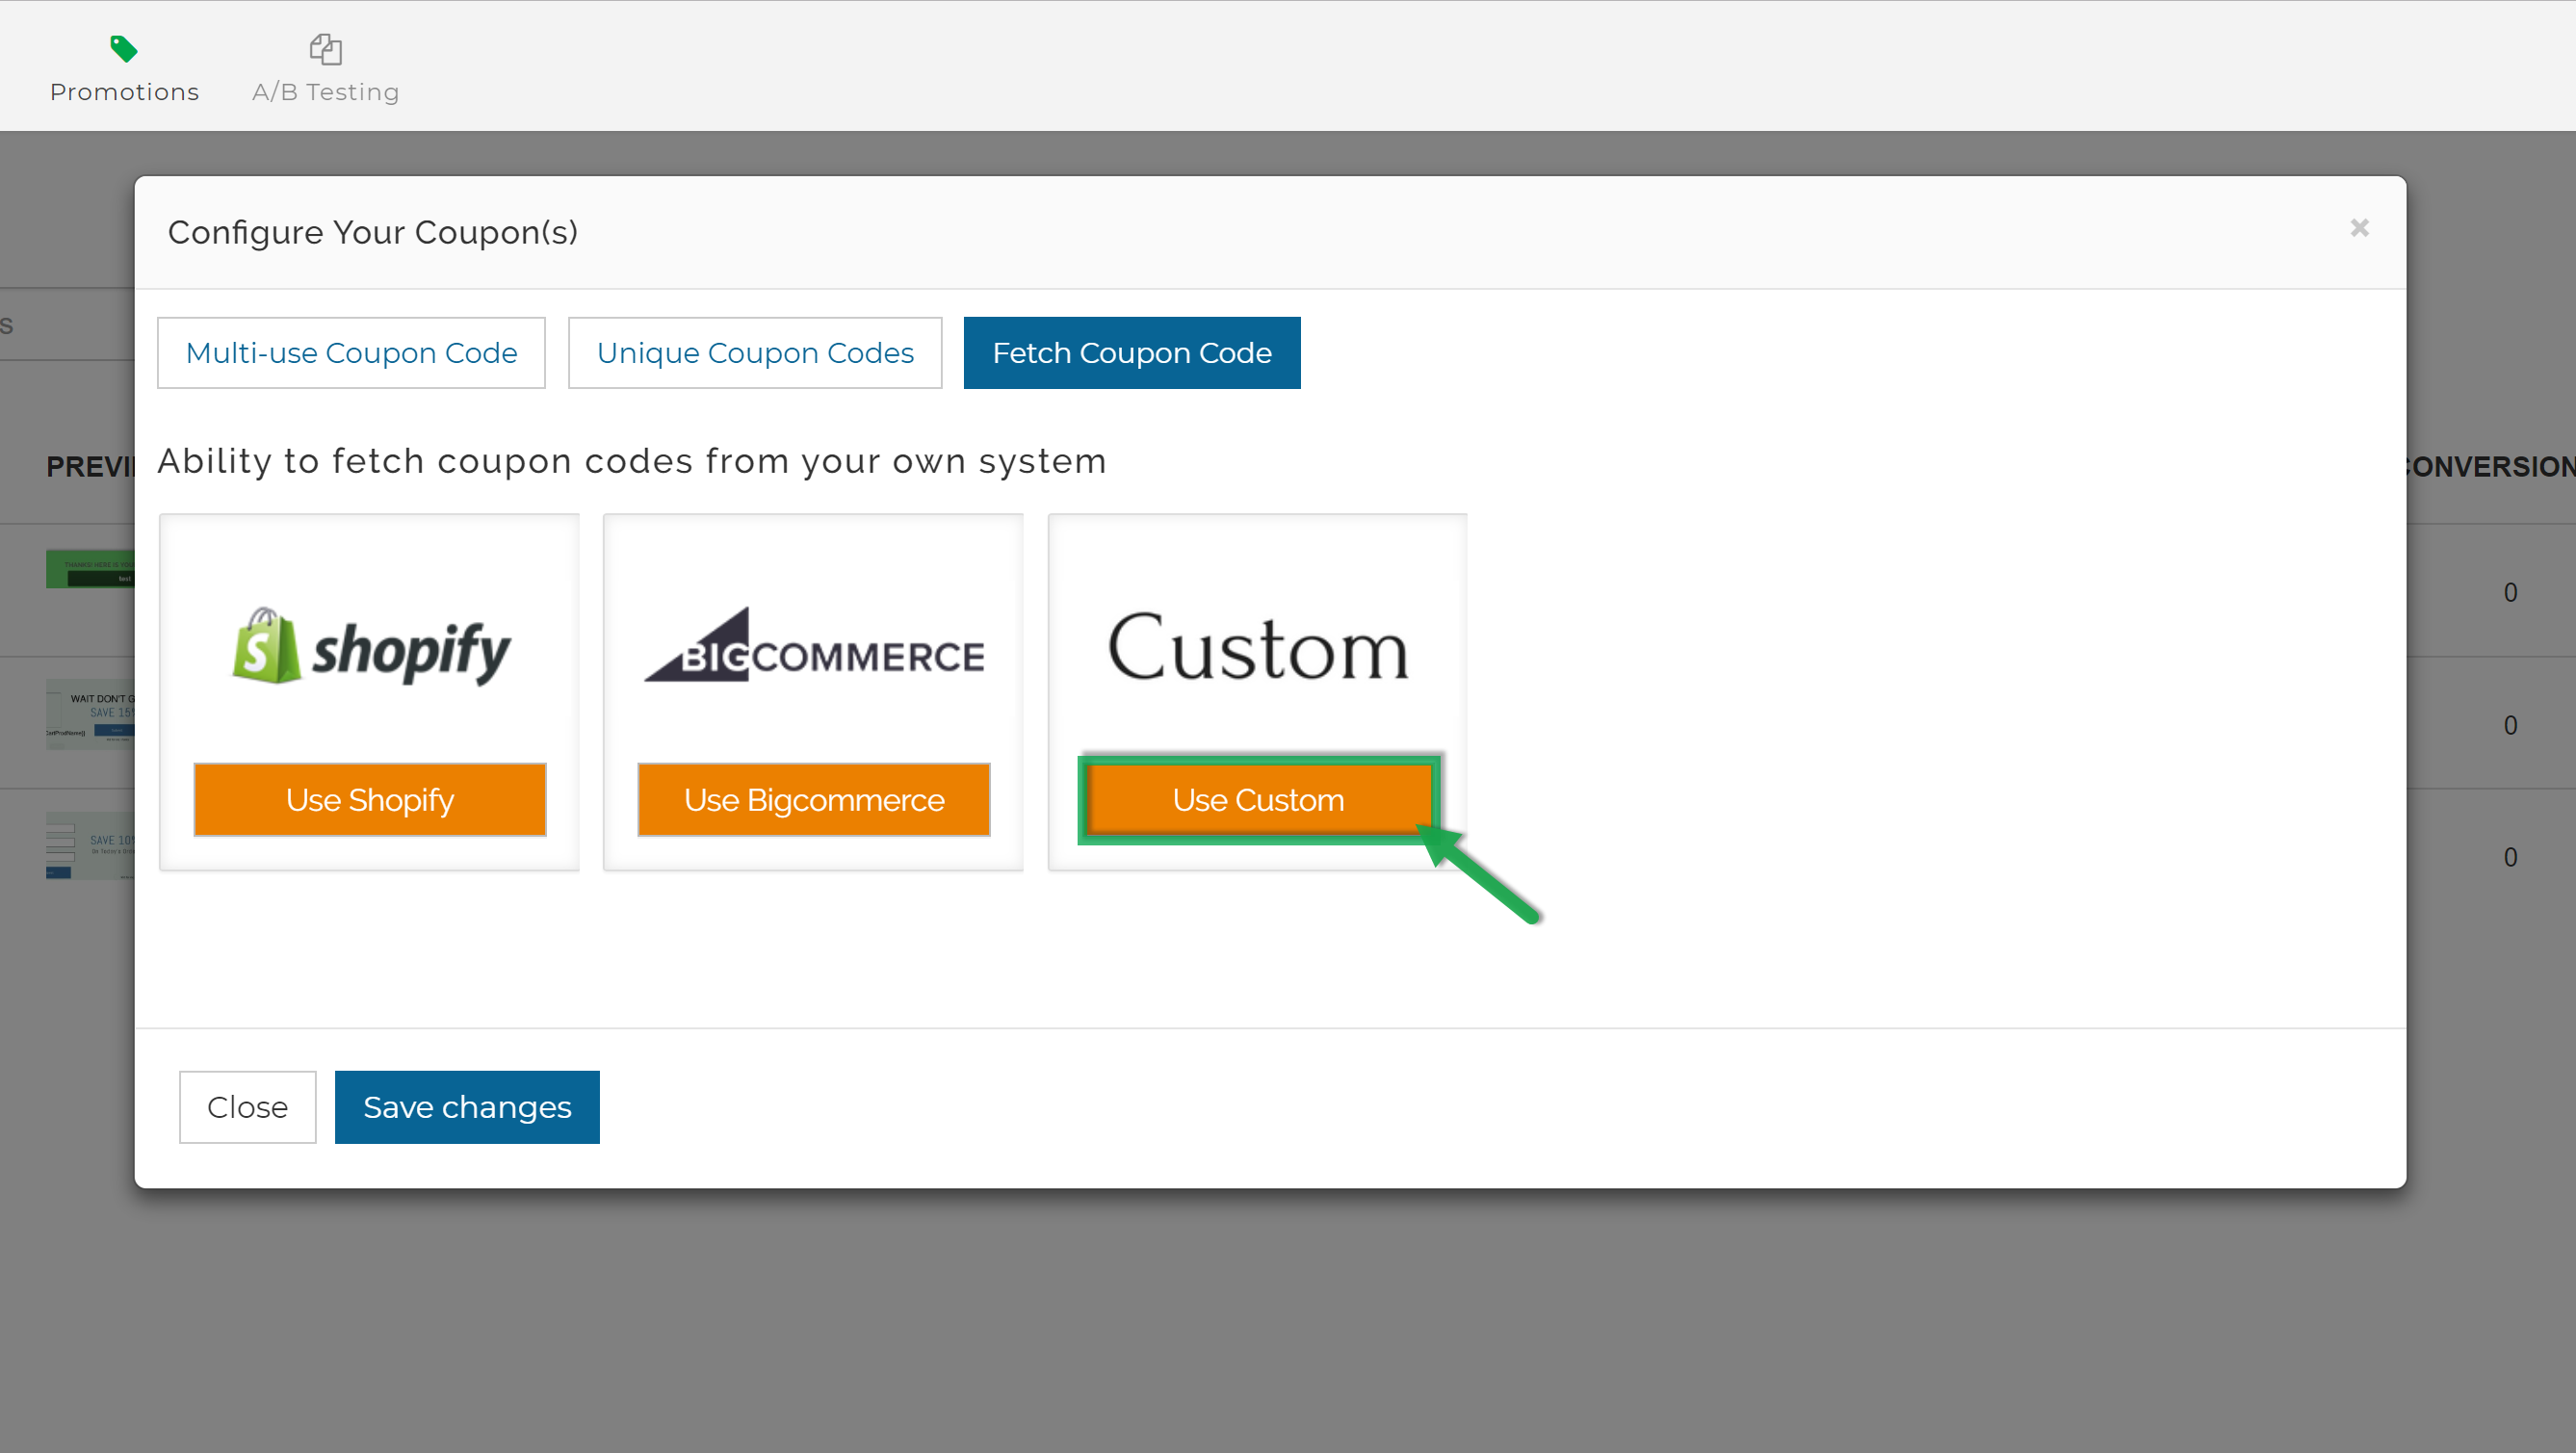
Navigating The Coupon Fetch User Interface
Choosing The Server Authentication Method
Choosing The Request Type
Details on Miscellaneous Options
Testing API Responses
Last update: 12/01/2021
Navigating The Coupon Fetch User Interface
Start at the promotion management view, select a promotion that has a unique coupon box layer, and proceed to click through the options menu to the coupon settings.
Step 1:
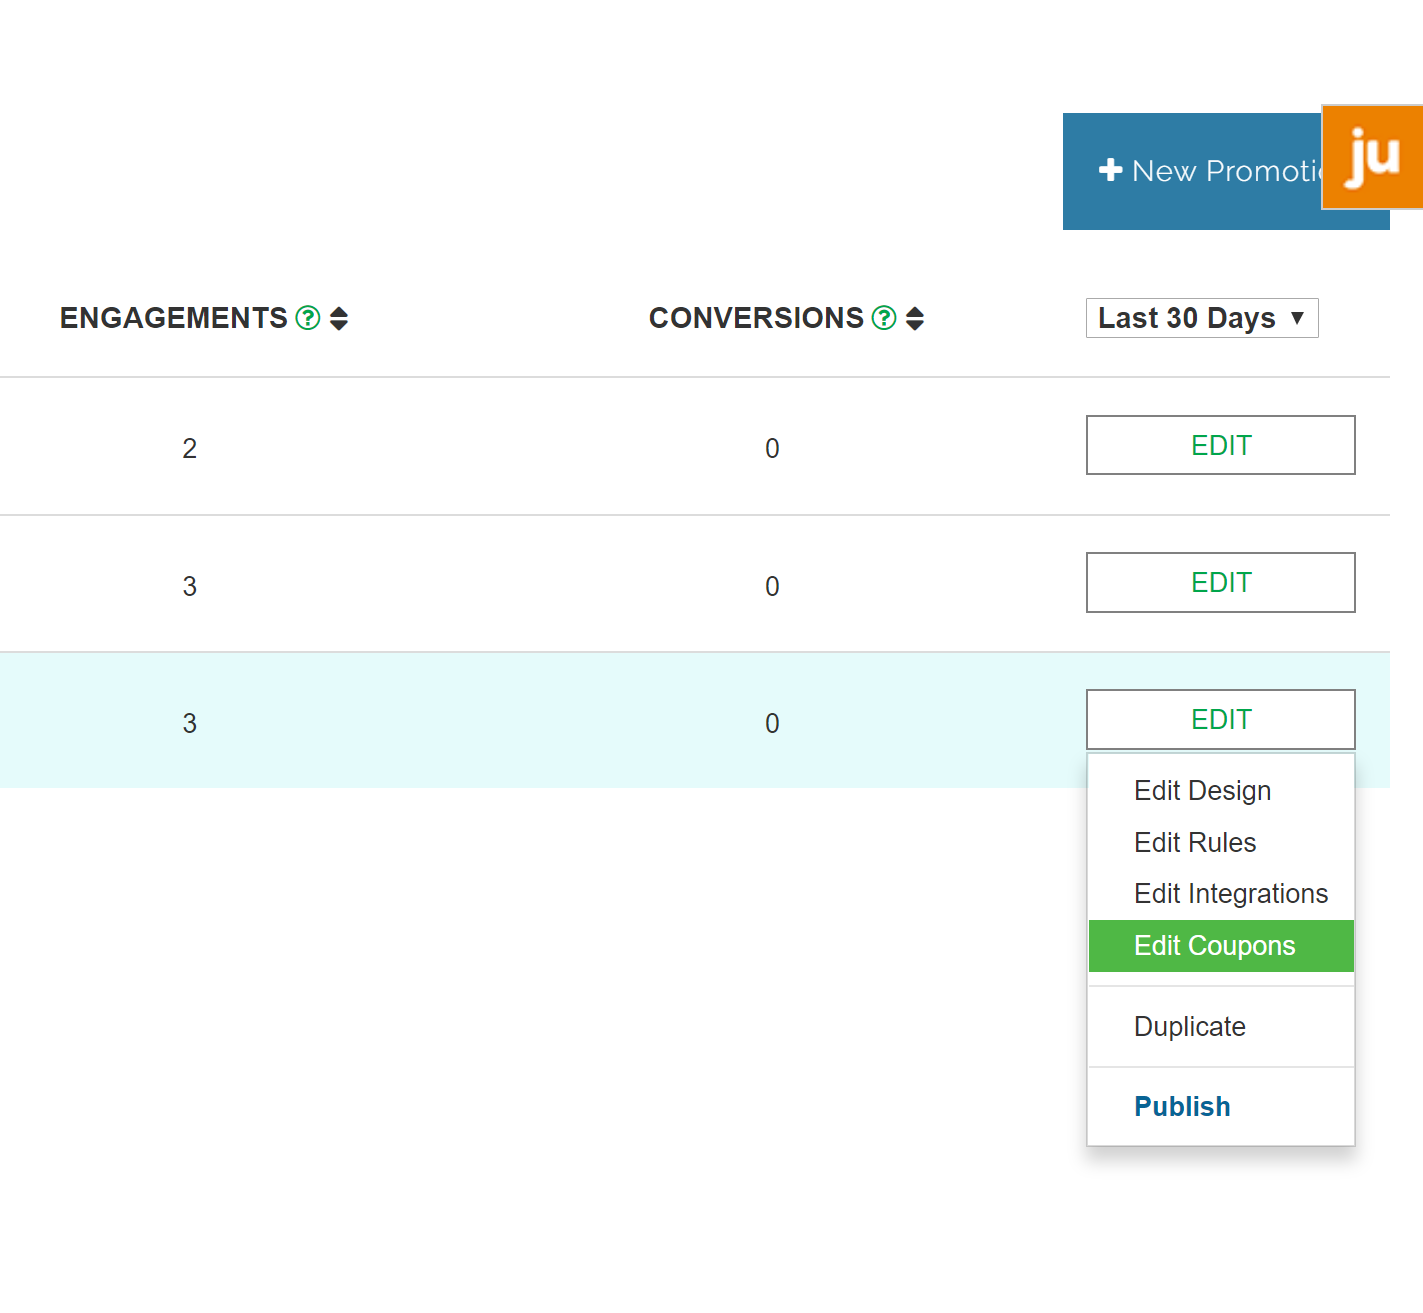
Step 2:
Step 3:
Step 4:
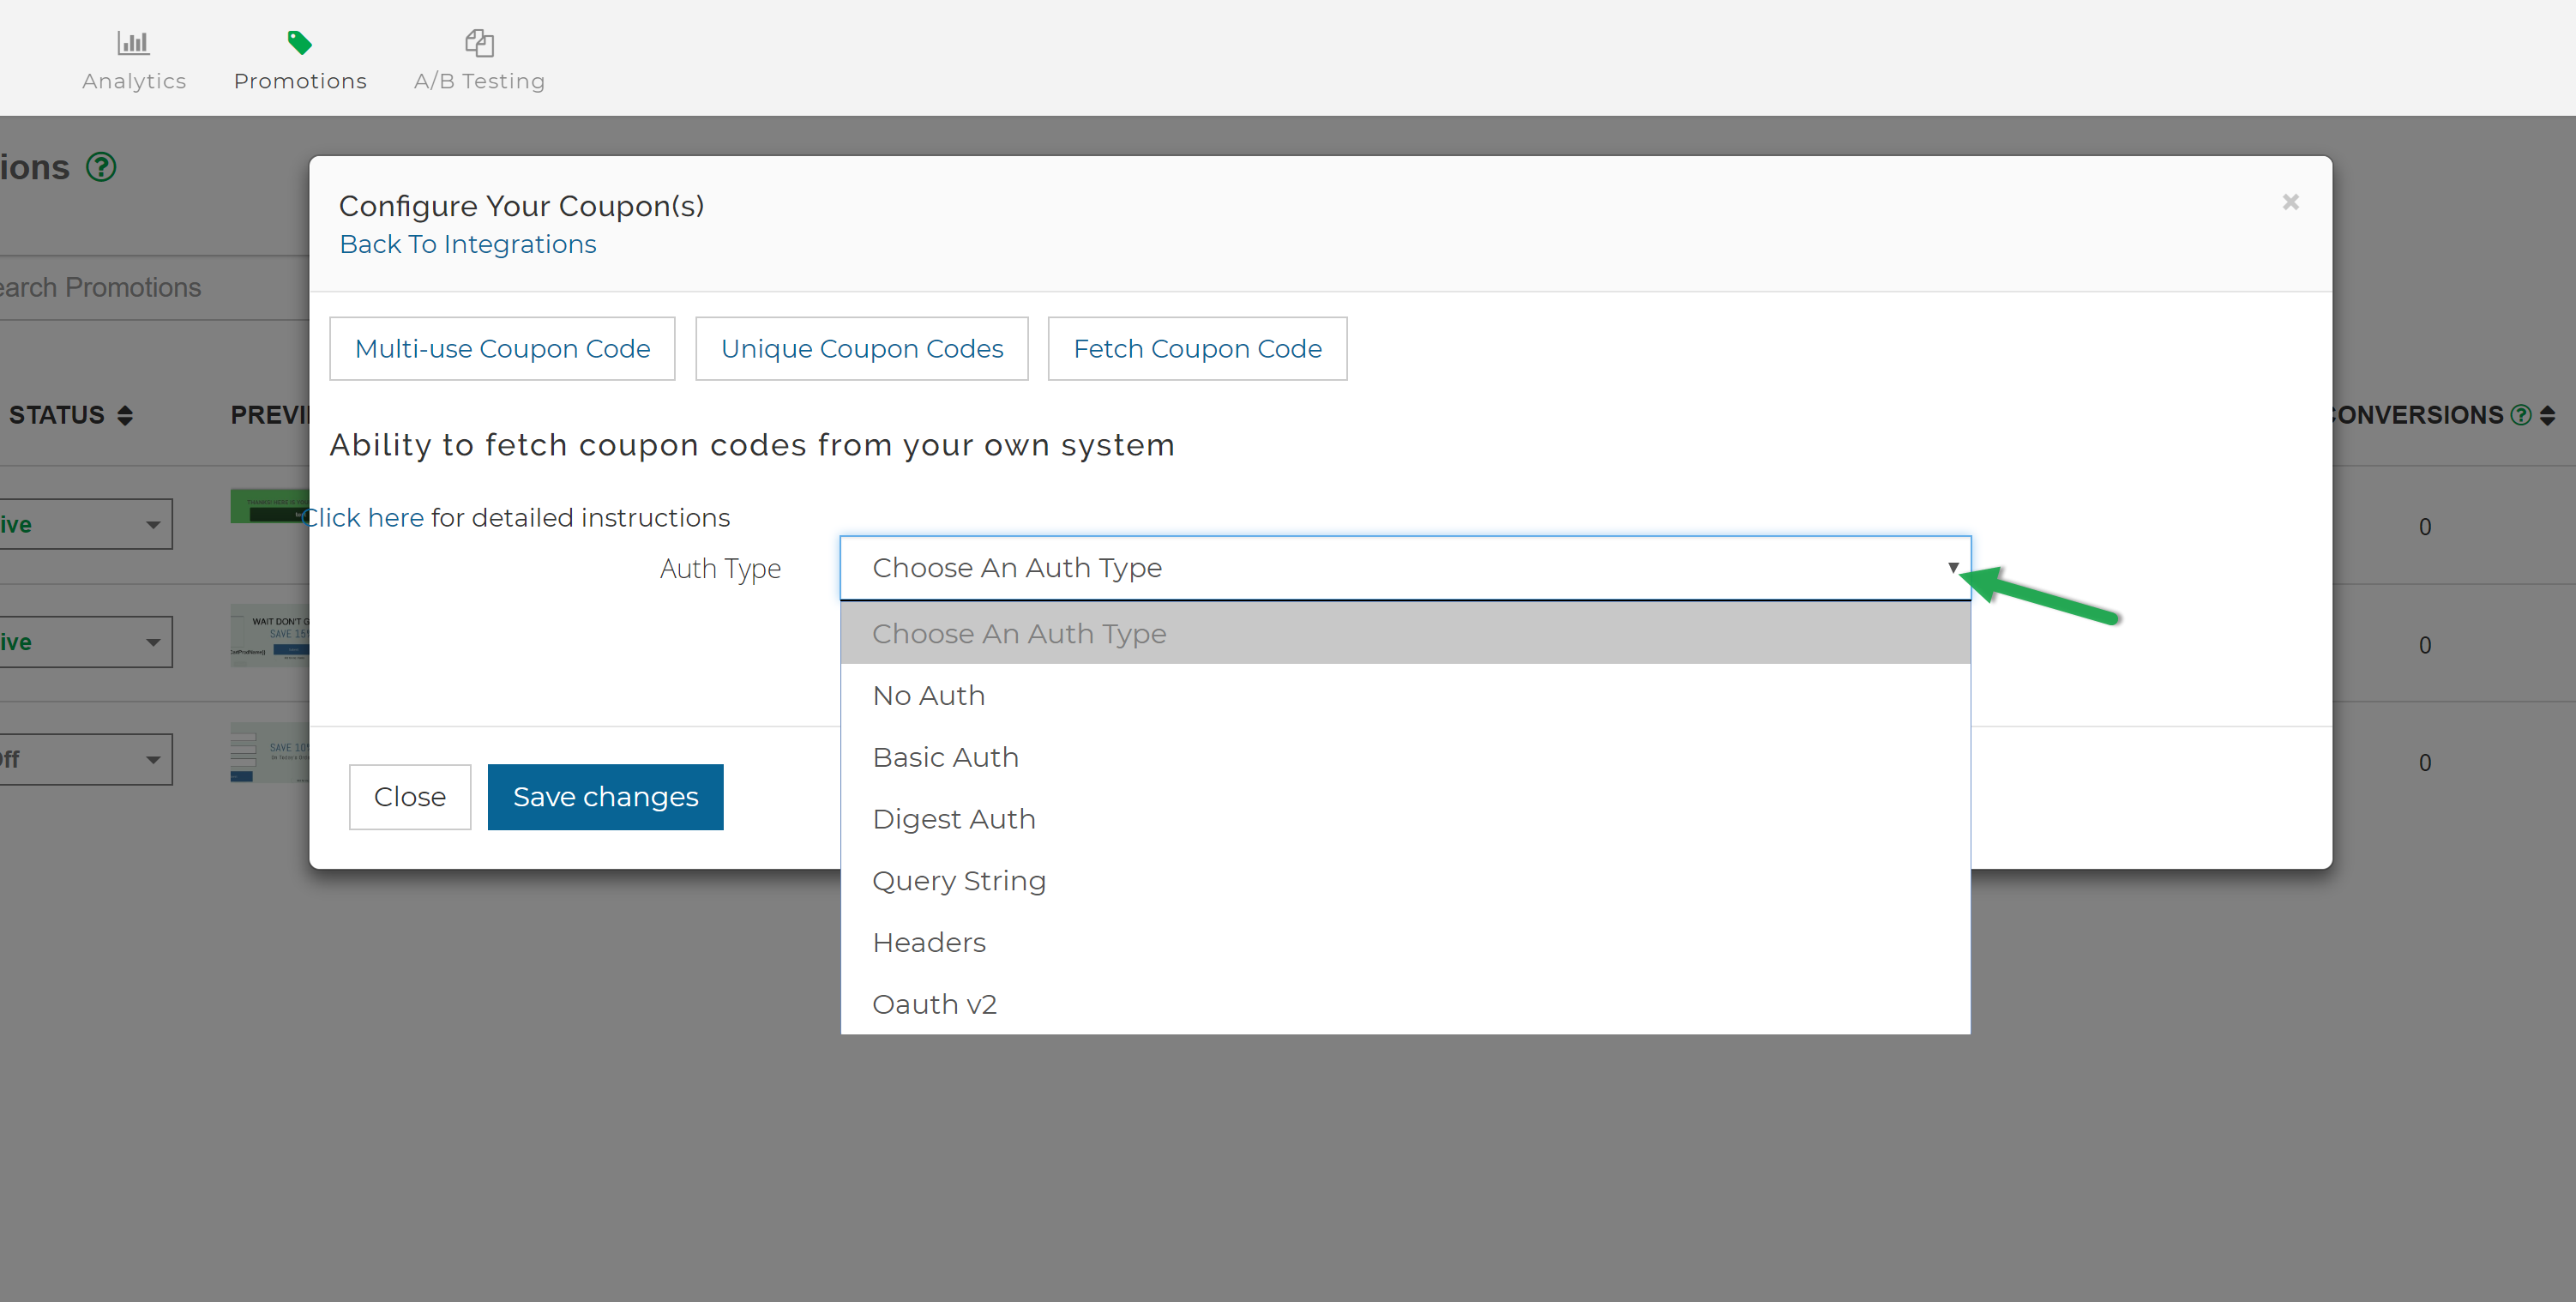
Choosing The Server Authentication Method
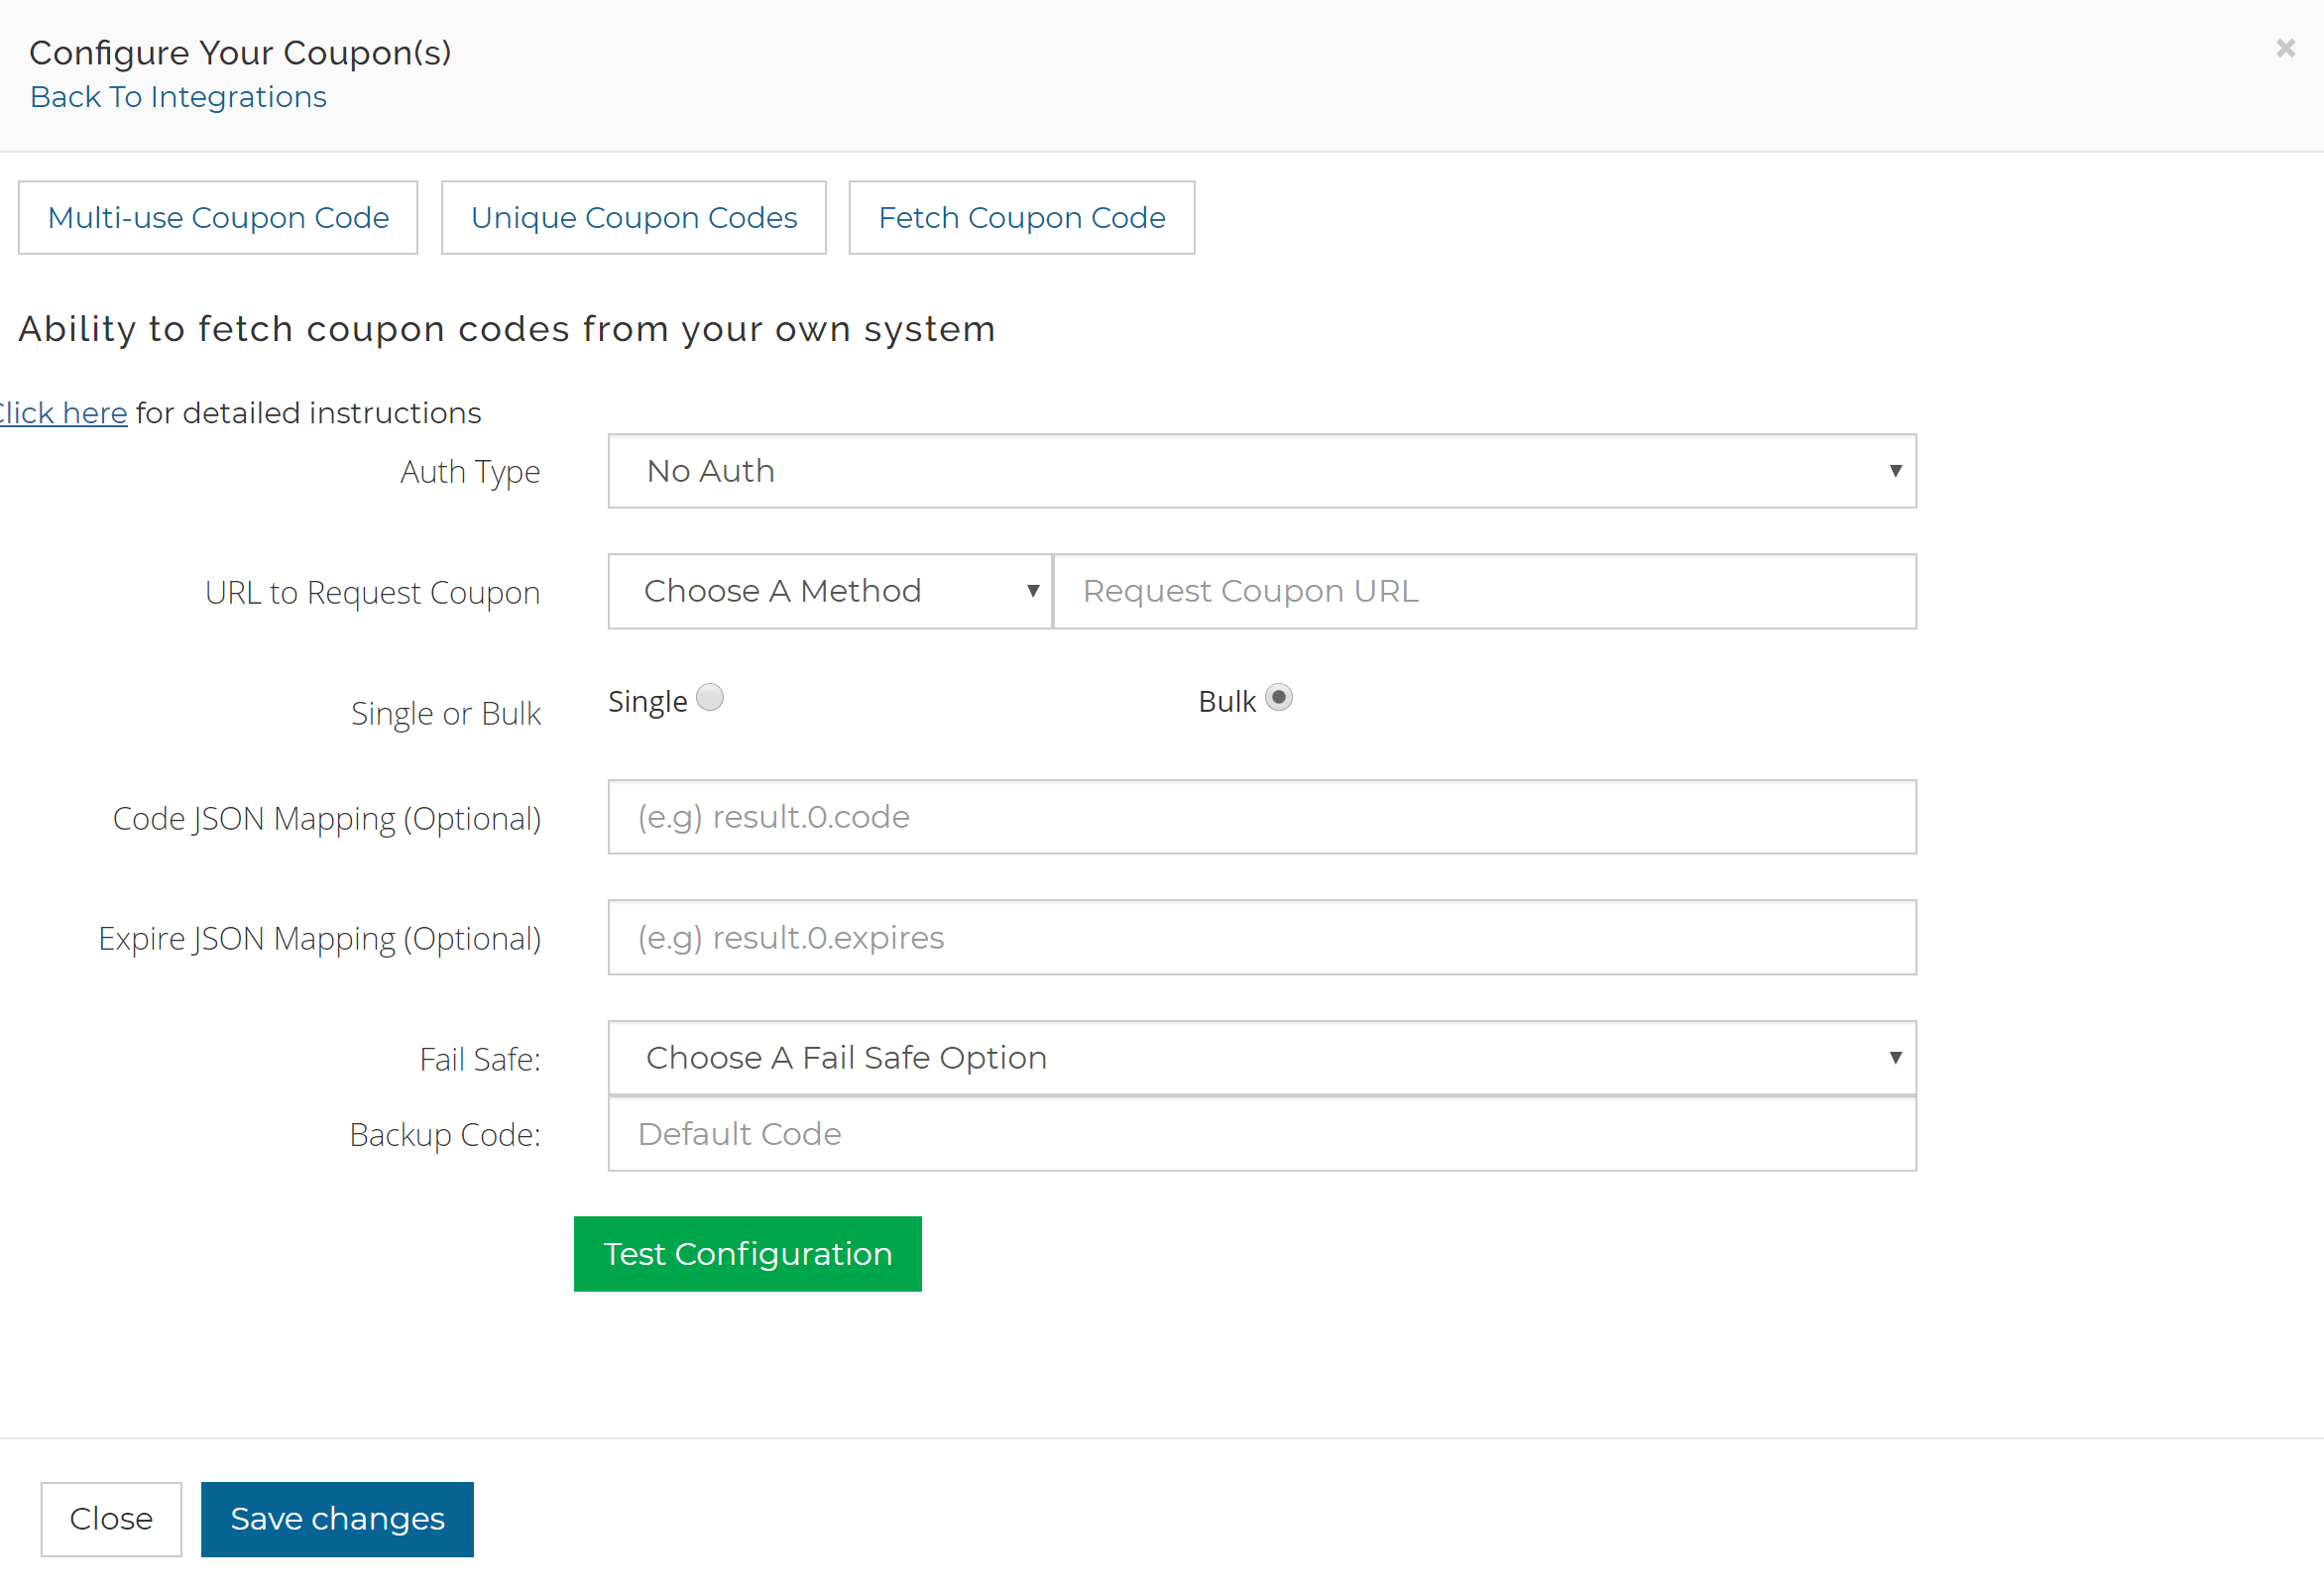
Authentication types include:
- No Auth - No authentication required for your coupon endpoint/API
- Basic Auth - Username and Password are required for coupon endpoint/API
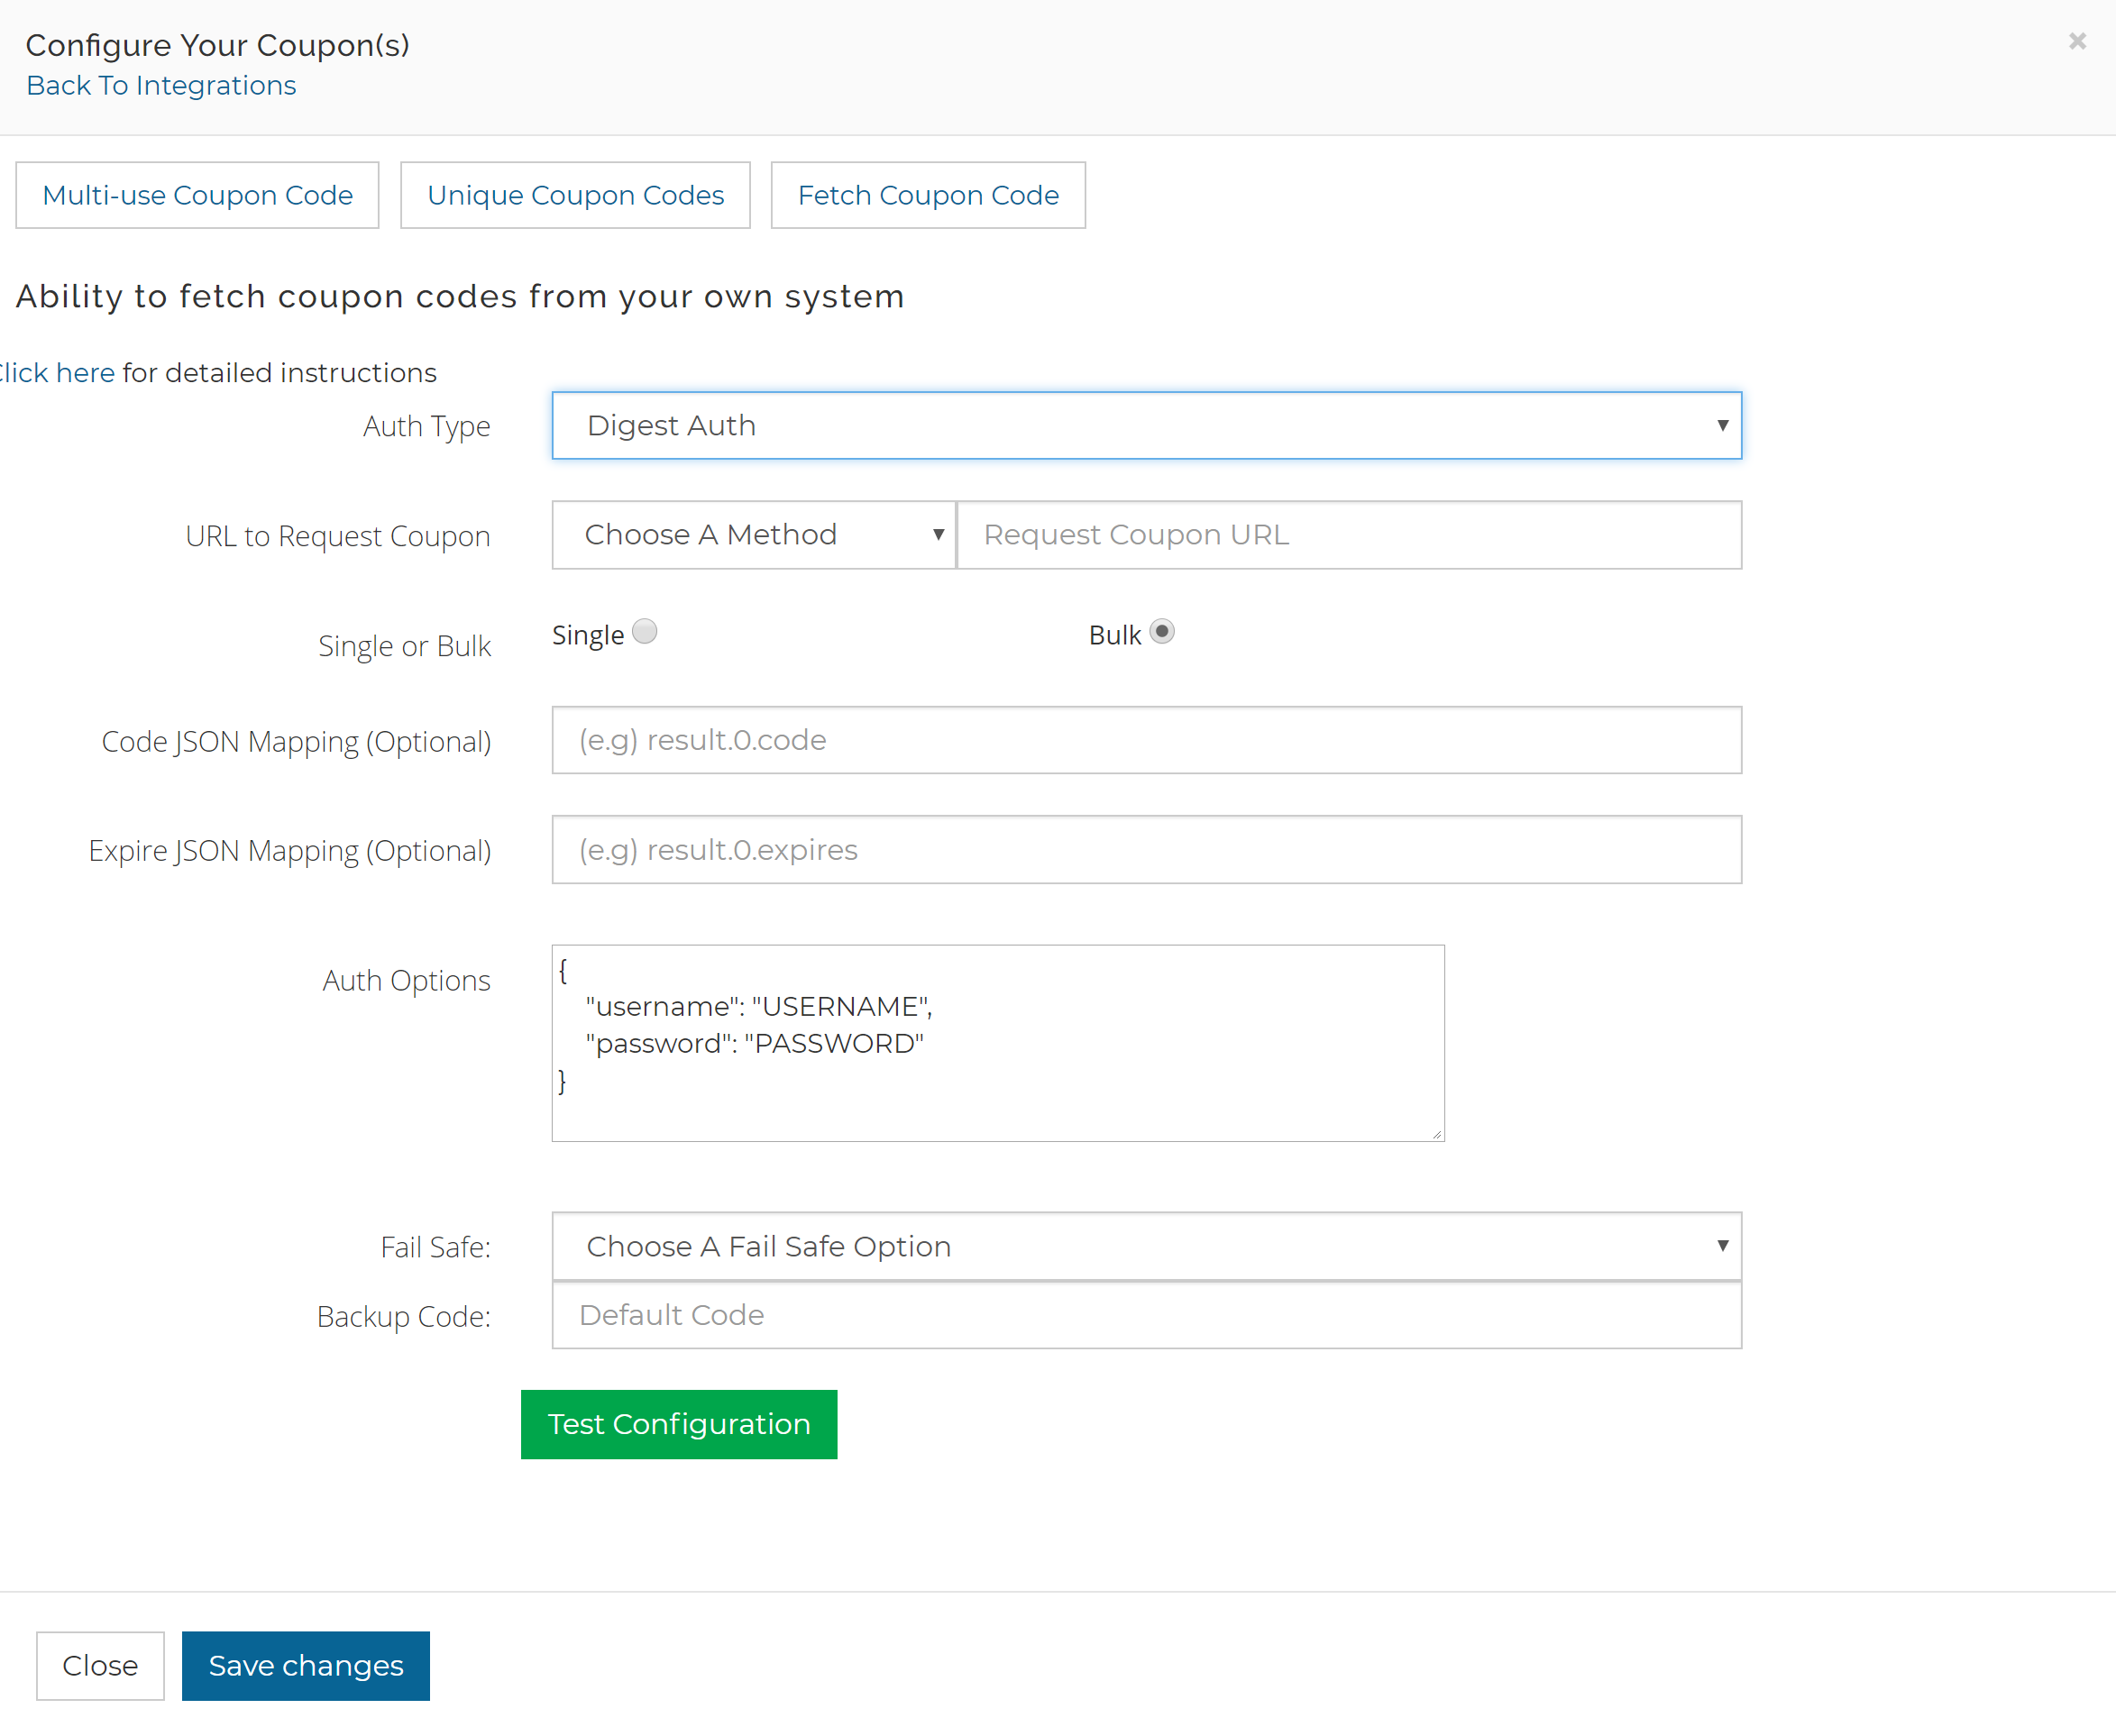
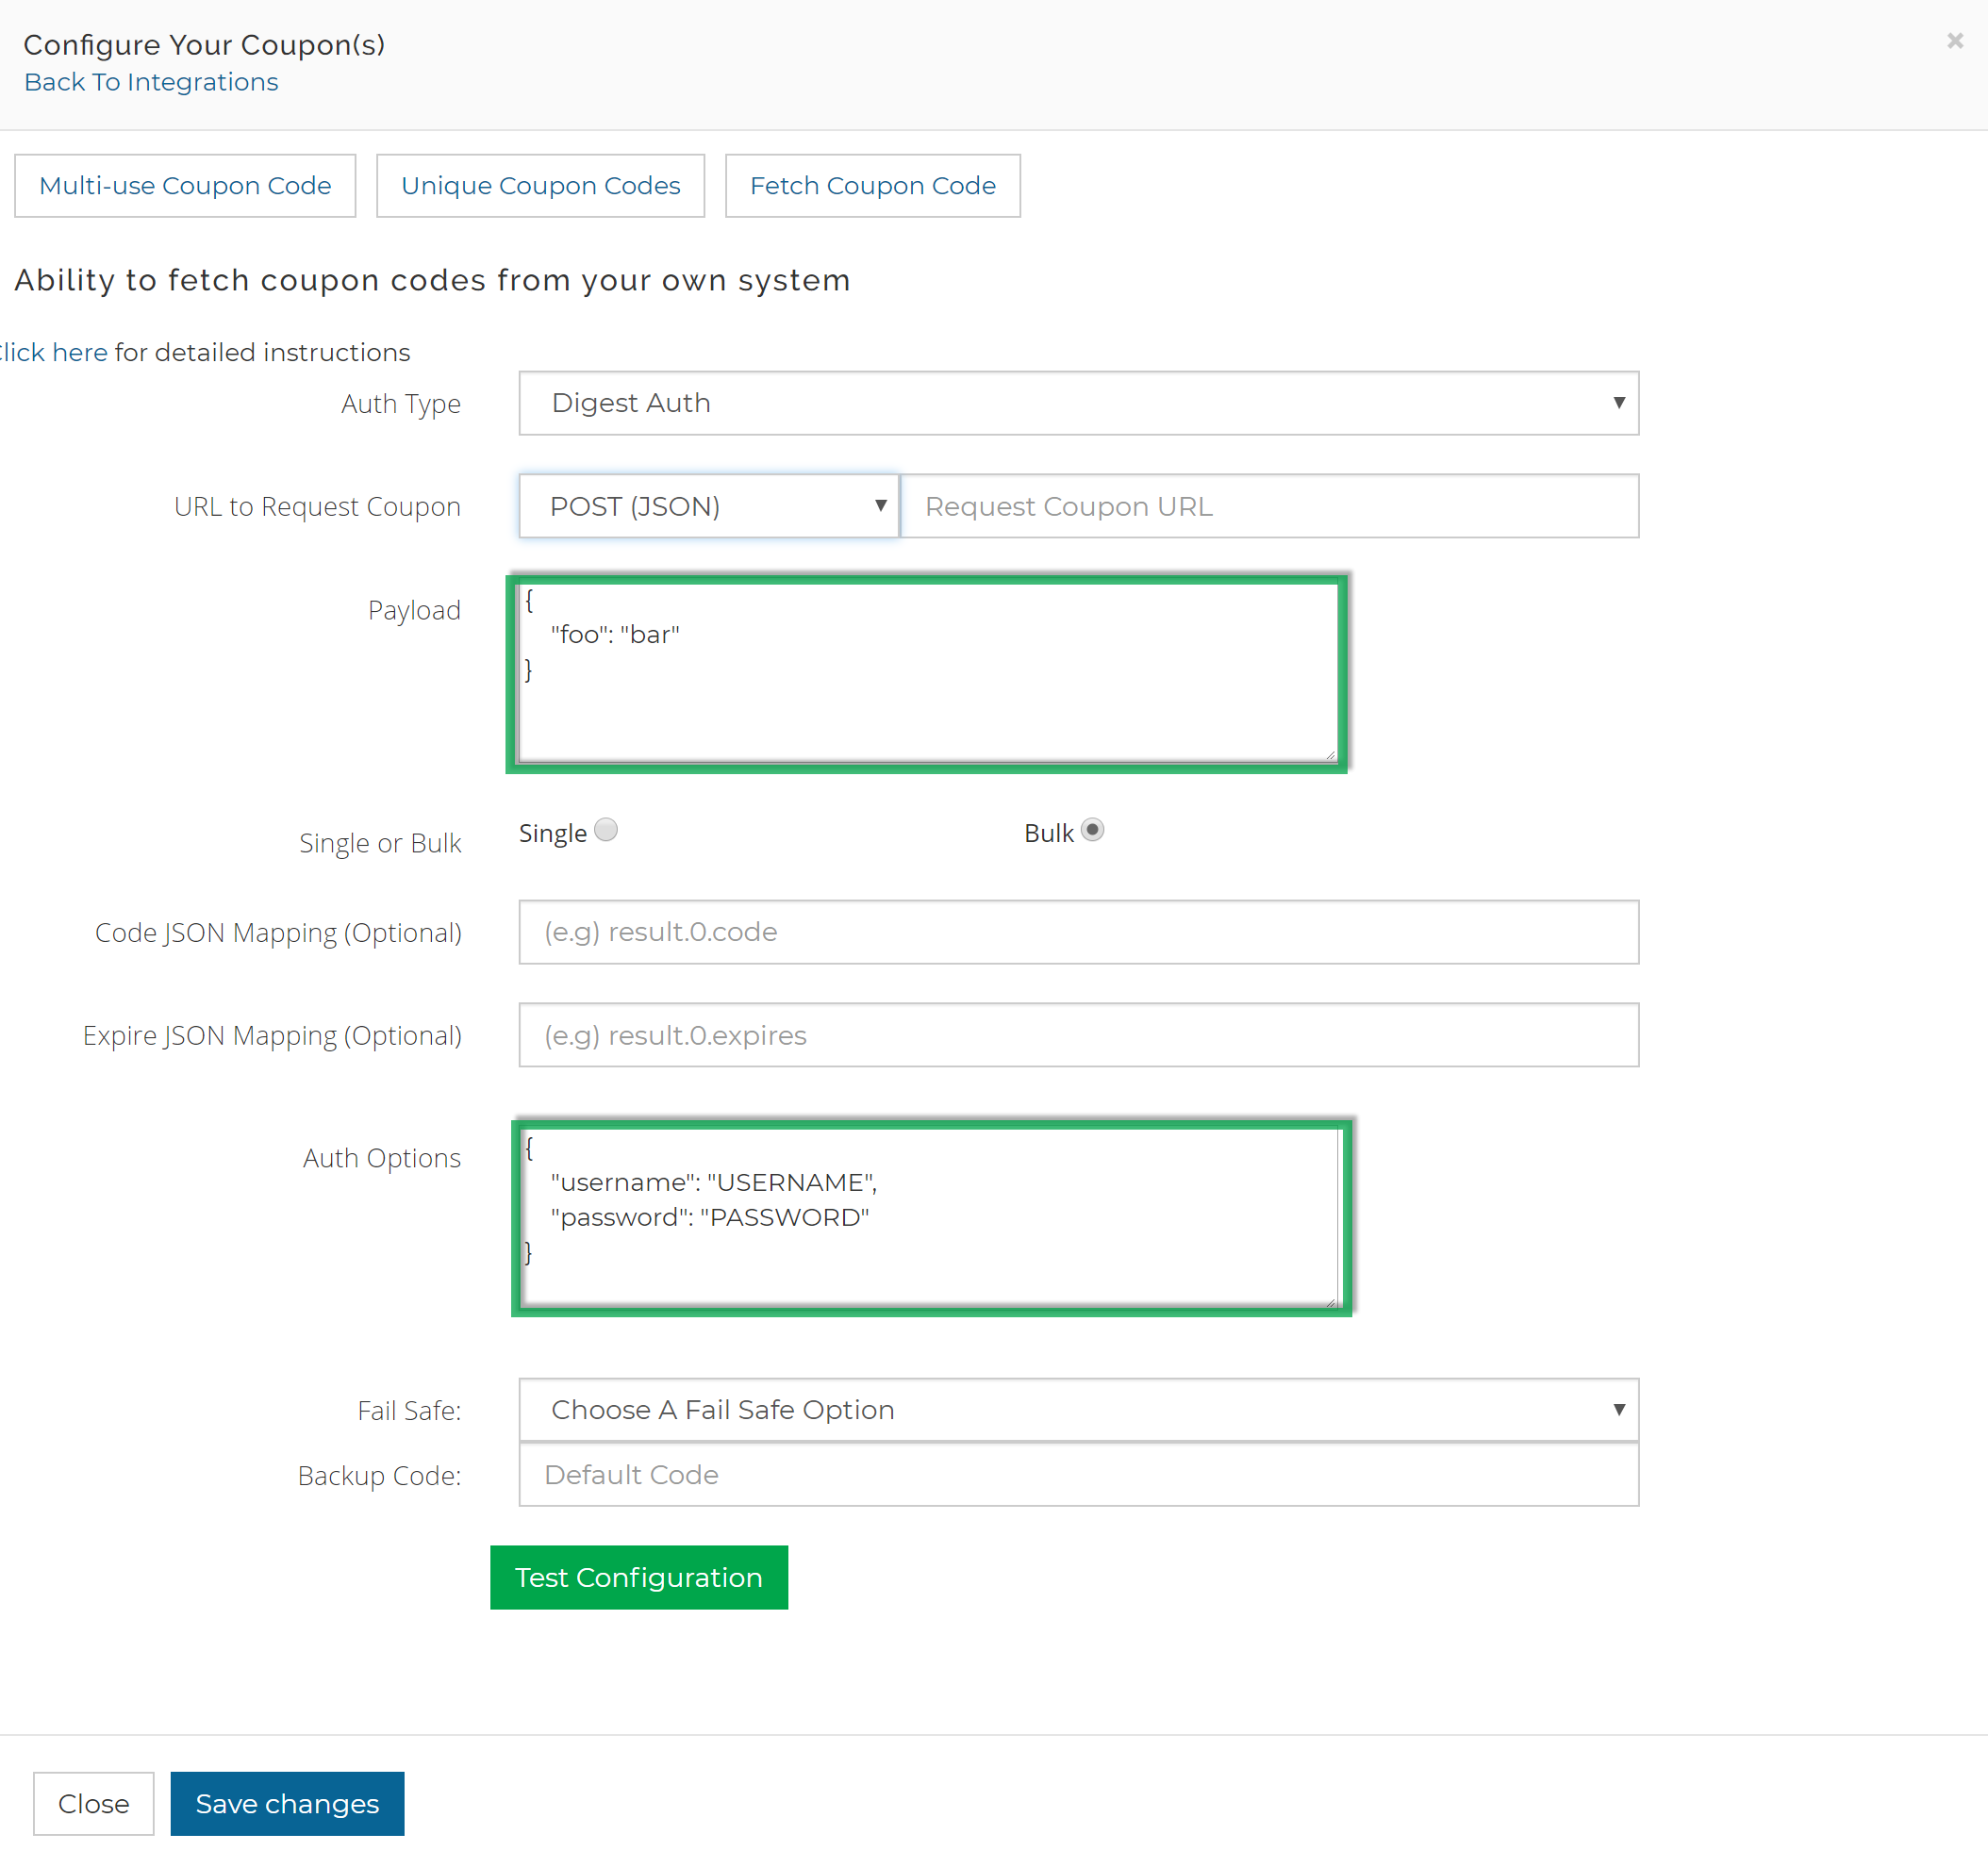
- Digest Auth - Identical from UI standpoint to the Basic Authentication option.
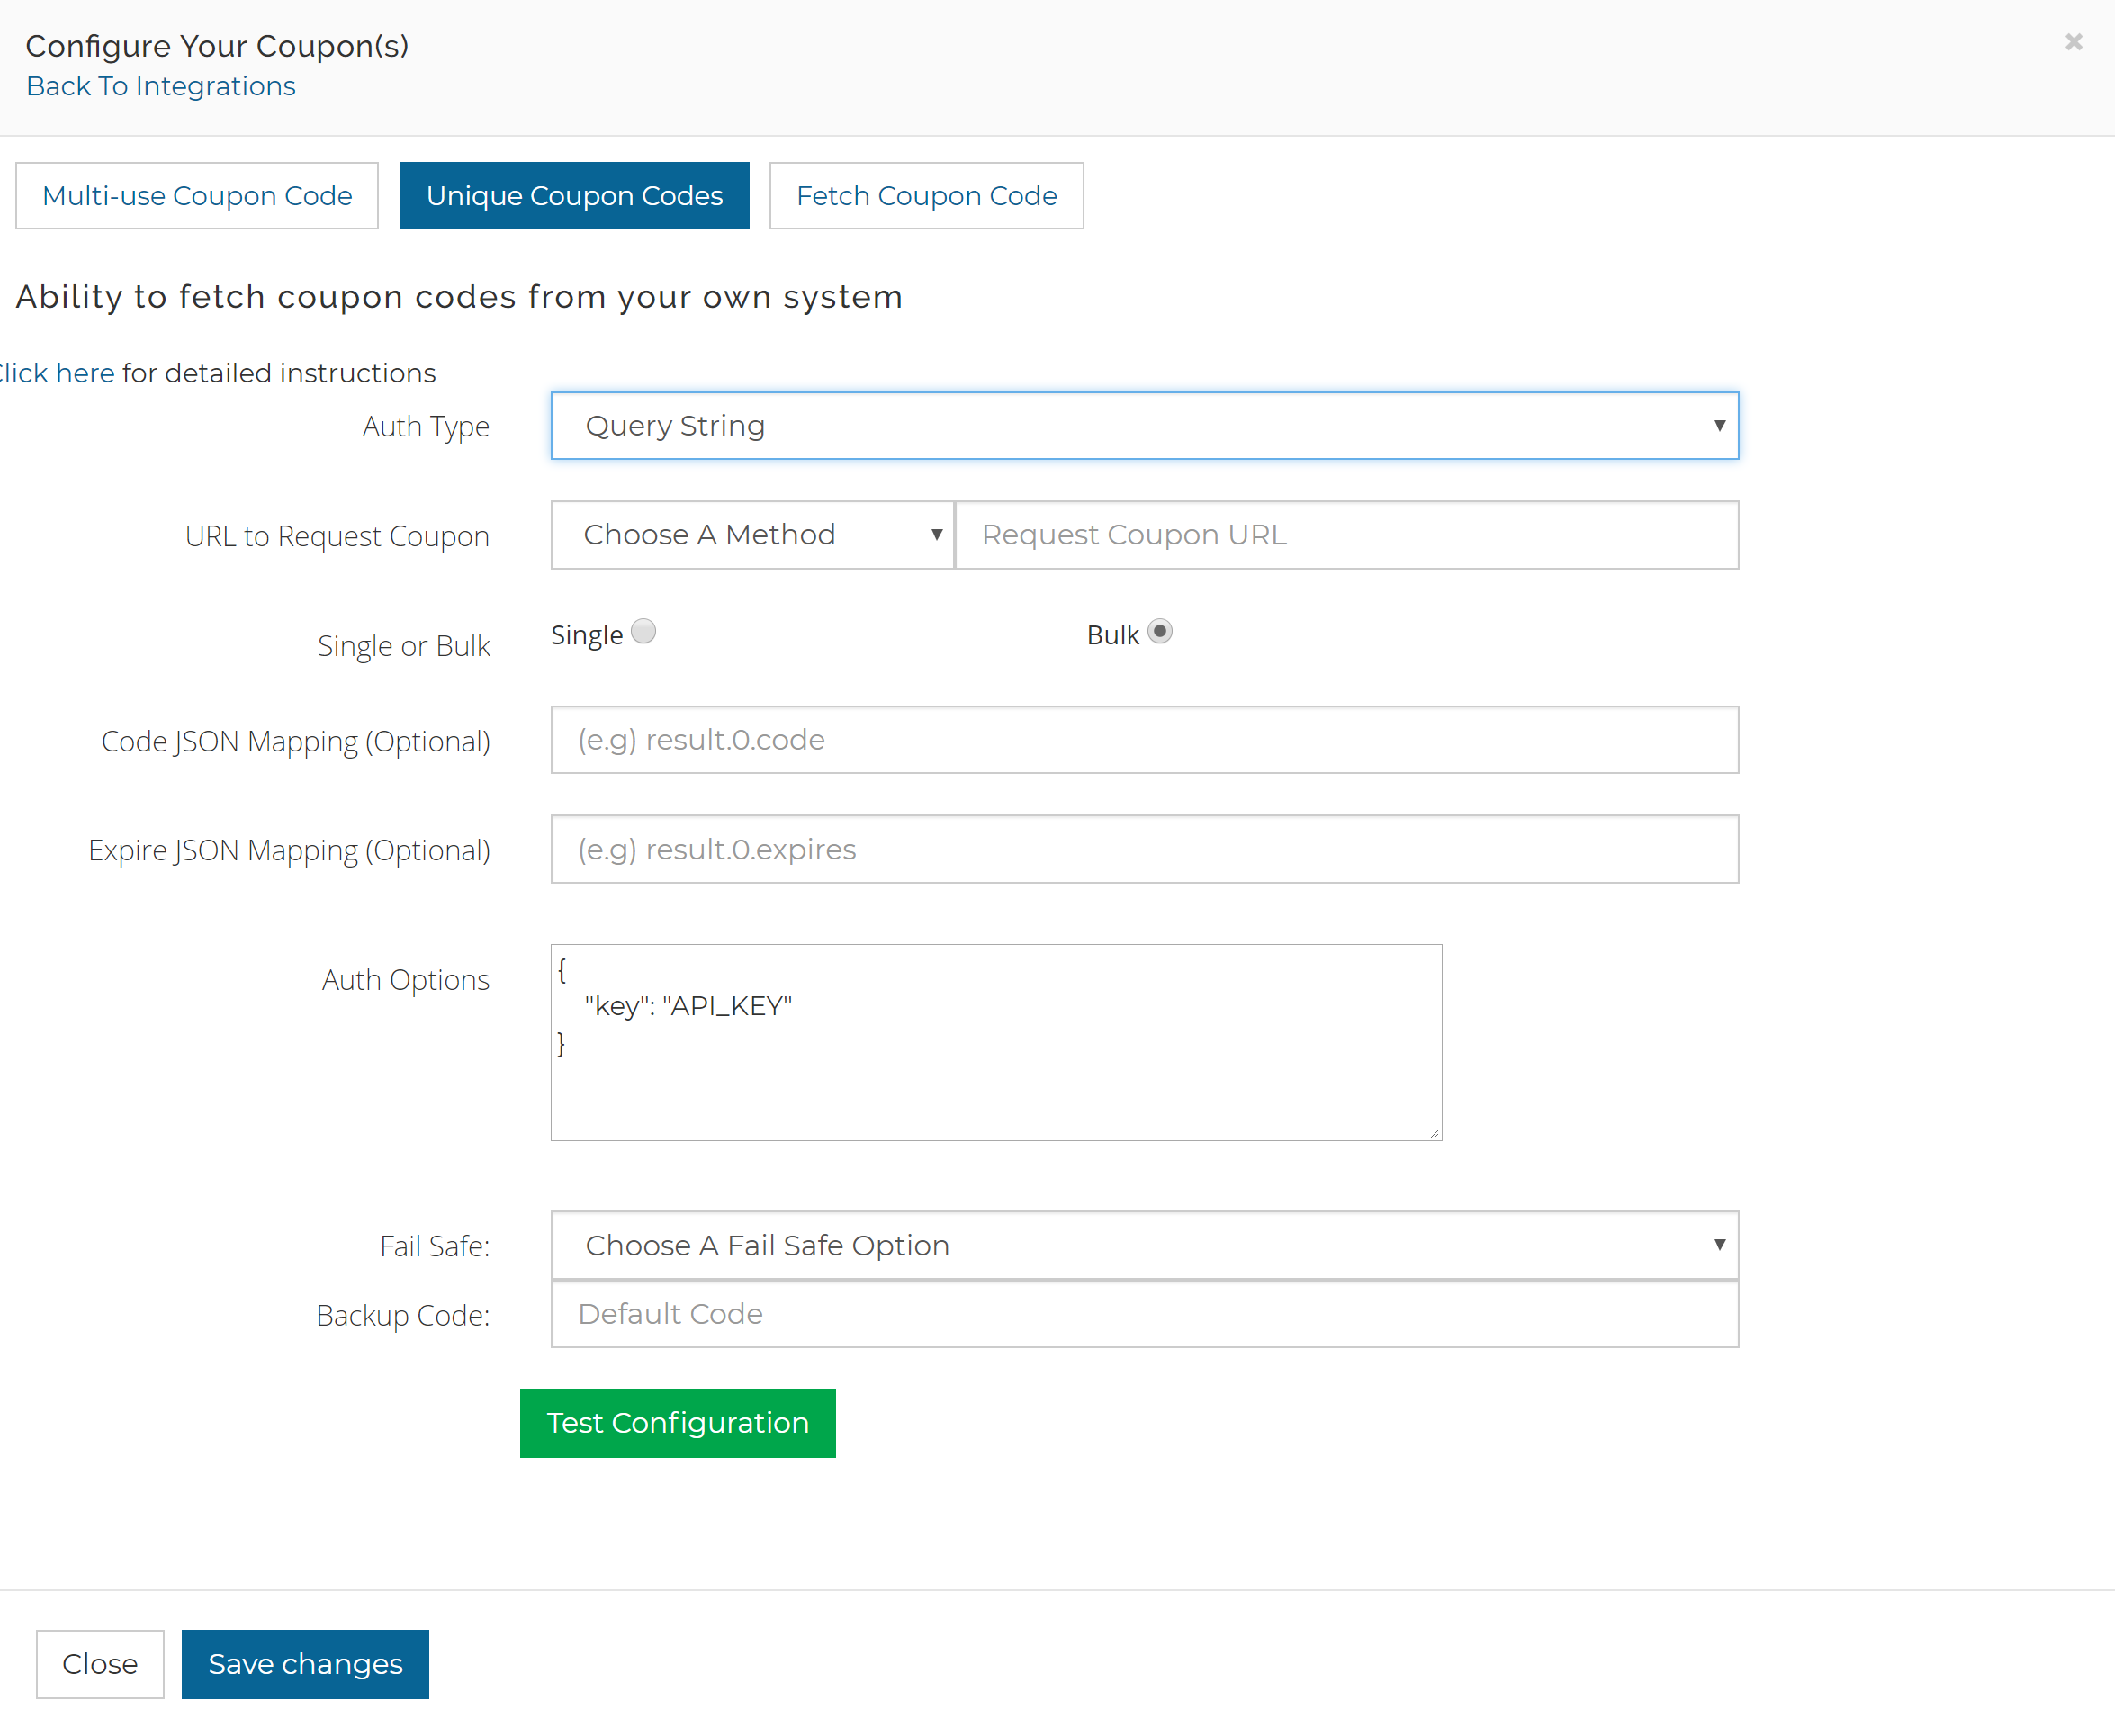
- Query String - Appends anything from the authentication option to the query string
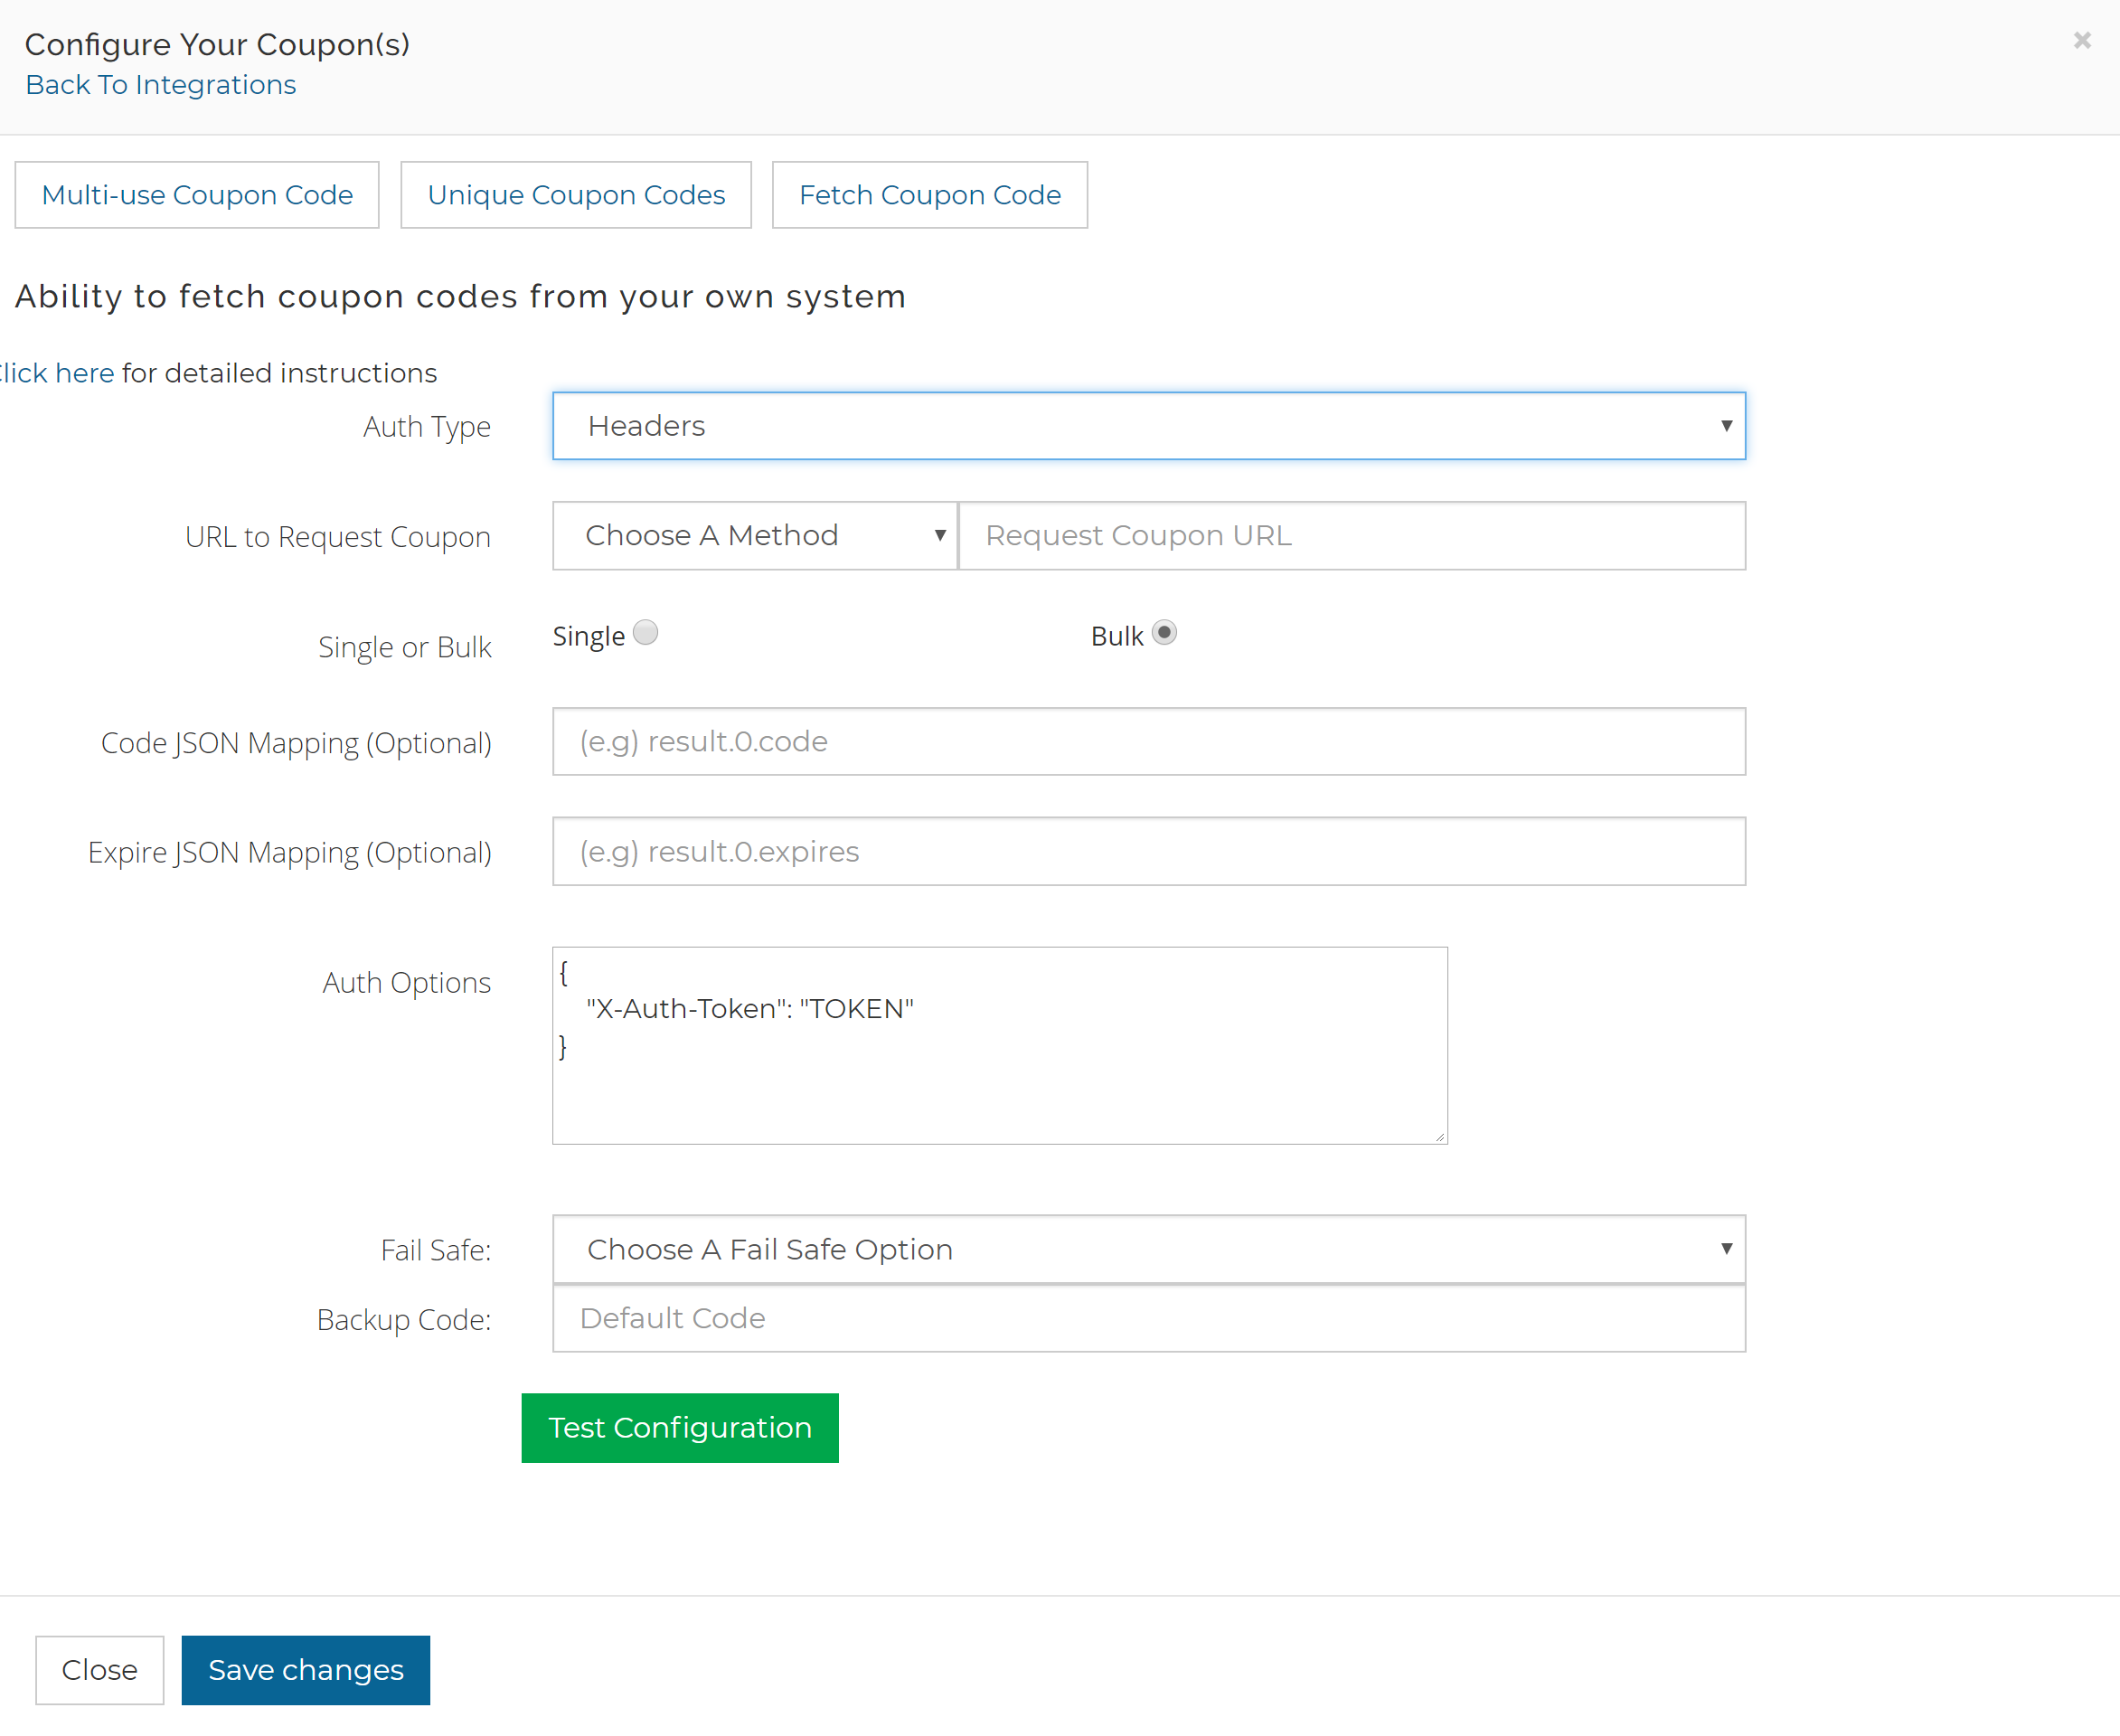
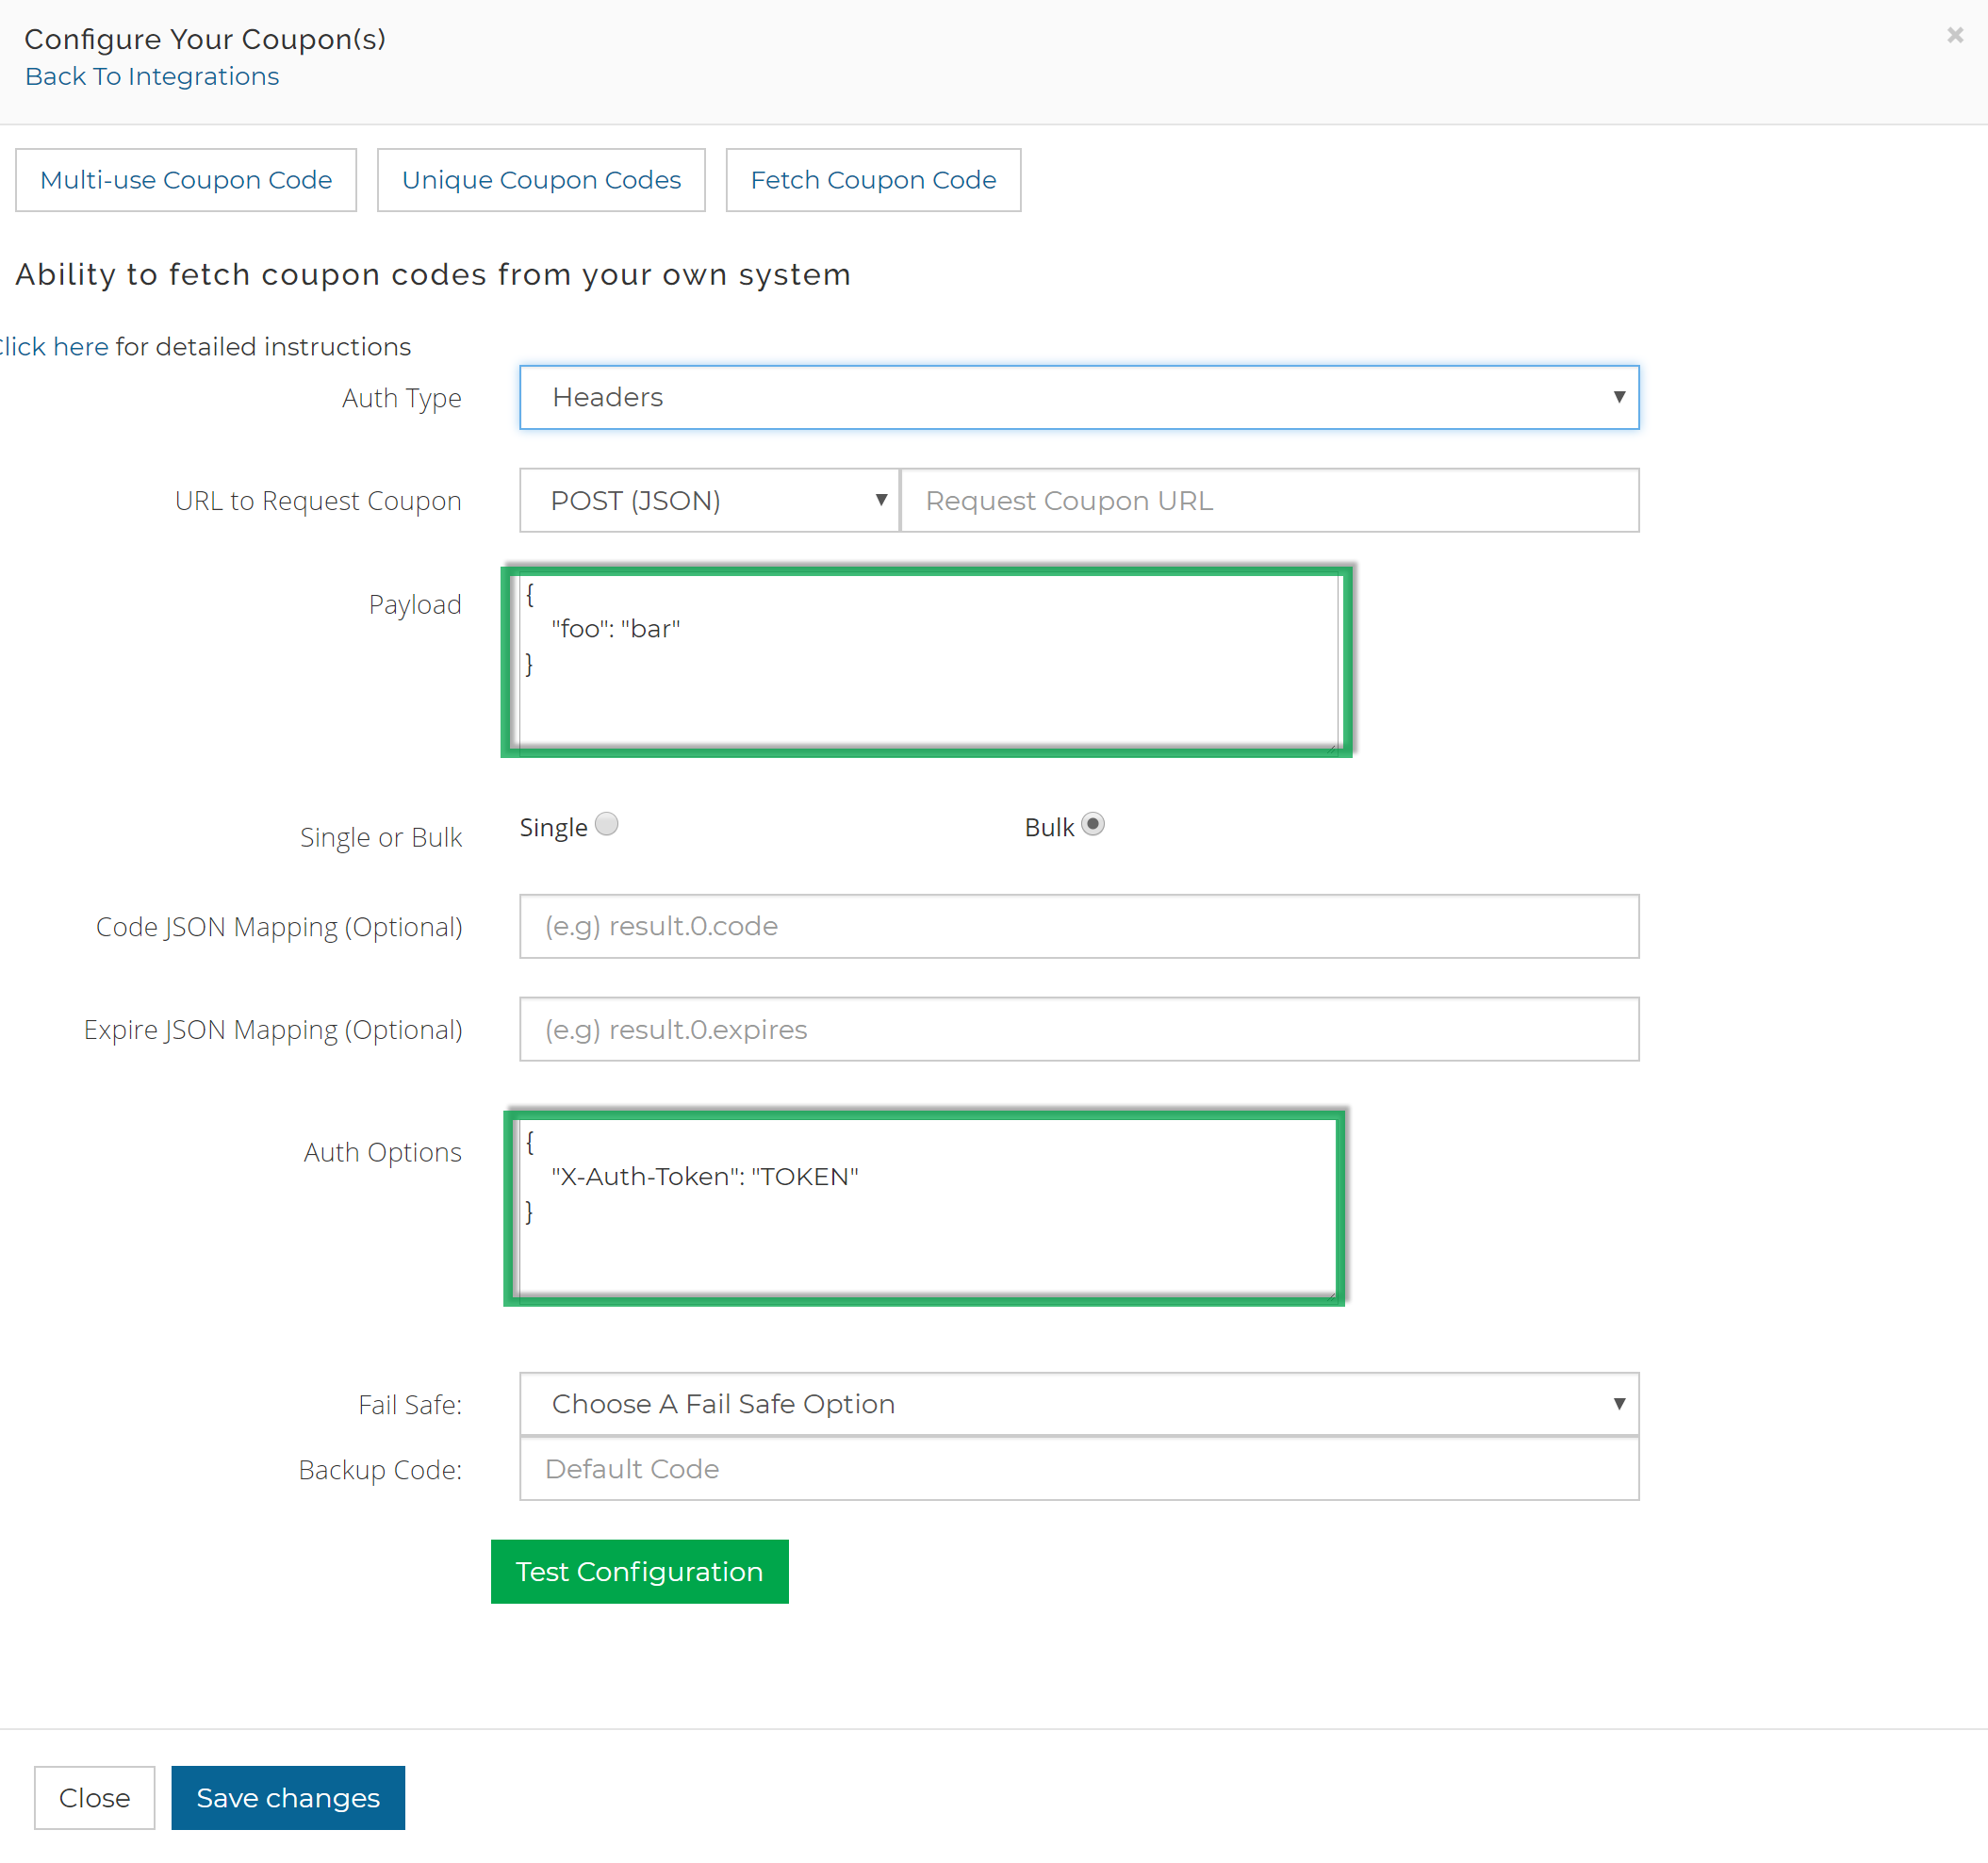
- Headers - This appends anything from the authentication options to the headers of the request made to the endpoint.
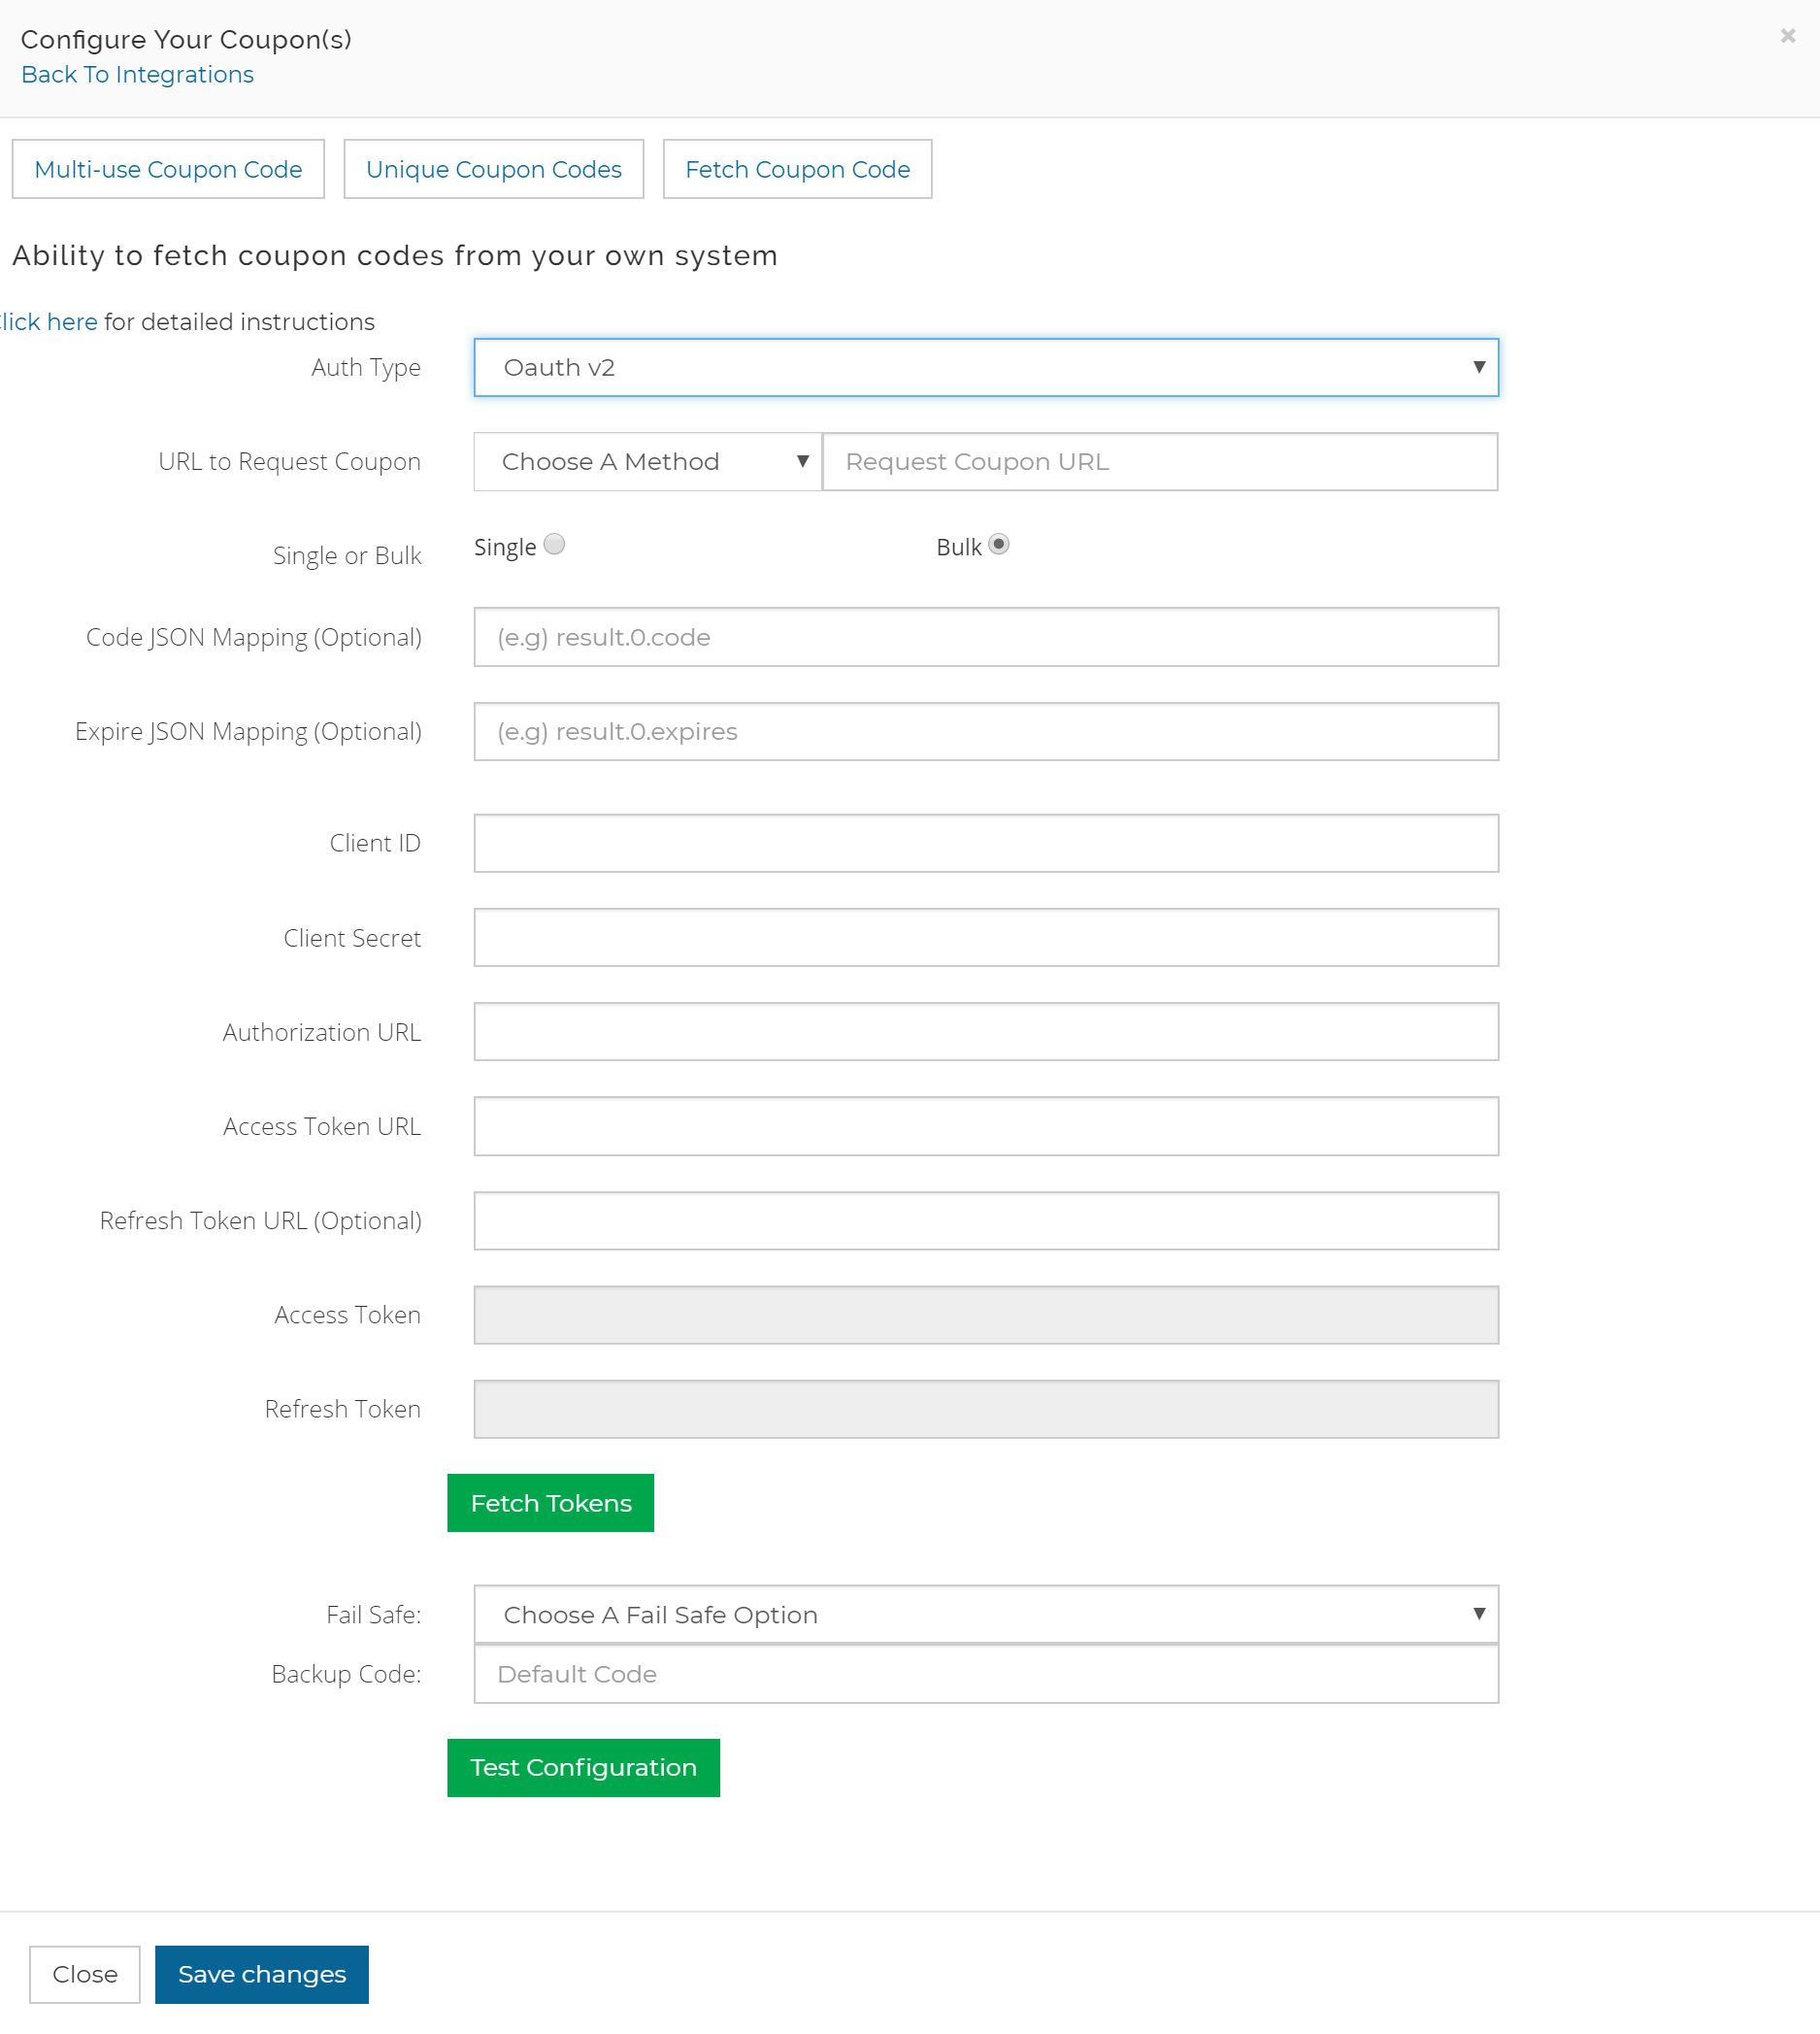
- OAuth v2 - Client ID, client secret. authorization URL and access token URL are all required for this option. Once given you can 'fetch tokens' so that you can start the OAuth process to retrieve the tokens.
- Refresh token is an optional feature.
No Authentication
Basic Authentication

Digest Authentication
Query String Authentication
Headers Authentication
OAuth v2 Authentication
Choosing The Request type
There are 3 available request types accessible within the Custom Coupon UI interface:
- GET - Makes a simple GET request at your set endpoint URI
- POST (JSON or FORM) - With both of these post options you can send a payload, that is anything your endpoint might need in the data body to process the request.
- POST (JSON) - Makes a POST request with the header: content-type: application/json
- POST (FORM) - Makes a POST request with the header: content-type: application/x-www-form-urlendoded
Example:
Digest Authentication POST
Example:
Query String Authentication - POST

Example:
Headers Authentication - POST
Details on Miscellaneous Options
- Single Coupon vs Bulk Coupon Type
- This indicates whether your API/Endpoint response will be one coupon or a multitude of coupon codes
- Code/Expire JSON mapping
- [data: { coupon: ‘coupon_code’ }]
Your JSON mapping would look like this: - result.0.data.coupon
- [data: { coupon: ‘coupon_code’ }]
- If your response is JSON, this will be required to extract the appropriate keys from the JSON, for example: If the response result is:
- The same logic applies for extracting 'expiration dates'
Testing API Response
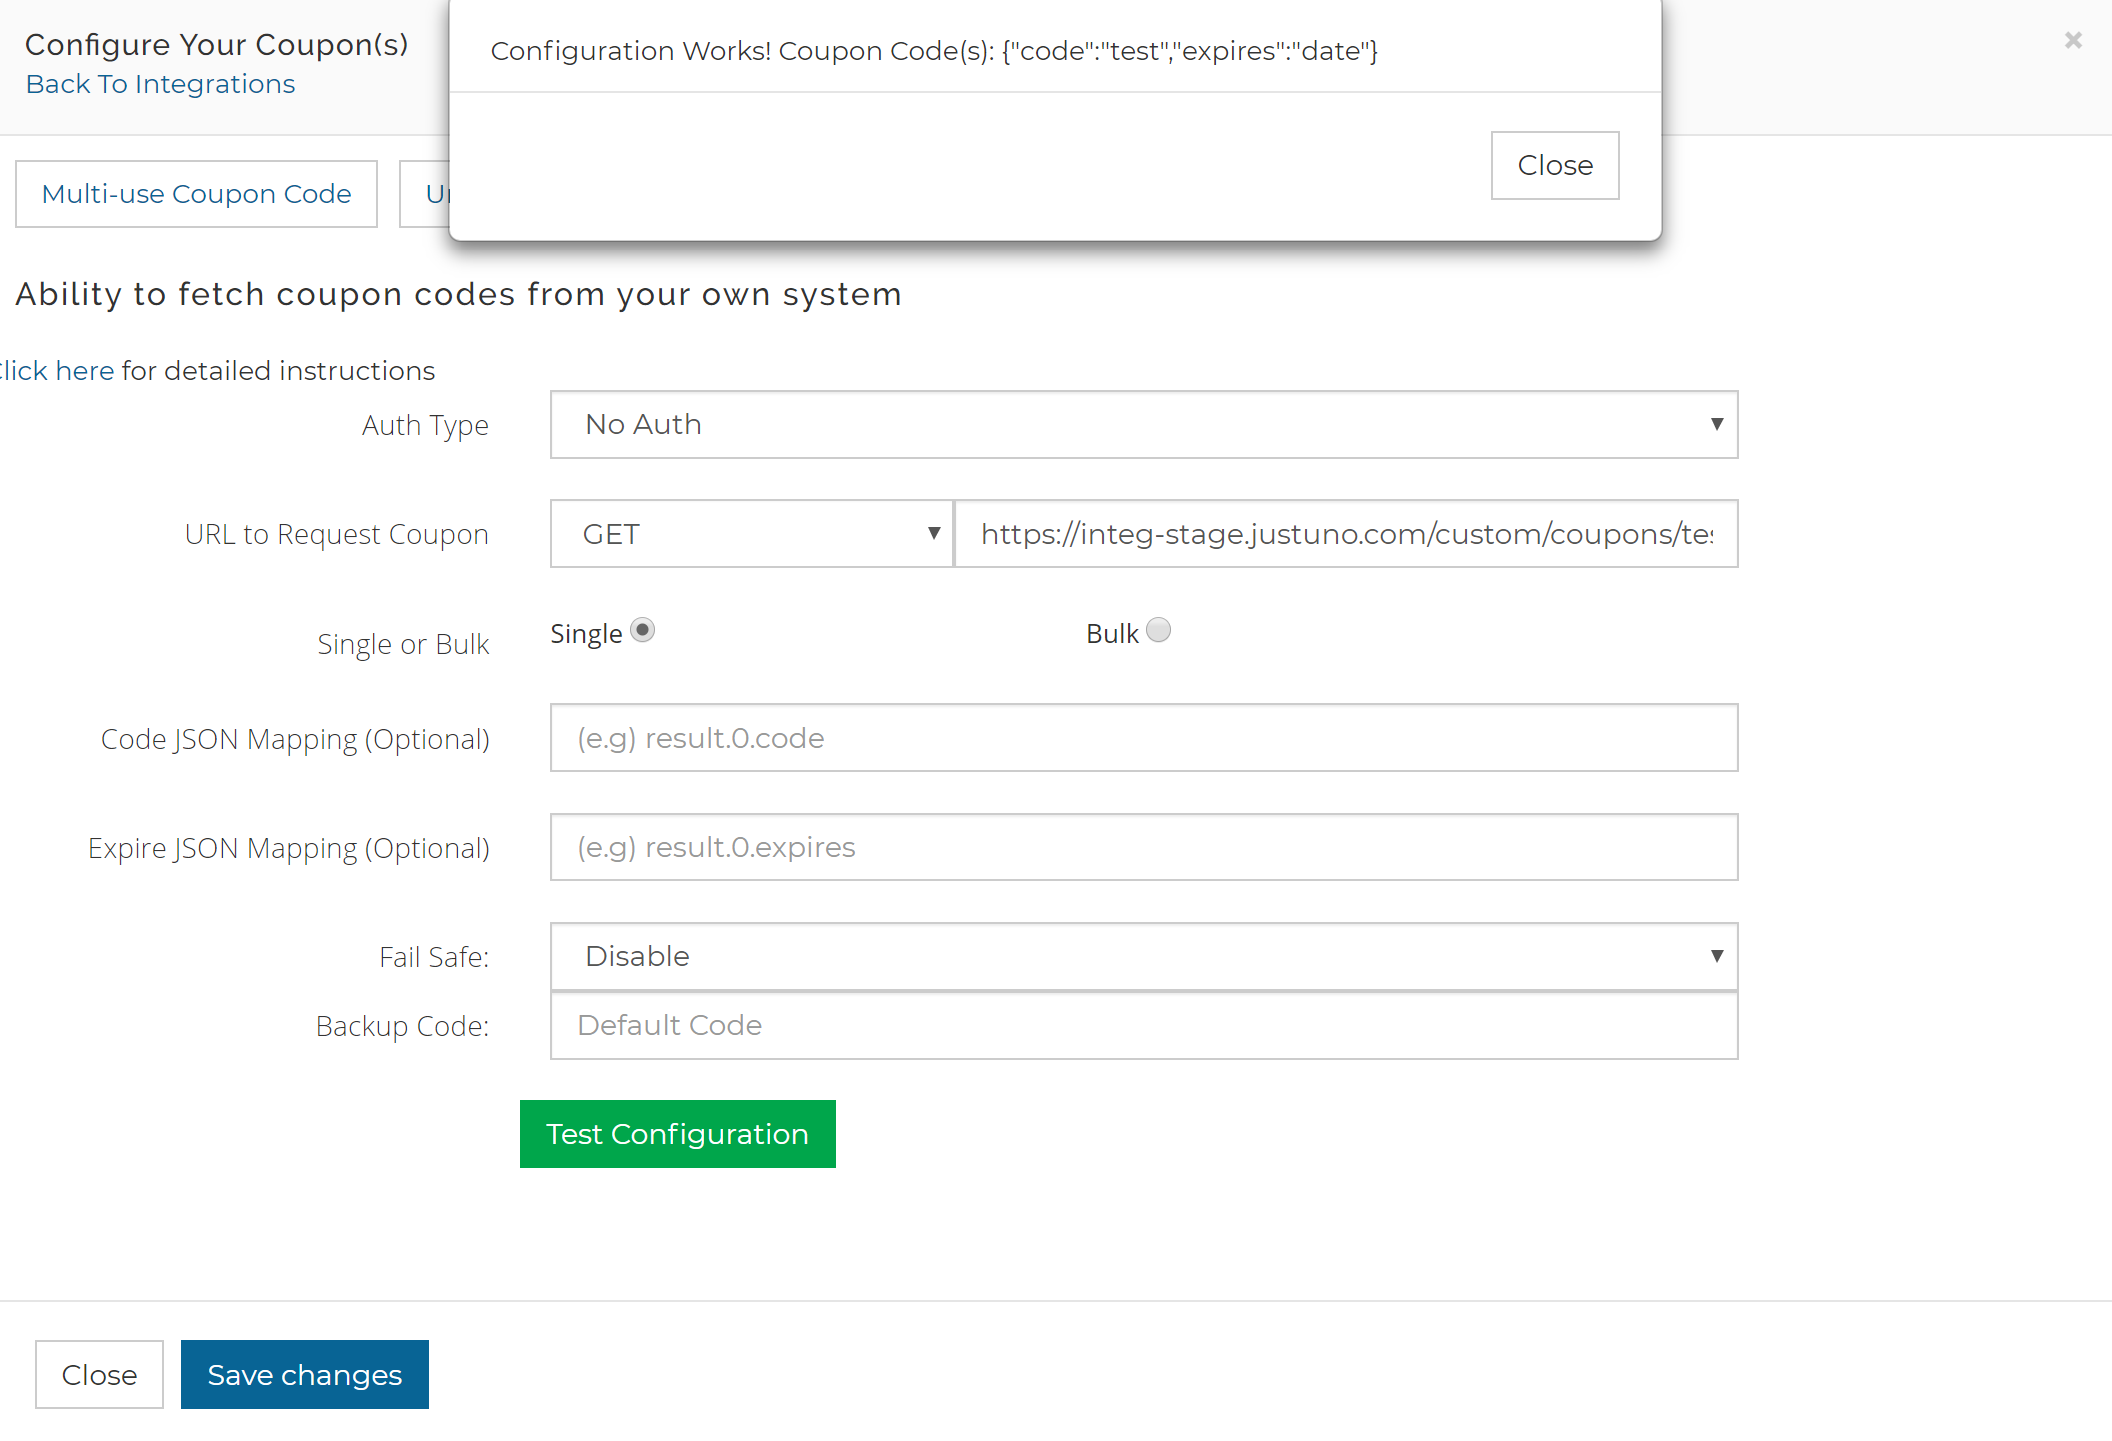
The configuration you set can be quickly tested using the "Test Configuration" button at the bottom of the interface window. The success message reads "Configuration Works!" followed by the response from the API/Endpoint.
Visit Justuno @justuno.com