Learn how to collect more information with your MailChimp integration
At a glance
Last update 01/24/2022
- Display your SMS capture field on a different screen from your email capture field. *Please see How to Set up a Two-Step Form for instructions to display on separate screens*
- Cannot require the SMS capture field, it must be an optional field
Introduction
When setting up any integration, please ensure that you have confirmed all other integration settings are cleared (Step 1 & Step 3) before proceeding with the installation of the new integration.
The Step 1 integration allows for deeper integration with MailChimp lists and facilitates the overall collection of more visitor information far swifter than previous integrations.
Watch the video or follow the instructions below:
Instructions
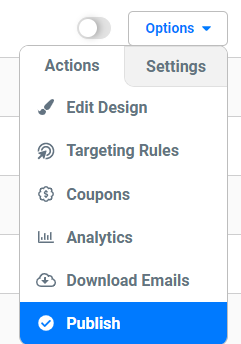
1. While in the Promotion Management View, navigate to the promotion you would like to connect with your MailChimp account. Click the Options menu and select Edit Design.
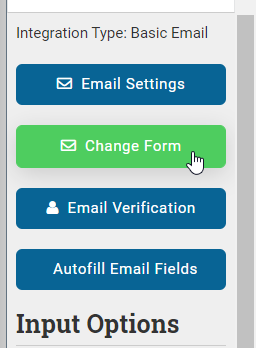
2. If there is already an e-mail field present, click on the email layer and find Change Form within the right-hand toolbar options.
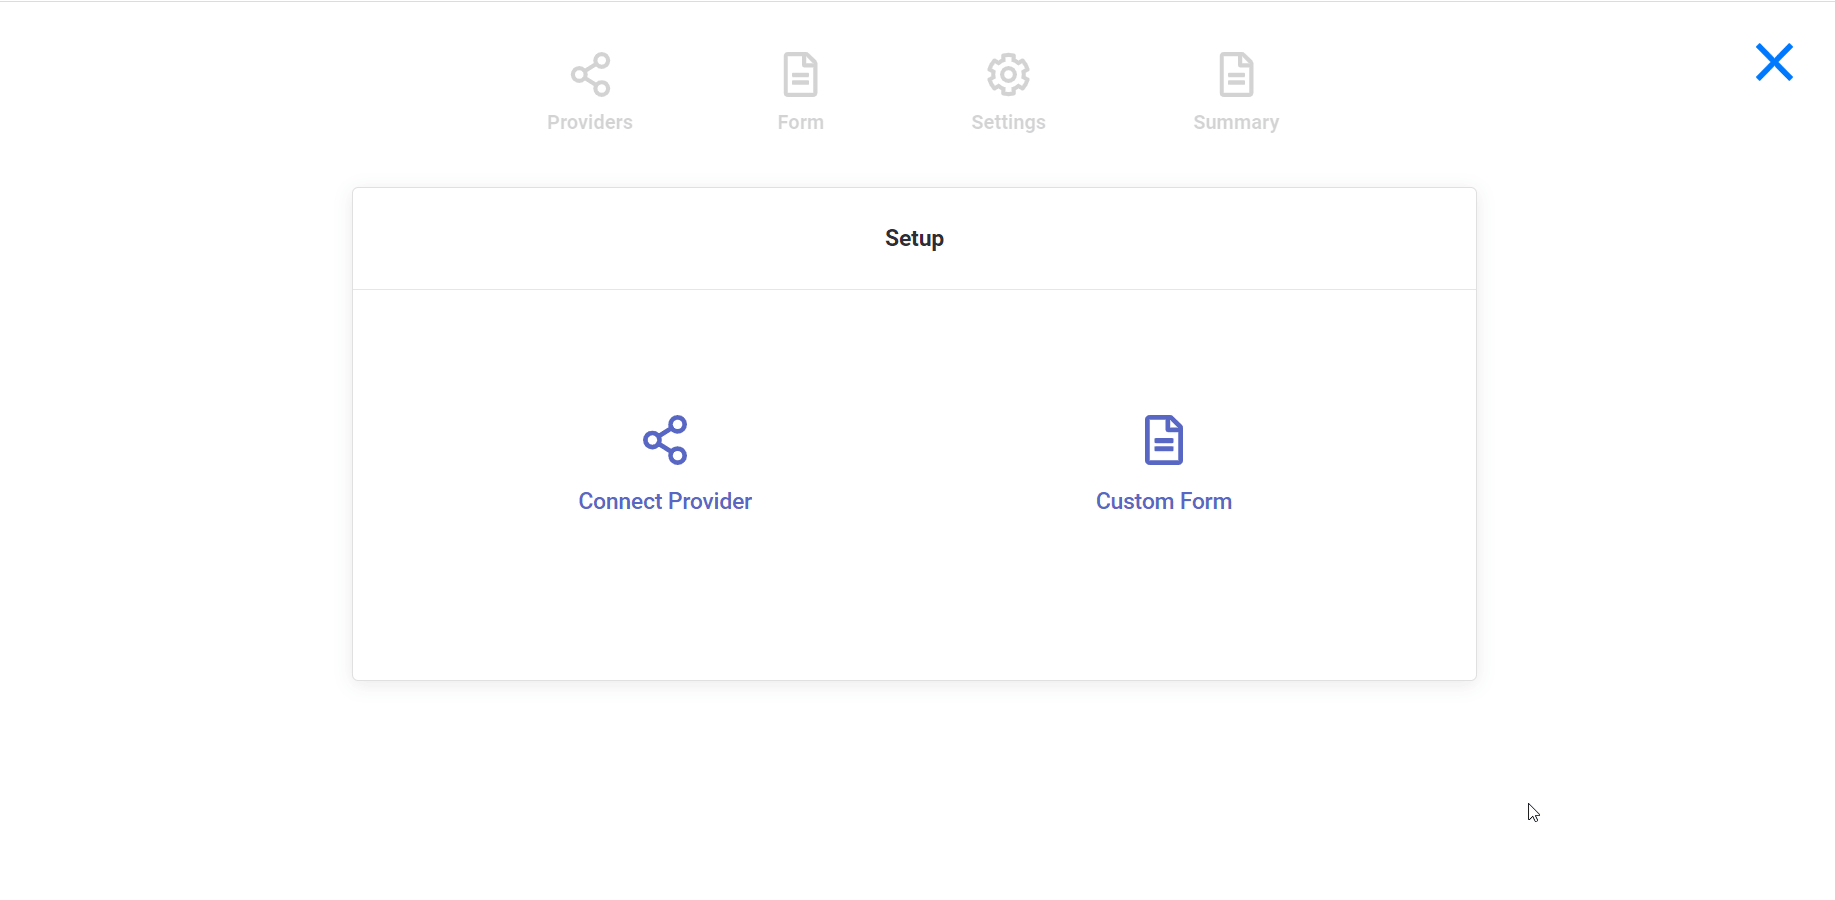
3. Choose Connect Provider, then choose ESP Provider. Finally, scroll down to the MailChimp logo and log in.
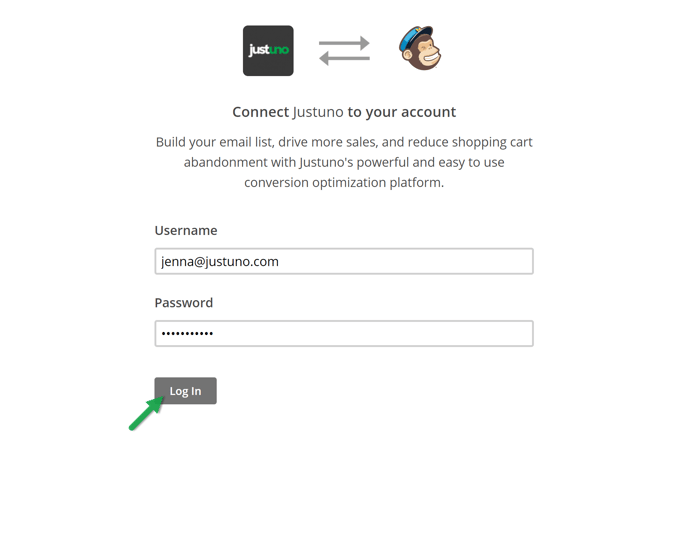
4. Once authenticated, click Next.

5. Select the list(s) where you would like the information/emails to be pushed to MailChimp.

6. Click Next, then add in a Segment (Tag) if you are using this feature, if not then skip to the next step
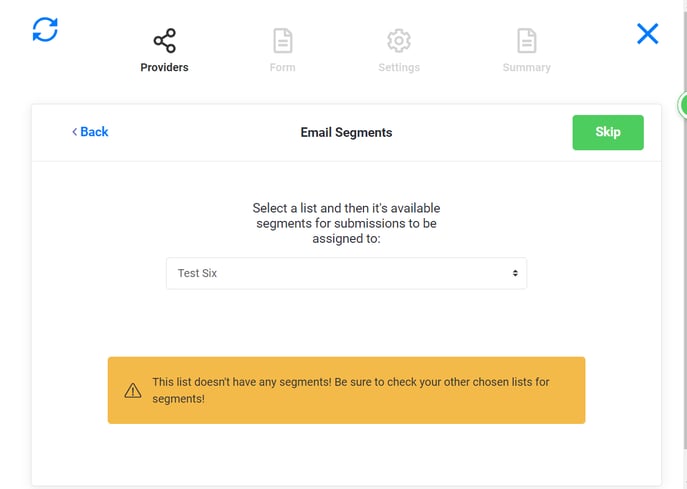
7. Next select one Group Category, followed by selecting one or more Groups, if not then skip to the next step.

8. Upon finishing the selection of desired lists, a form will be generated from the associated Mailchimp fields, and can now be edited within Justuno's Form Builder. Modify the form as desired then click Next. 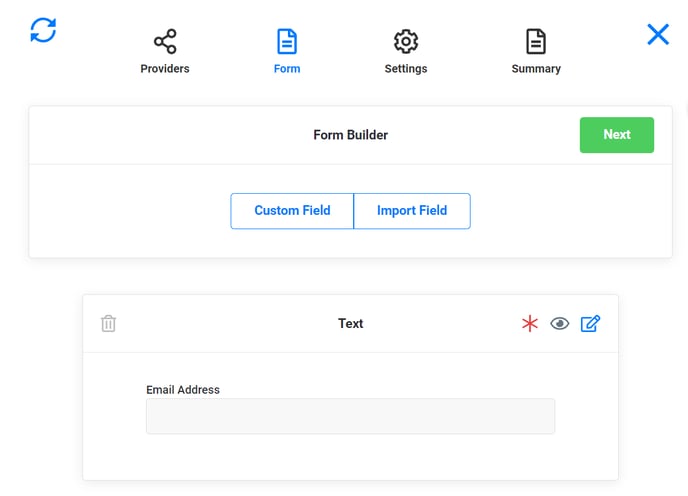
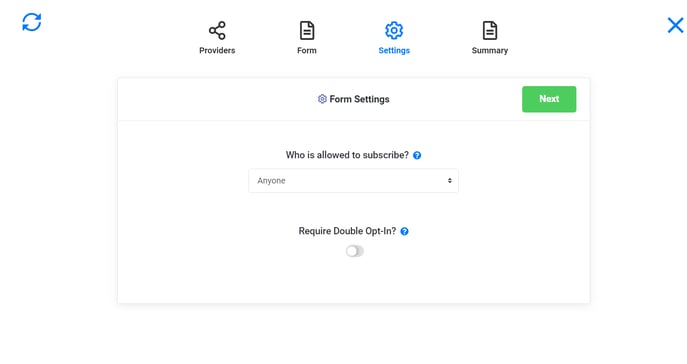
9. Configure the Form Settings, then click Next.
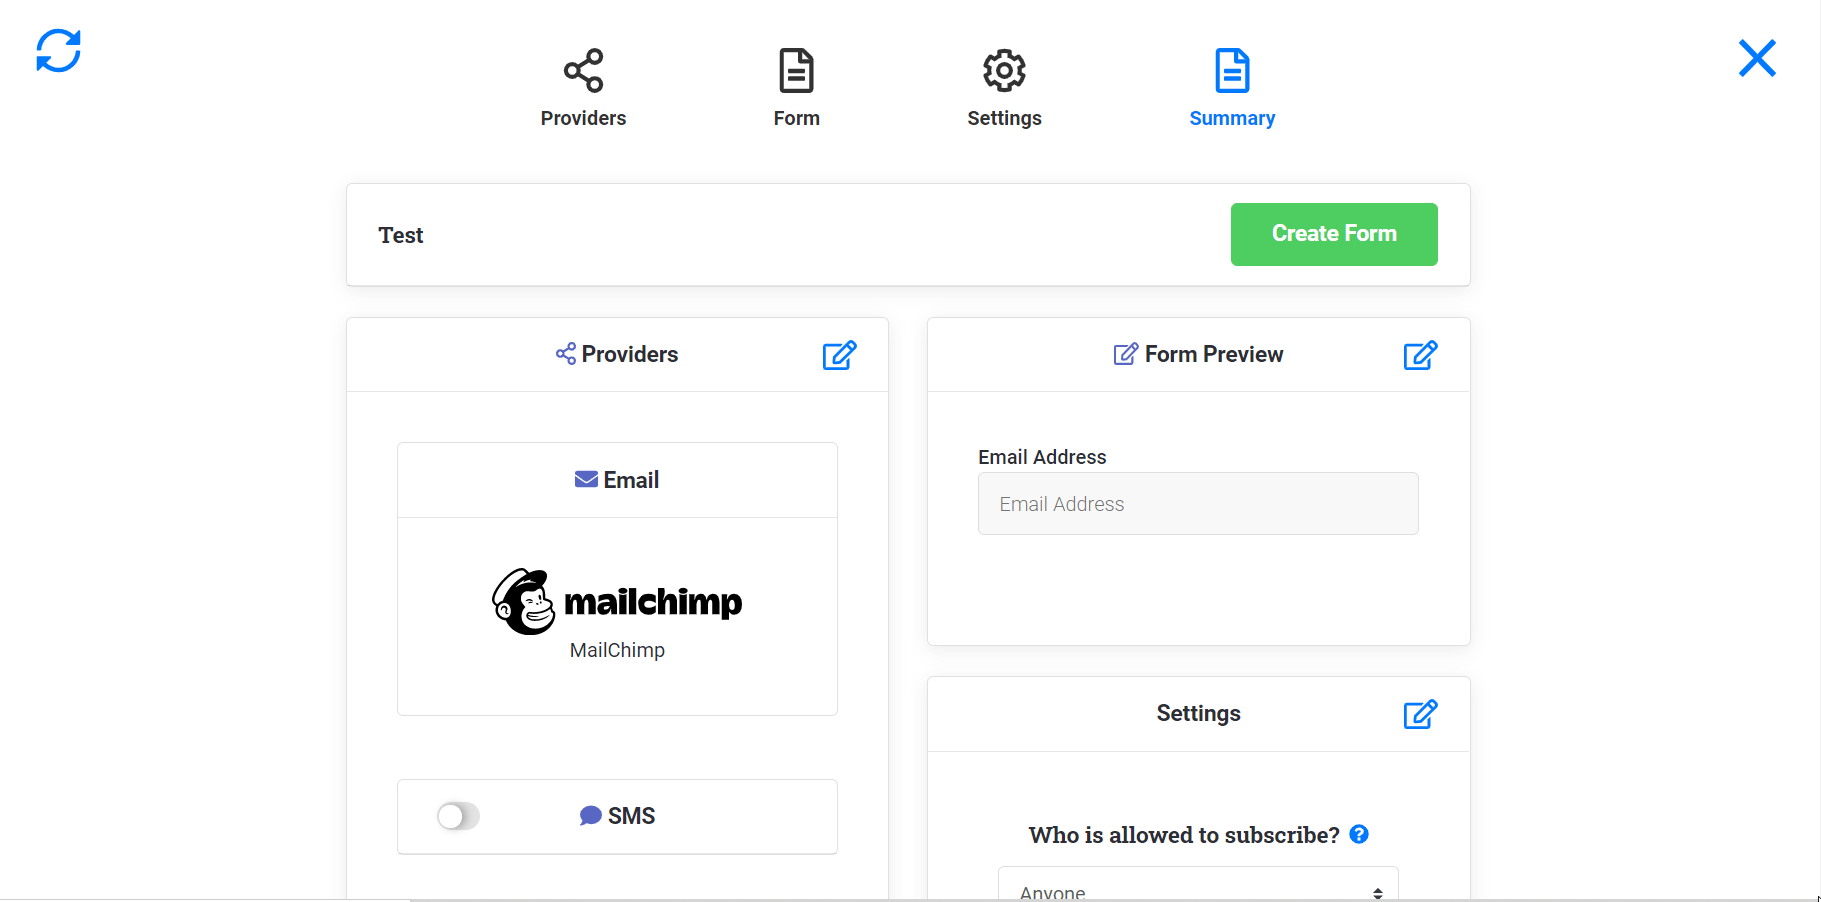
10. Review the summary page, then click Create Form.
11. Modify the promotion to your preferences, and then you are done!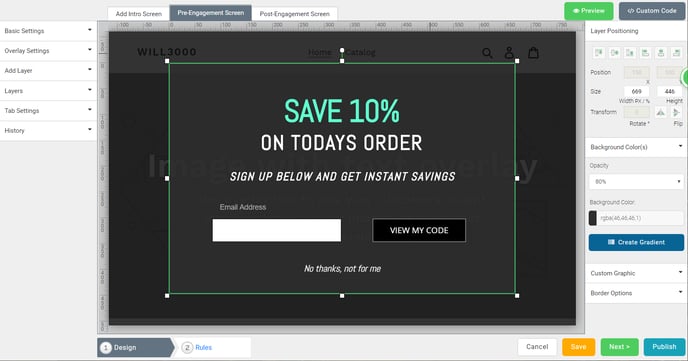
Note: It is best practice to ensure that any fields marked as "required" within the initial Mailchimp list settings be marked as such to match within the Justuno Form Editor before finalizing the form creation; this practice will avoid unforeseen issues with Mailchimp's API resolving discrepancies between the expected structure/formatting of the form data and the actual structure/formatting of the form data that a Justuno promotion is submitting.
Note: If you are passing additional fields to MailChimp, you must make sure the name within the field matches the name in your Merge Tag. If you are trying to pass "JUSTUNO" and your field name in MailChimp says MERGE3 it will not work as it does not match. Make sure the name matches.
How to access your List fields and *|MERGE|* tags in MailChimp:
1. Log into MailChimp
2. Click on Lists
3. Click on the List you are pushing your information to
4. Click on Settings
5. Click on List fields and *|MERGE|* tags
Note: If you are sending information that does not require a user to fill anything out, make sure the hidden field options are enabled. We have some very commonly used data properties that are available for direct auto-populating within fields, and can be set via a drop-down menu located just below each field:
-
- Current URL (the URL a user is on when they submit the form)
- IP Address (the visitor’s IP address)
- Coupon Code (the coupon code they receive in the post-engagement screen)
- Referring URL (the URL the user clicked on to get to the new page in your website.)
- Previous Referring Domain (the URL of the last domain the user came from)
- First URL Visitor Landed On (the URL the user first landed on)
If you are pushing the coupon code to Mailchimp please make sure you have a coupon code presenter layer in the post engagement. Here is an article to help you with that setting
PLEASE NOTE: You do not have to integrate Mailchimp again within Step 3 Integration unless you would like to send emails to two separate lists in MailChimp.
Want to supercharge your onsite promotions? Check out Justuno Plus, a premium plan for marketers featuring exclusive access to our AI product feed, a dedicated CRO Strategist, and more. Justuno Plus
Visit Justuno @ justuno.com