Incorporate Justuno with Rejoiner Form Integration with a few simple steps.
At a glance:
Last updated 9/01/2021
Please Note: This email service provider does not offer SMS capture services. You cannot pass SMS numbers to your ESP with this integration and any existing SMS integration will be disconnected.
Introduction
This Justuno support article will cover how to change the signup form to connect with Rejoiner Form Integration. Rejoiner is an email service provider built specifically for direct-to-consumer eCommerce brands.
Prerequisites
- Justuno Promotion
- Rejoiner Integration account
Adding Rejoiner Integration to a Justuno Promotion
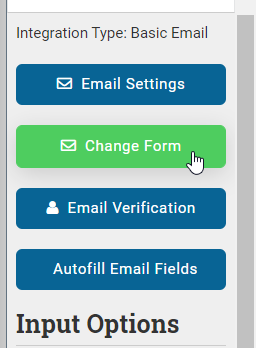
Step 1: Once you have created a promotion and are in the design canvas, find the email sign up layer and hit change form (If you have an integration set up in Step 3 of your promotion already, please disconnect it for step 1 integration to work)
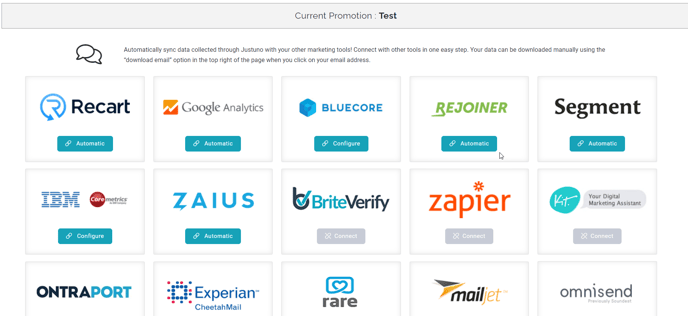
Step 2: Find the Rejoiner form option
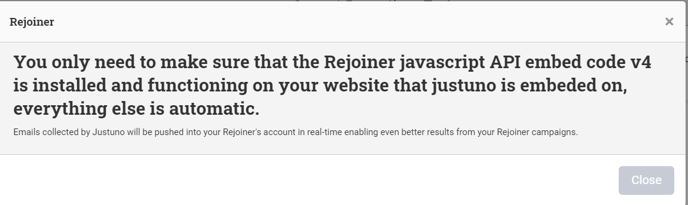
Step 3: Connection to Rejoiner is automatic if you have the Rejoiner JavaScript API embed code 4 installed and functioning on the site that Justuno is installed on.
Visit Justuno @ justuno.com