This Justuno Support article covers the steps needed to connect the Marketo Design Canvas Integration
At a glance
Introduction
Prerequisites
Instructions
Last update 01/13/2022
Please Note: This email service provider does not offer SMS capture services. You cannot pass SMS numbers to your ESP with this integration and any existing SMS integration will be disconnected.
Introduction
Here’s a quick list of what we’ll cover in the article:
- API Credentials and connection to Justuno
- How to Add Fields
- How to Hide Fields
- Auto-Populate Fields (Collect IP Address, Coupon Code, Current Website URL, Referring URL, Previous Domain Referring URL, First URL visitor landed on)
Prerequisites
- Justuno Account
- Marketo Account, API Keys, and Instance URL
Instructions
API Keys:
To connect Justuno to Marketo, you will need to set up your API credentials and find your Instance URL.
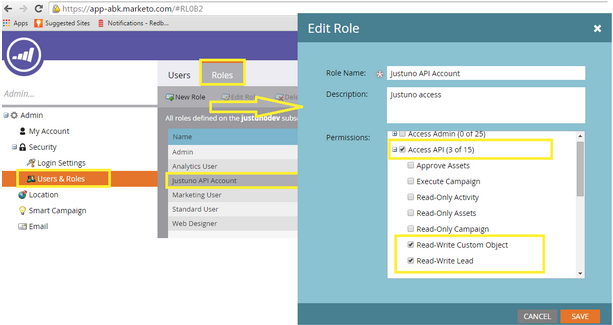
Step 1 - Create API User Role
- Navigate to Admin > Security > Users and Roles
- Create a new Justuno API Role and assign Access API permissions
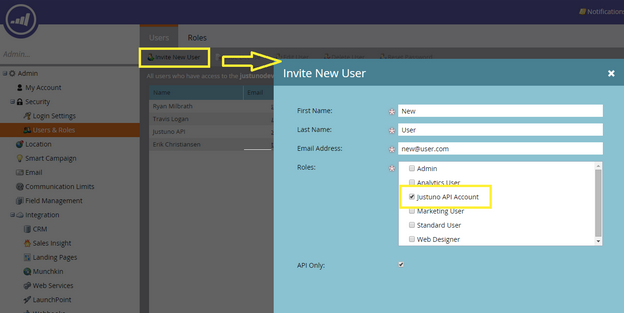
Step 2 - Create a new Justuno User Account that will access this role and has only API access.
Users > Invite New User
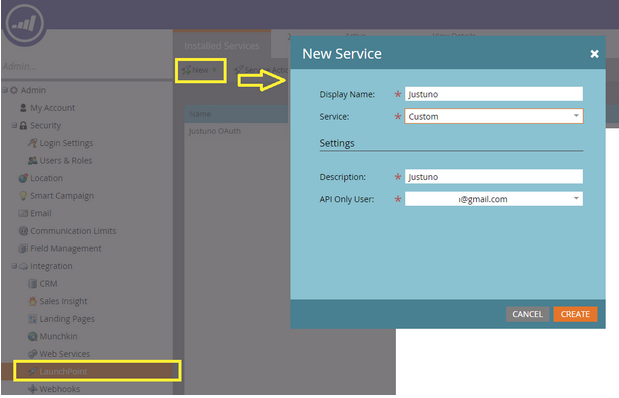
Step 3 - Create a Justuno Launchpoint Service and specify the API Only User that you created in Step 2.
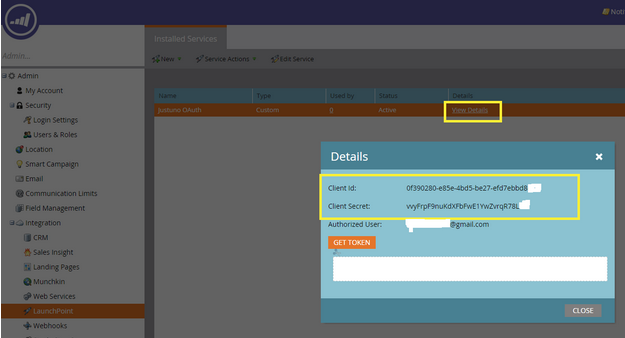
Step 4 - Copy Client ID and Client Secret
- After creating the Launchpoint service, click “View Details”
- Copy the Client Id and Client Secret for later use.
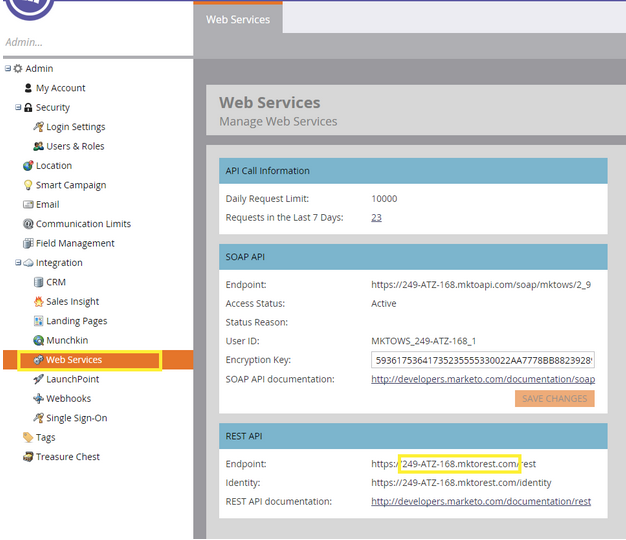
Step 5 - Locate REST Endpoint URL
a. navigate to Admin > Integration > Web Services and locate the highlighted portion of the Endpoint URL for later use.
Now that you have copied all the necessary API credentials, you can now start the Promotion configuration in Justuno.
Log in to Justuno
Navigate to Justuno.com and log in using your account credentials.
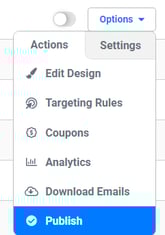
Edit Promotion Design
- Click the Promotions tab at the top. Click “Edit Design” next to the desired Promotion
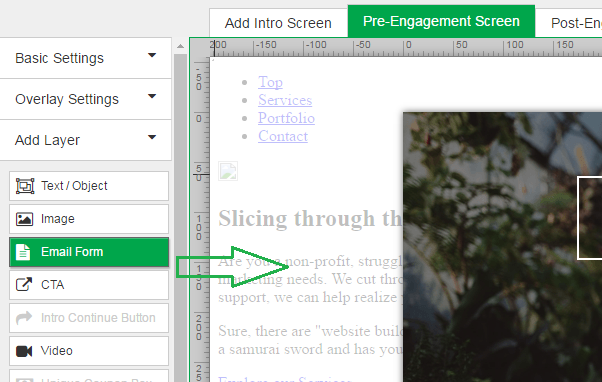
ADD/EDIT Email Form
To ADD a new email form, select “ Email Form” under the “ Add Layer” option on the left side and drag it onto the Promotion Canvas. (If you have an integration set up in Step 3 of your promotion already, please disconnect it for the step 1 integration to work)
- Click the “Marketo” tile to authenticate.
a. You will be prompted to enter your API credentials.
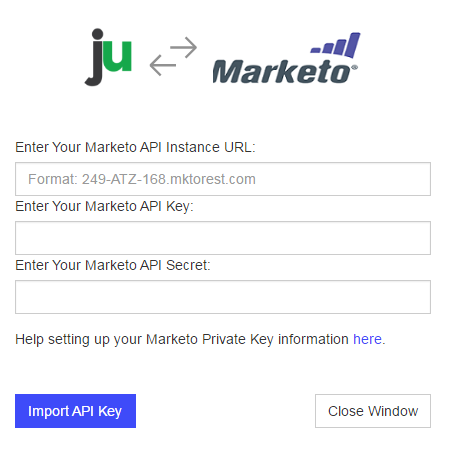
b. Click "Import API Key".
Marketo Mailing List Selection
- Once authenticated, you will see your current Marketo Static Mailing Lists appear. Select one list you would like contacts to be added to.

Marketo Field Definition
We return a common set of Marketo Fields for you to use within the form. You can set additional options for each Field, such as Required or Hidden properties.
If you are sending information that does not require a user to fill anything out, ensure the hidden setting is checked. We have added a few hidden fields that are commonly used:
- Current URL (the URL a user is on when they submit the form)
- IP address (the visitor’s IP address)
- Coupon code (the coupon code they receive in the post engagement)
- Referring URL (the URL the user clicked on to get to the new page in your website.)
- Previous Domain Referring URL (the URL of the last page)
- First URL visitor landed on (the URL the user first landed on)
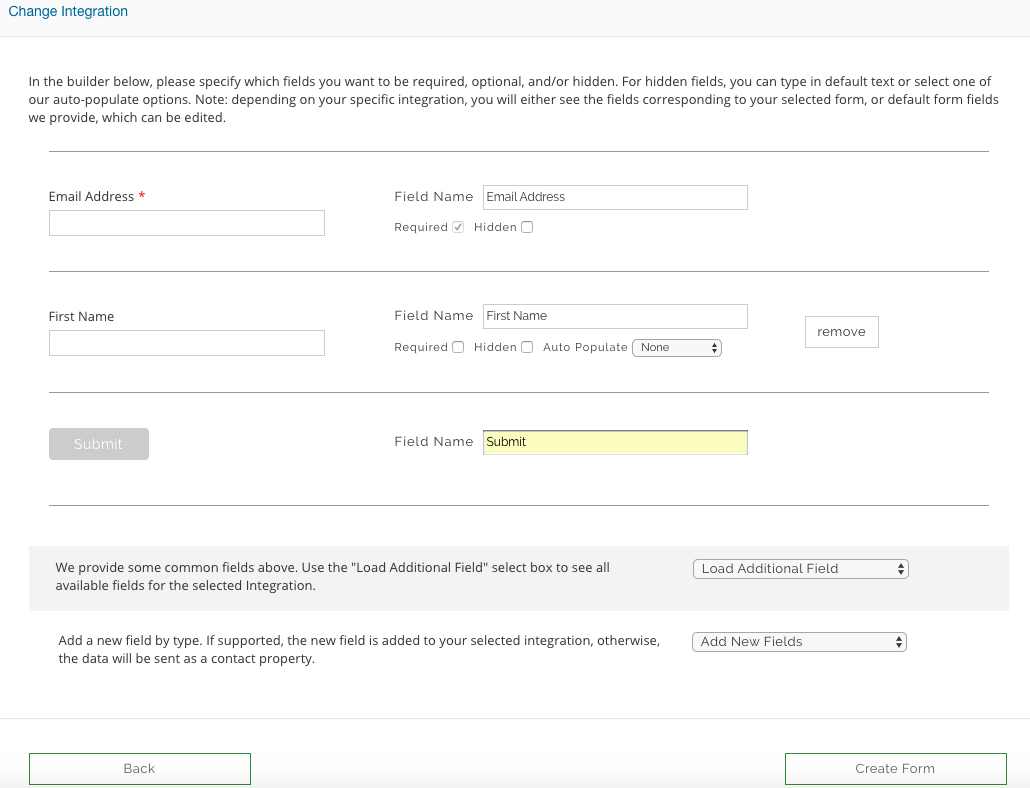
If you need a Field that does not exist, click “Add New Fields” to create a new one.
Create Form
- Once you have finalized the fields to use, click “Create Form” and then arrange your promotion fields as desired.
Preview and Publish Your Changes
Once you have arranged all fields, be sure to SAVE and then Preview or Publish your Promotion.
Important Step: If you have an integration set up in Step 3 of your promotion already, please disconnect it for the step 1 integration to work.
Visit Justuno @ Justuno.com